Proximity Bias and Hybrid Work: What You Need to Know

proximity bias can create a company culture where in-office employees are rewarded for their presence with resources and promotions while their remote counterparts are left behind.

As employees return to the office, companies embracing hybrid work arrangements face a challenge: proximity bias. 

In hybrid work environments, proximity bias could lead to the incorrect assumption that those working in the office are more productive than their remote teammates. 

Managers and employees alike are concerned about the effects of proximity bias and hybrid work. In fact:

  • Two in five employees are worried that less face-to-face time with company leadership will negatively impact their career growth
  • 41 percent of executives say potential inequities between remote and in-office employees are their top concern
  • A study found remote workers were less likely to be promoted than their in-office colleagues, despite being 15 percent more productive

At the same time, hybrid work is the new norm. Most employees favor a hybrid work model, so forcing everyone back to the office isn’t the solution. 

That’s why it’s more important than ever to be aware of proximity bias and make sure everyone on your team feels included. 

The good news is that managers and employees alike can take steps to avoid proximity bias in the workplace. 

Here’s what we’ll cover in this post: 

How proximity influences our perception of colleagues

Our brains take shortcuts all the time, using processes to simplify the information around us to make more efficient decisions. 

But sometimes, our brains misinterpret that information, and it affects the accuracy of our judgments. In the case of proximity bias, our brains overvalue what is around us and undervalue what isn’t. 

If left unchecked, proximity bias can create a company culture where in-office employees are rewarded for their presence with resources and promotions while their remote counterparts are left behind.

Illustration of a hybrid meeting. Some participants are sitting at a conference table speaking with another while another group is on a large screen.

Examples of proximity bias in the workplace

Proximity bias can show up in both big and small ways. Here are a few examples of proximity bias in the workplace:

  • Offering in-person employees more exciting projects or professional development opportunities
  • Leaving remote stakeholders out of decision-making or important discussions
  • Providing in-person employees with more perks

While bias is often unconscious, knowing how proximity influences your decisions can help you recognize and overcome it. 

What managers and leaders can do to prevent proximity bias

The reality of the hybrid model is that we have to adapt to new ways of collaborating. 

Remote team members cannot be an afterthought. Successful hybrid leaders set up processes that allow employees to flourish regardless of where or when they work. 

Adopt a remote-first approach to communication

When everyone isn’t working in the office simultaneously (or at all), key decisions can’t be made at the water cooler. 

Adopting a remote-first approach to how your team communicates will help prevent people from feeling left in the dark when working from home.

That means when one person is remote, everyone is remote. Digital and asynchronous forms of communication should be the default method, regardless of an employee’s location.

Asynchronous communication: communication that doesn’t happen in real time. Common examples of asynchronous communication are emails, video messages, and comments in which the sender does not expect an immediate response.

Make sure discussions about projects and tasks happen in a digital messaging app like Slack or Teams, where all relevant team members can contribute and benefit from the conversation. 

It’s not just remote employees who benefit. Remote-first, asynchronous communication will: 

  • Enable employees to take time off without feeling like they’re falling behind
  • Allow new employees to get up to speed more quickly
  • Archive information in a way employees can reference at any time

Ready to embrace asynchronous communication?

Discover how taking an “async-first” approach and canceling our meetings for an entire month helped transform the way we work at TechSmith.

Get the Report
cover of report about asynchronous communication

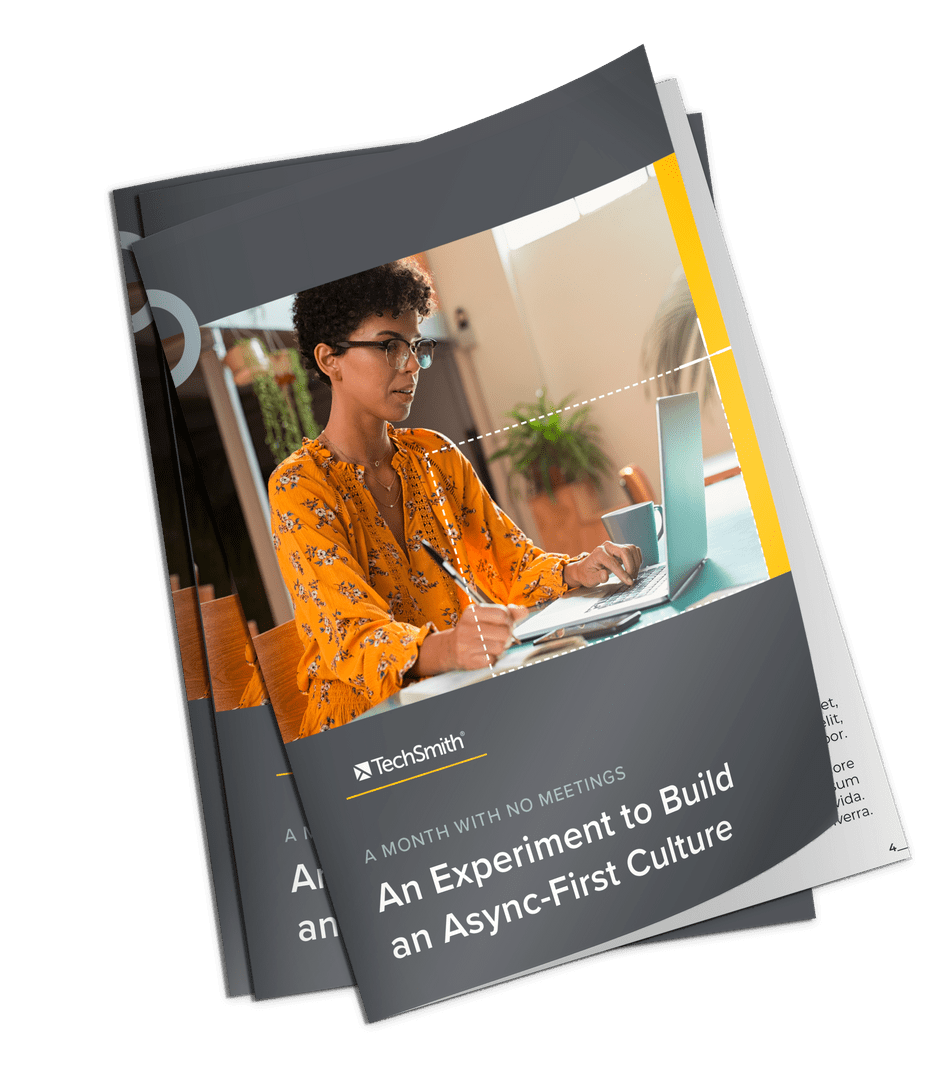
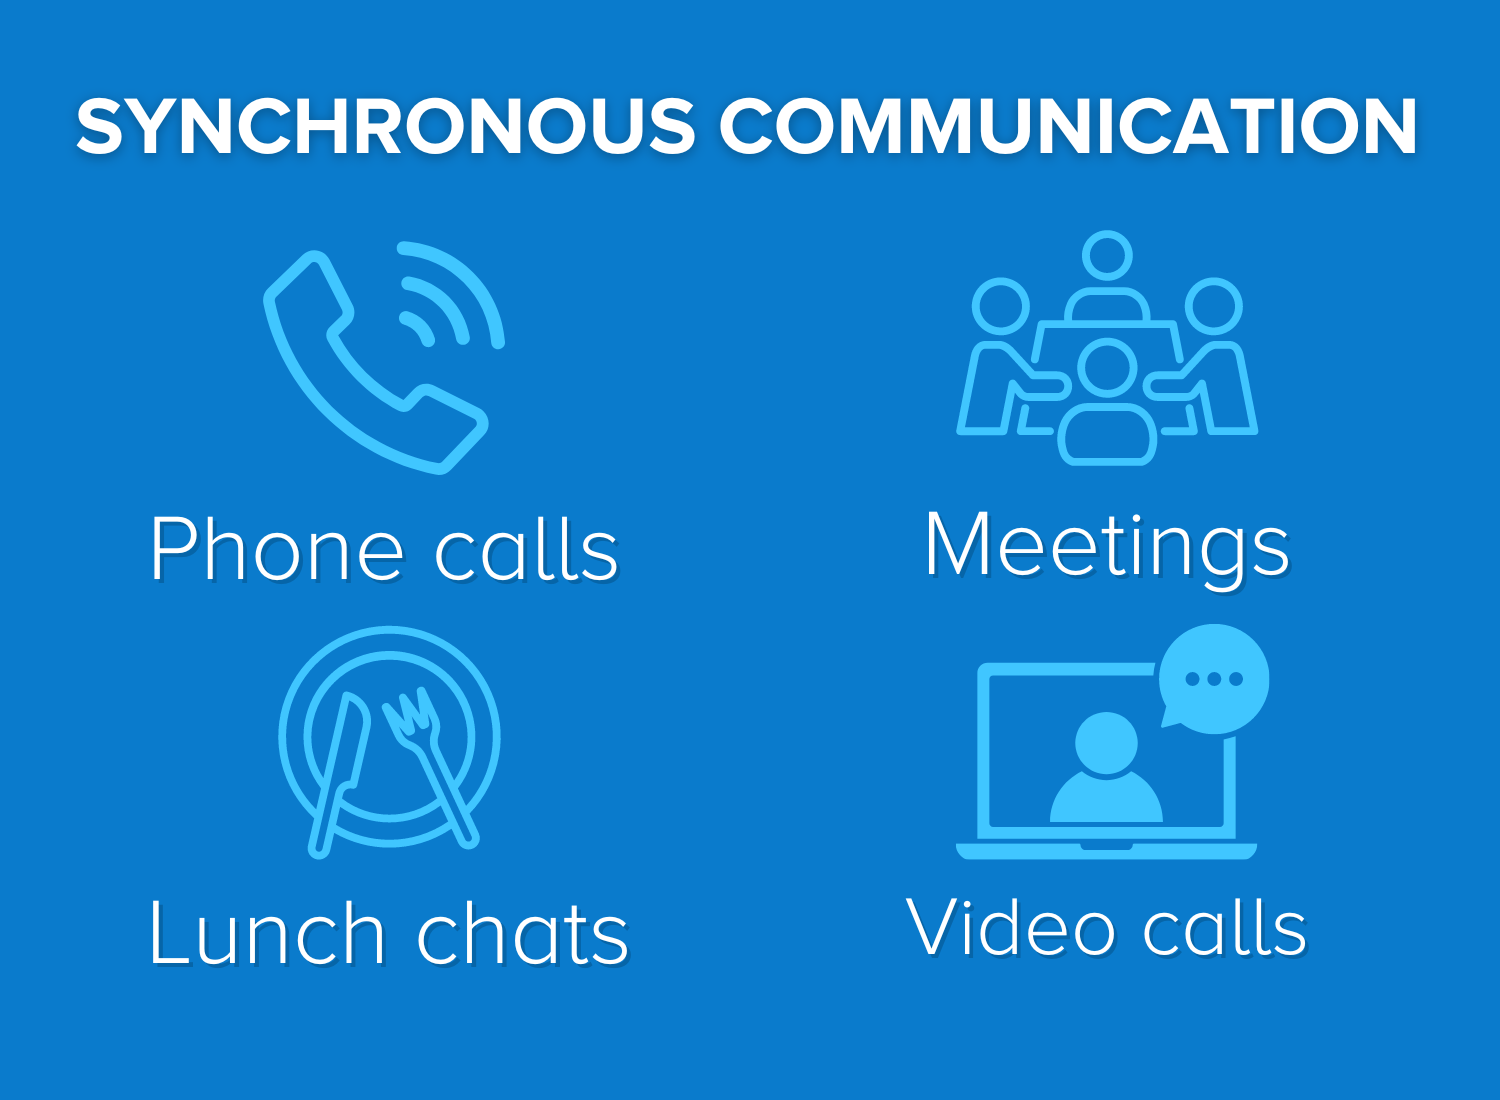
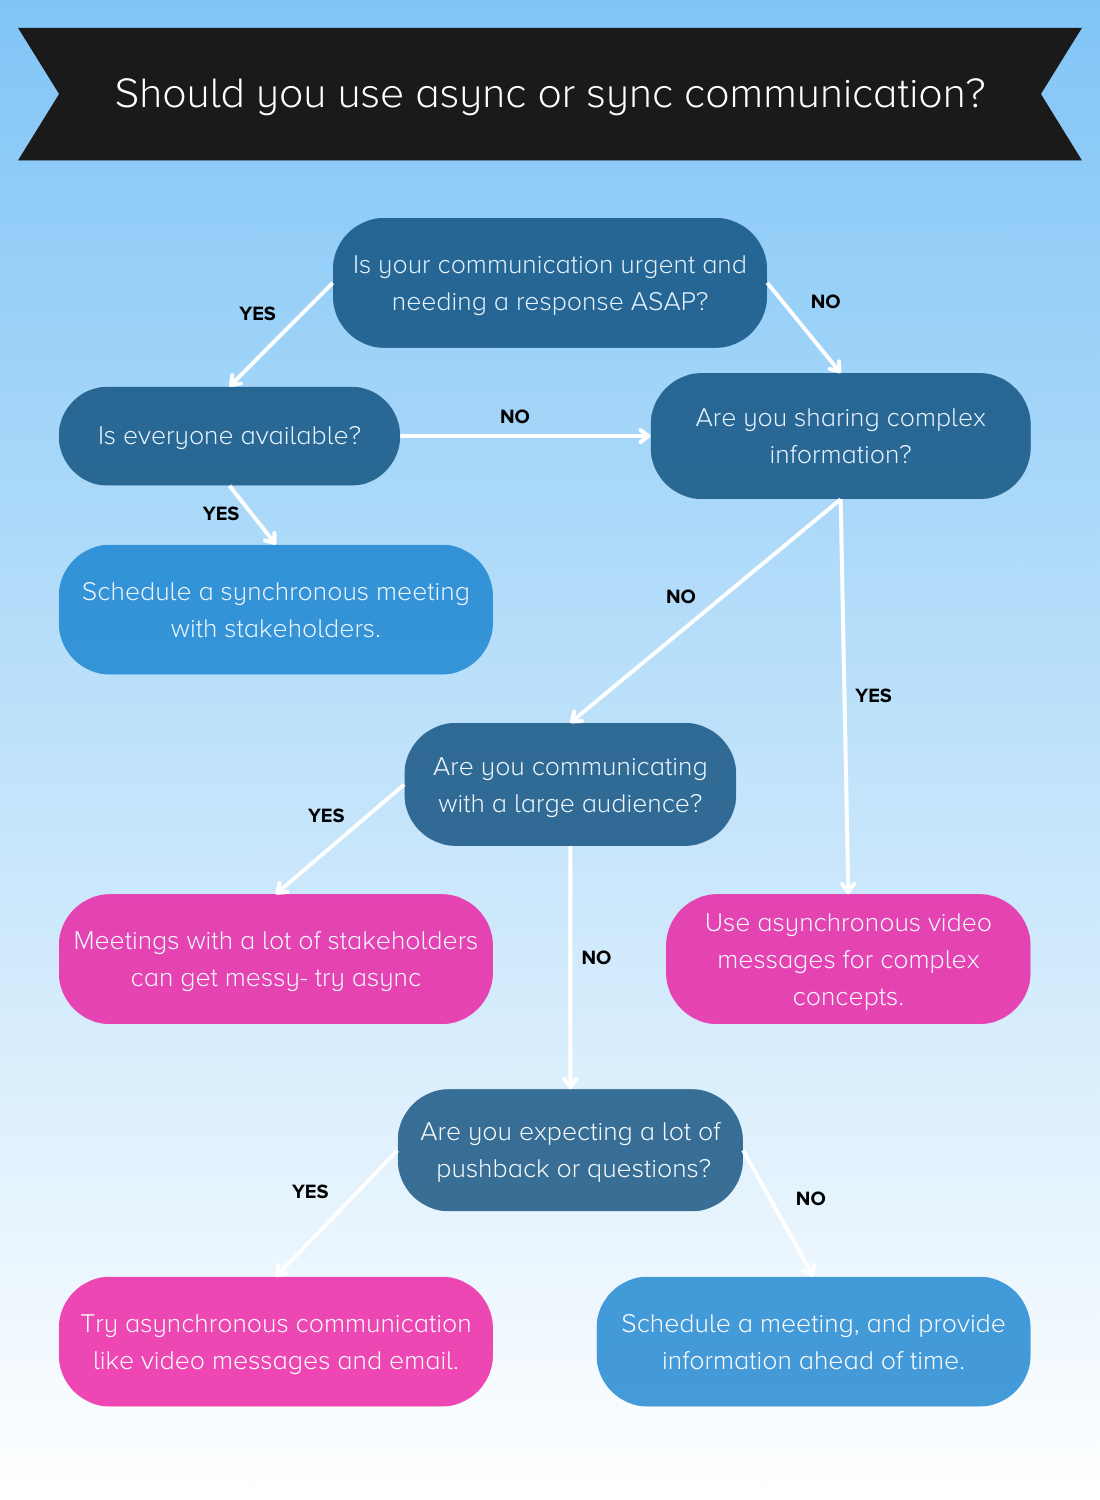
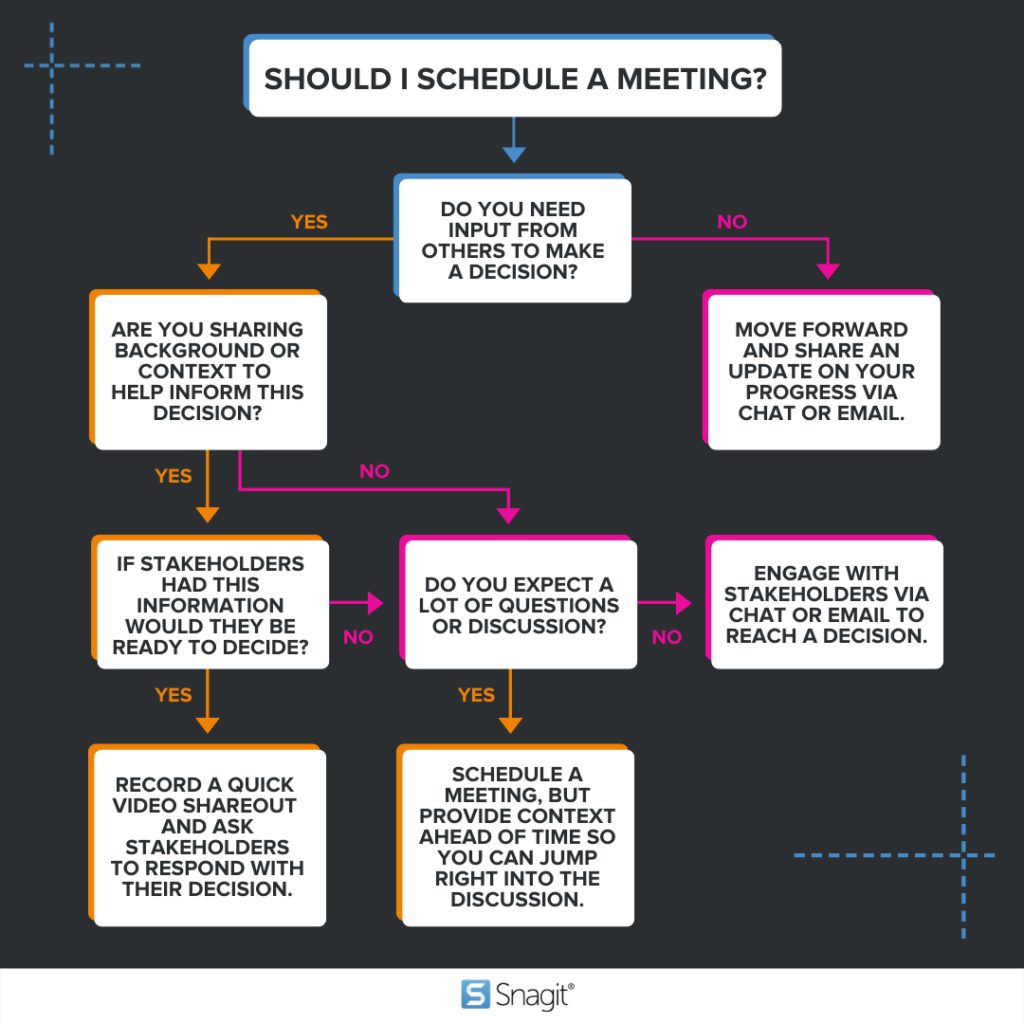
Stop relying on real-time meetings

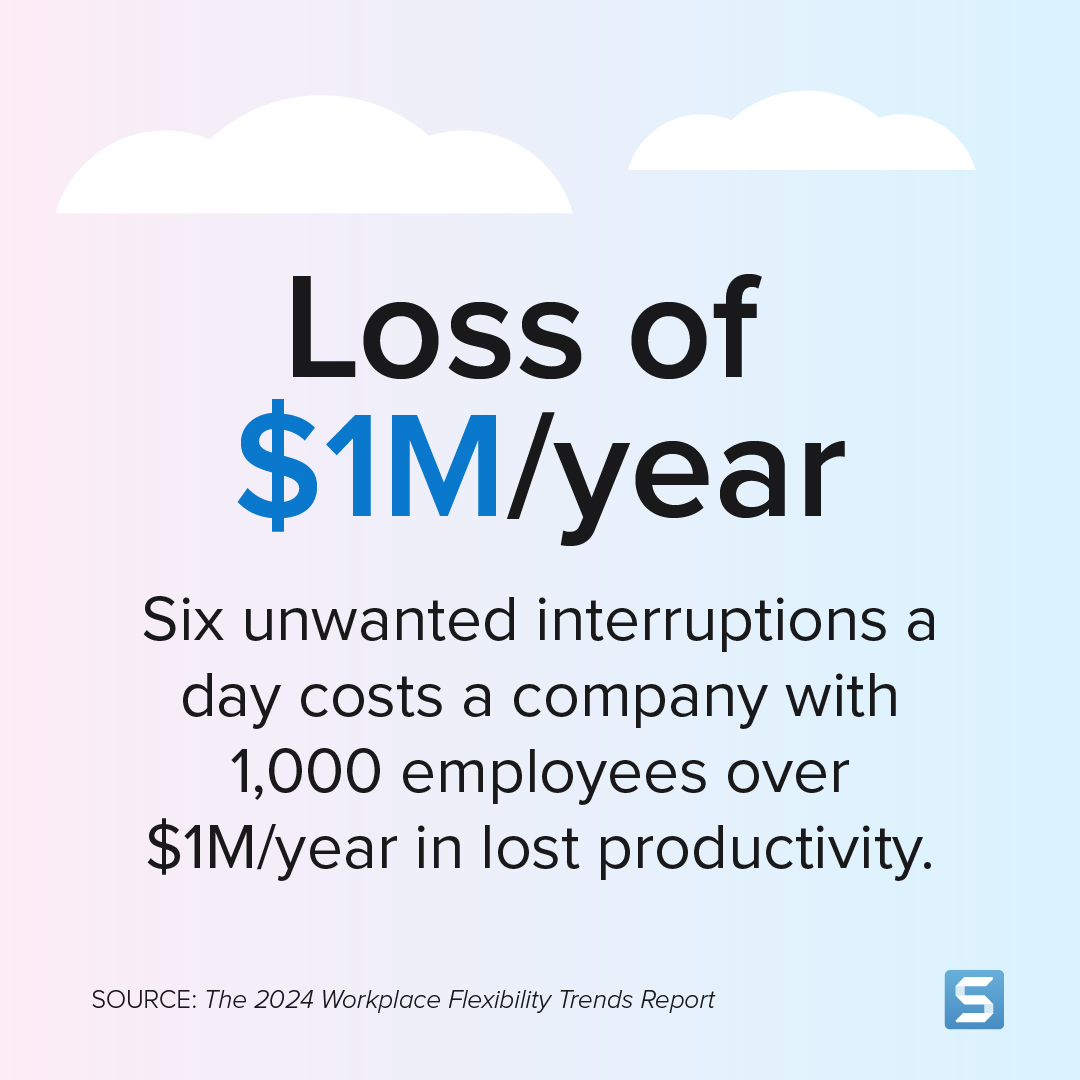
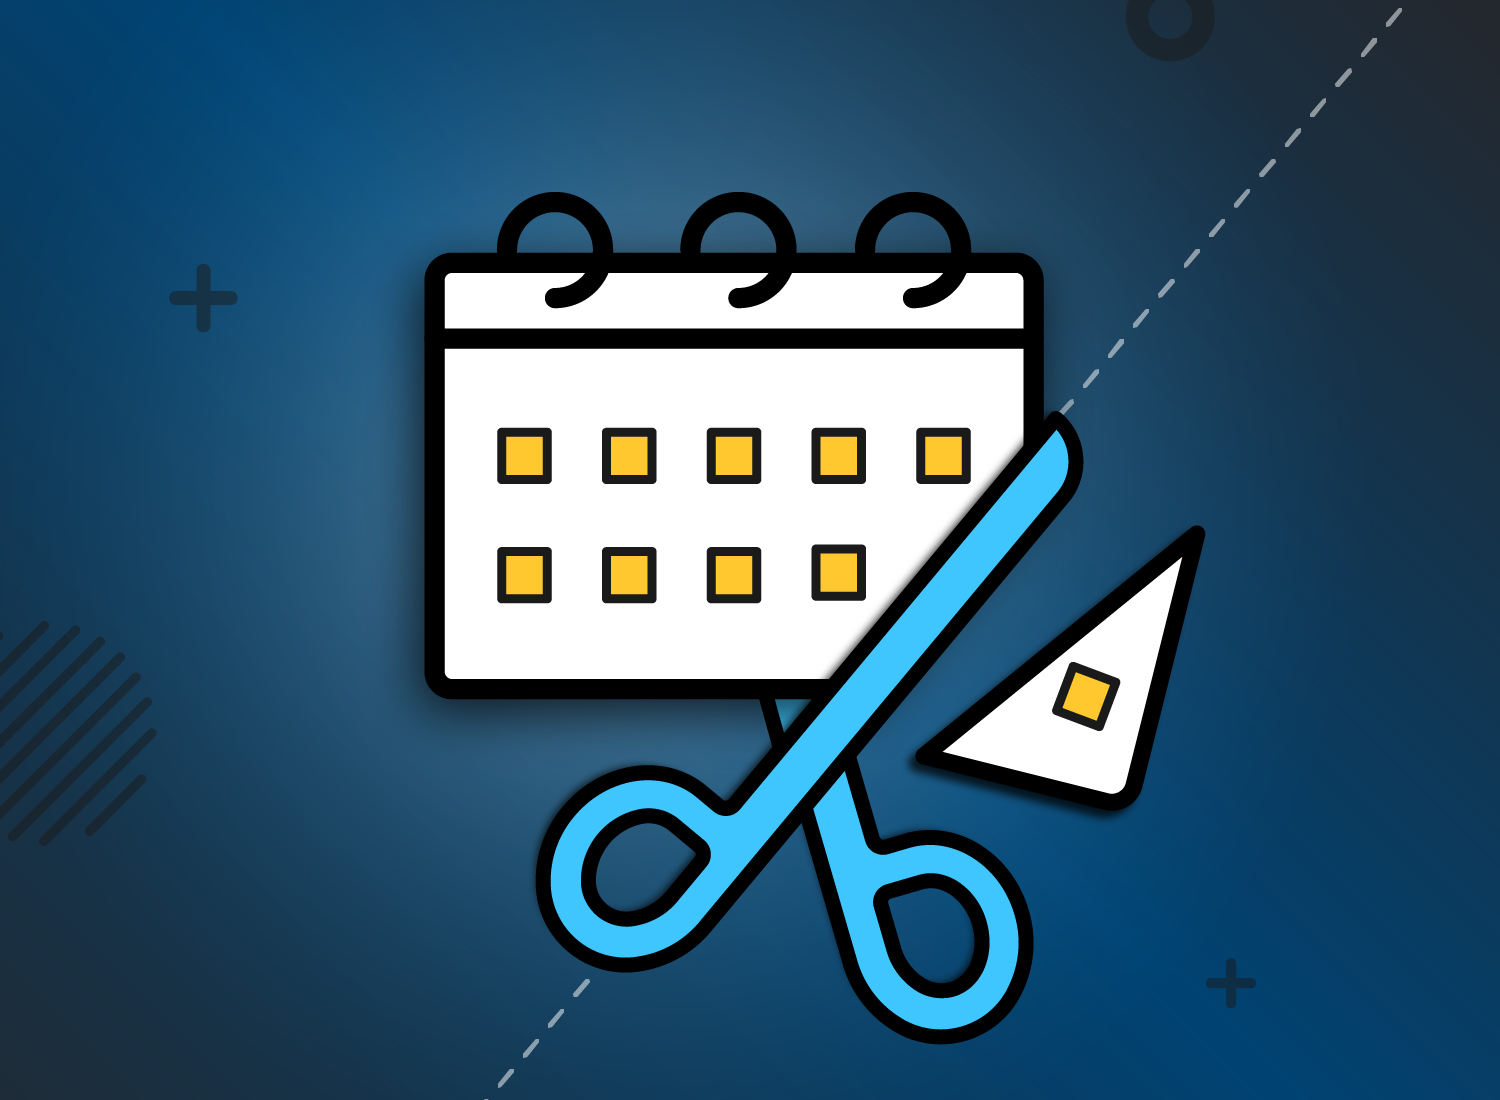
When your team works across locations and time zones, relying on synchronous communication can be frustrating and unfair. Schedules and location can prevent everyone from being able to participate fully. 

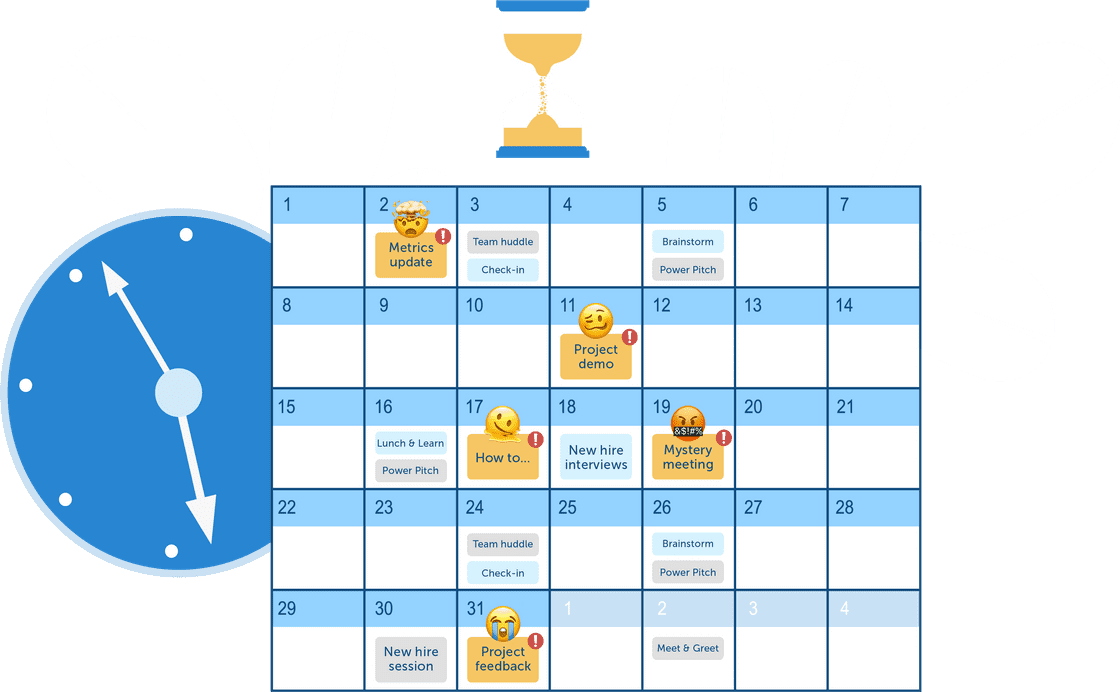
If you’re like most office workers, you probably feel like you waste a lot of time in meetings anyway. Here’s the sign you need to take back your calendar. 

Matt Pierce

It’s important that you don’t have the people who are in the office vs. the people who aren’t in the office. The more that we can use these tools and communication methods to level the playing field, the better everything is going to be.

– Michelle Massey, Vice President of Community and Customer Operations at TechSmith

There are several types of meetings that are almost always better in an asynchronous format: 

  • Status updates
  • Project demos
  • Data shareouts
  • Informal training

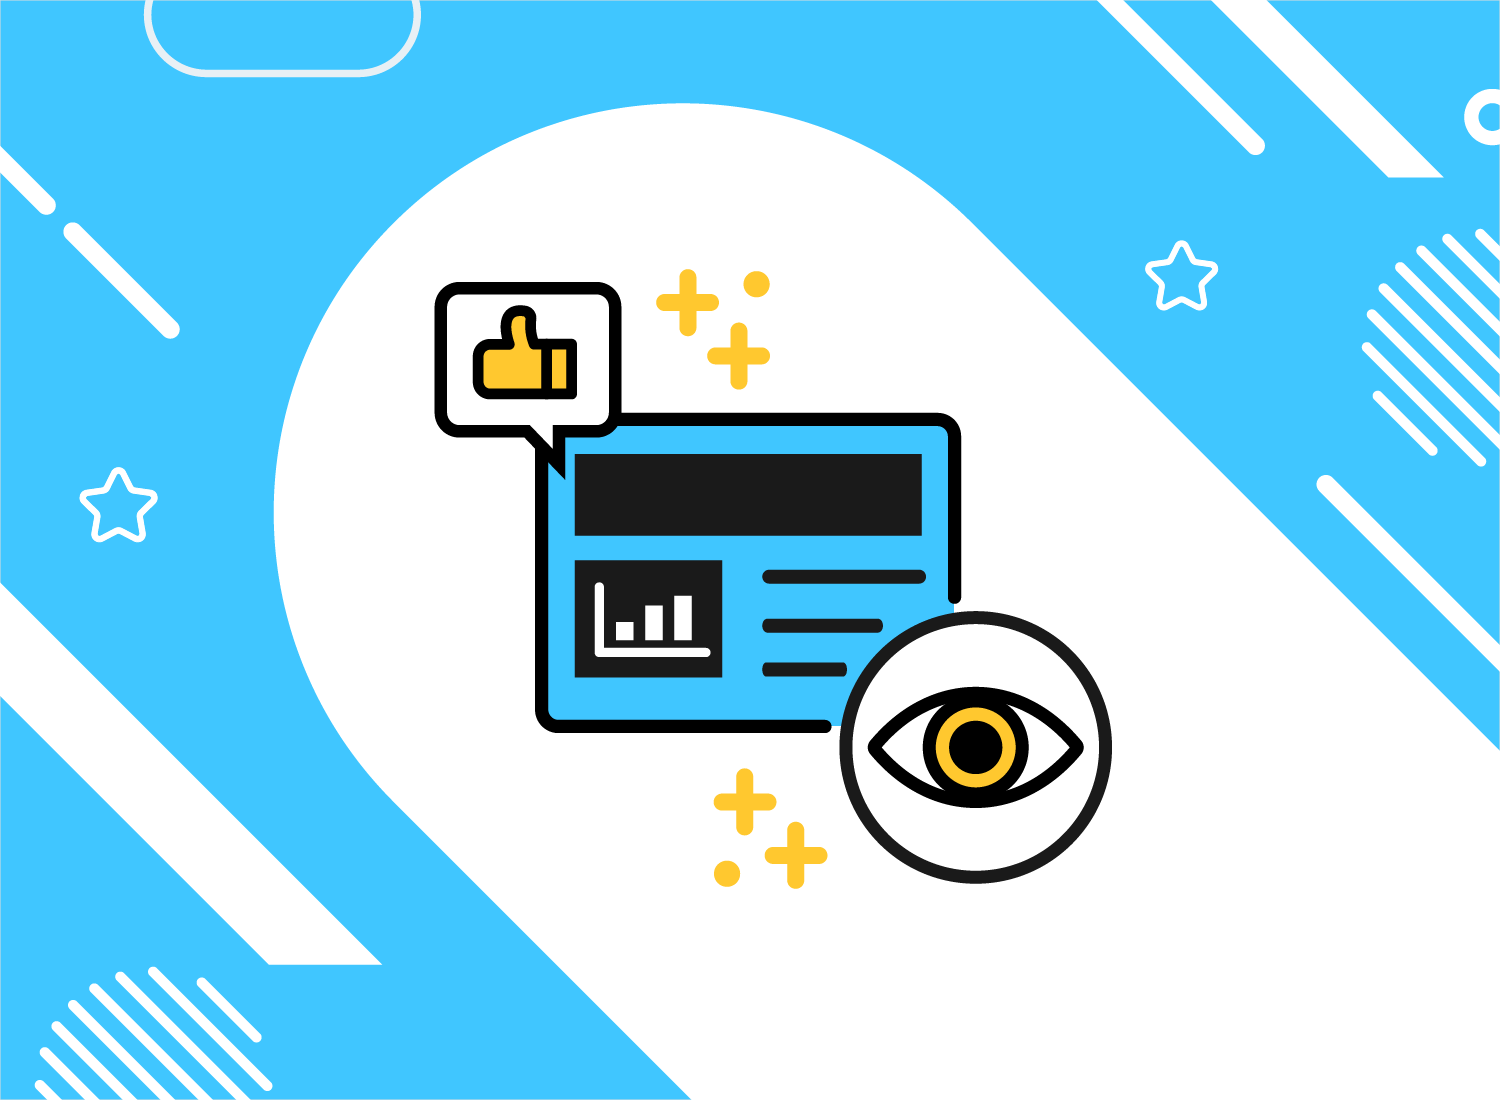
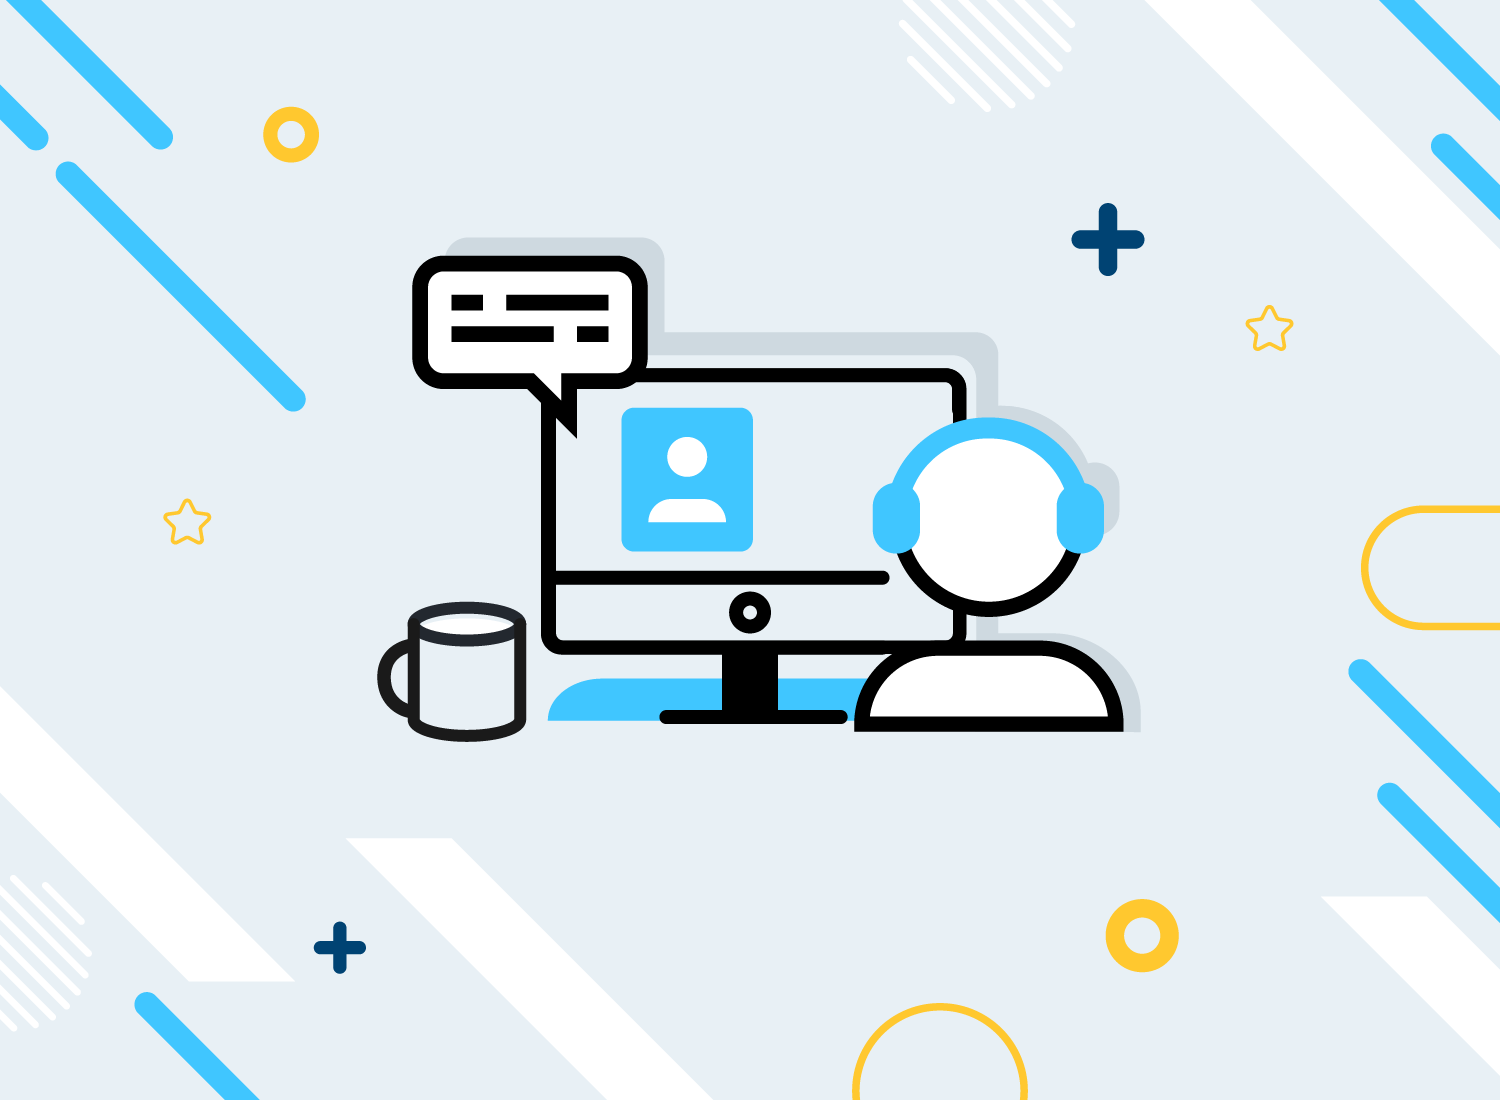
Anytime you’re scheduling a meeting to share information, consider recording a video instead. 

Let’s say you want to share results from a recent marketing campaign with your team. If you were in a Zoom meeting, you’d probably share your screen to walk through a dashboard and provide context around the results.

With a screen capture tool like Snagit, you can accomplish the same thing in less time without interrupting your team’s day for yet another meeting or leaving someone out.


In just a few minutes, you can create a quick video that your team can watch on their own time (and even at 1.5x speed). Snagit can even simultaneously record your screen and camera, replicating the “face-to-face” feeling of an in-person or virtual meeting. 

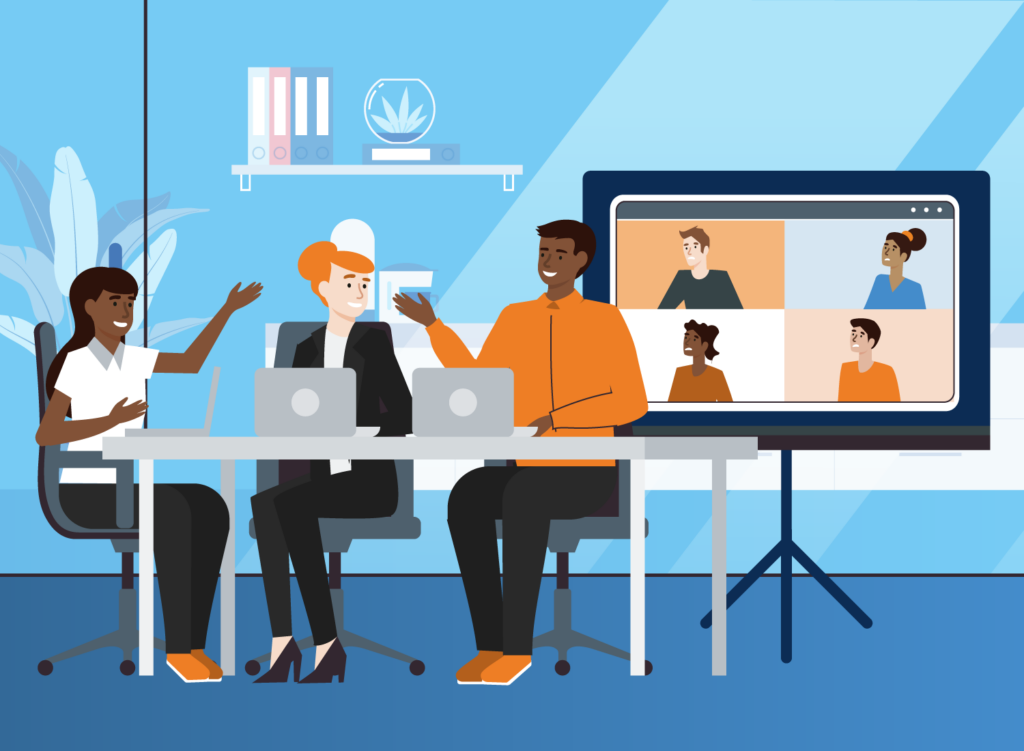
Of course, there will be times when meeting in real time makes the most sense. There are a few things you can do to help level the playing field for remote team members:

  • Have everyone call into virtual meetings individually to prevent in-person side conversations
  • Make sure everyone has the equipment they need, like cameras, microphones, or bandwidth, to be fully present
  • Record the meeting so those who cannot attend can watch it later

Measure employee performance by output

In a typical office environment, employees can try to impress by being the first person at their desk in the morning and the last one to leave at the end of the day. 

But focusing on hours worked as an indicator of performance can leave your team feeling pressured to be “always on” when working from home to make up for their lack of physical presence.

Instead, shift your mindset to focus less on time spent in the office or online and more on the quality and quantity of work your employees produce. 

Be intentional about checking in

When working in the same physical space as an employee, you naturally have more opportunities to observe their work, offer feedback, and recognize their success. 

To effectively manage a hybrid team, you have to be intentional about how you connect or risk in-person employees receiving preferential treatment. 

Start by keeping track of when and how you engage with your team, both in-person and virtually, and identify disparities. 

You might find that you offer feedback more frequently when working in the office. If that’s the case, employees who are remote full-time may miss out on opportunities to improve their work. 

Incorporating virtual forms of feedback into your communication could help level the playing field for fully remote employees.

How employees can be more visible when working remotely

It’s no secret that flexible, hybrid, and remote work can feel isolating. More than half of people who started working remotely during the COVID-19 pandemic feel less connected to their coworkers. 

But, if you’re proactive, you can still make meaningful connections with your colleagues and establish a presence on your team while working away from the office.

Turn your camera on during virtual meetings

Many people don’t enjoy being on camera, and “Zoom fatigue” is a real phenomenon. However, video conferencing can help us feel connected even when we’re not in the same place.

When you’re on camera, it’s easier to establish a sense of presence and a shared sense of being together even though we may be physically separated from across the globe.

— Diana Howles, author of Next Level Virtual Training: Advance Your Facilitation

When you’re on camera during a meeting, your colleagues can see your nonverbal behaviors and better understand who you are and what you’re saying. 

Turning on your camera will help people get to know you better and allow you to communicate more effectively. Research has even shown video conferencing can create perceived proximity.

To avoid video burnout, pace yourself and take breaks as needed. Identify which meetings you’ll benefit most from being on camera, and when it might make sense to step away.

Turning off the “self-view” option once you have established yourself in the frame during a meeting can also help relieve camera fatigue.

Stop relying on text-based communication

Asynchronous communication is essential for keeping hybrid and distributed teams on the same page, but it can sometimes feel less than human.

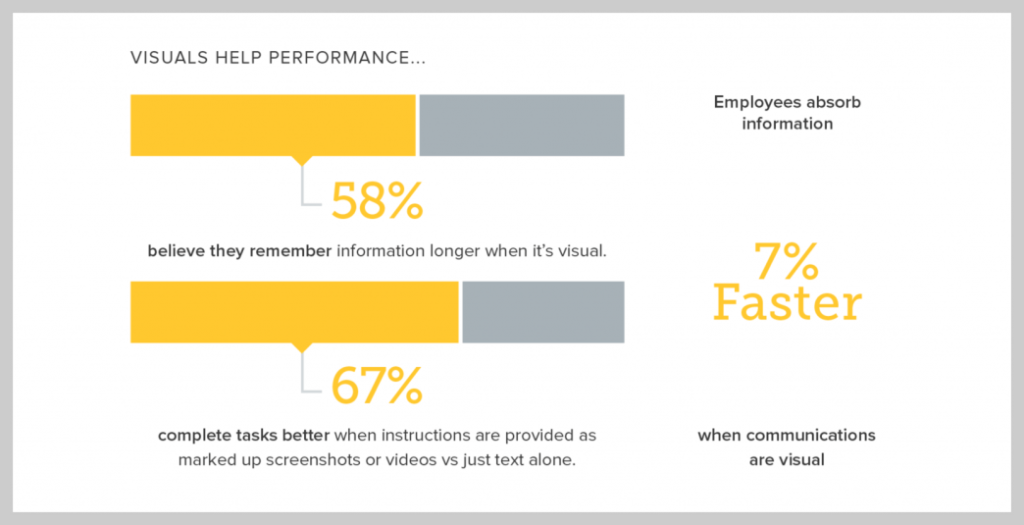
That’s because we often default to text-based ways of sharing information when research shows most people understand information better when it’s communicated visually. 

The next time you’re about to send a mile-long email, consider if a video message could be more effective. 

Suppose you’re providing feedback on a project. Text-based communication can easily lead to misunderstandings. But, when your teammates can hear your voice and see your face, they’re less likely to need clarification. 

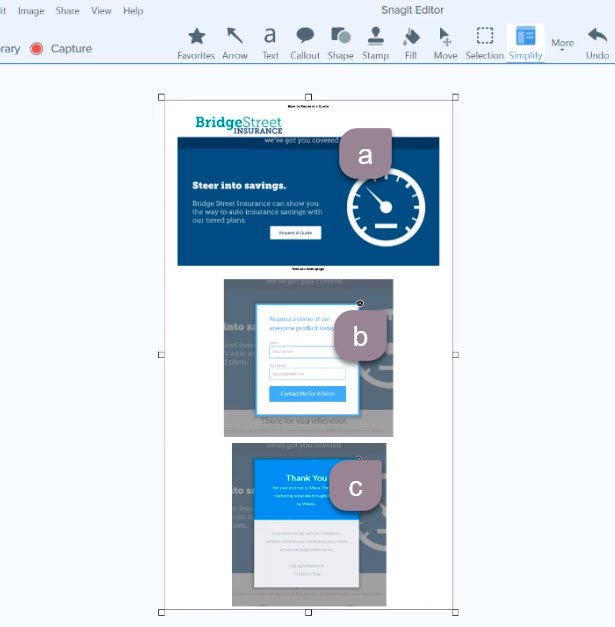
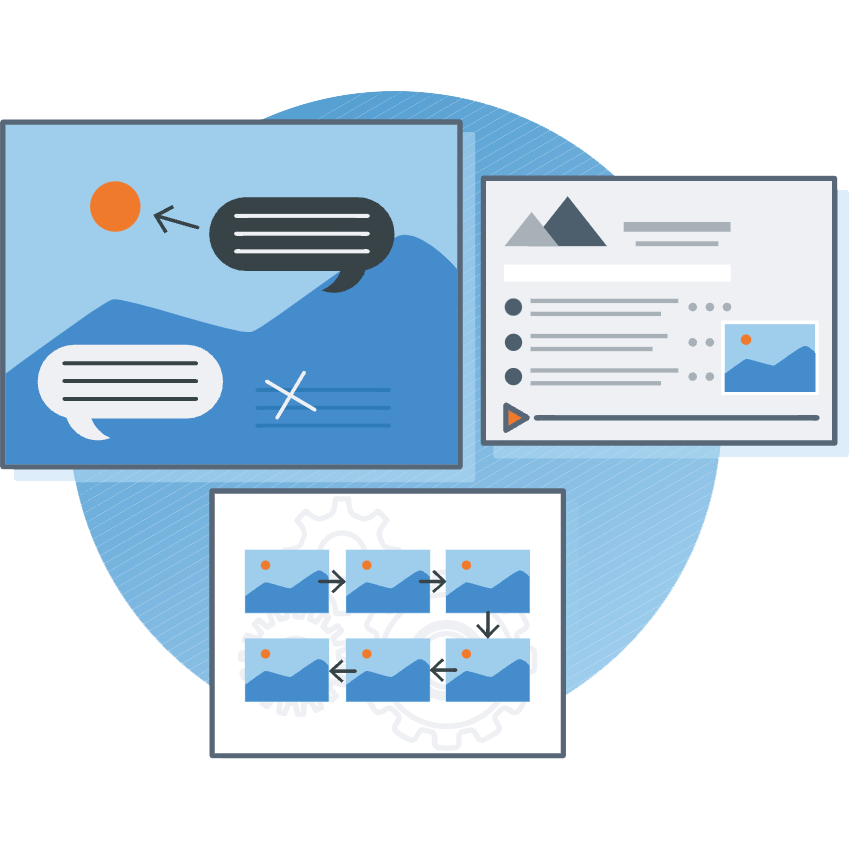
Even better, with Snagit, you can record your screen and draw attention to the areas of a project needing attention with arrows and callouts while you walk through your feedback.

What could have been a boring or confusing email thread can be transformed into an opportunity for communication that feels more like the face-to-face interactions you might have in an office environment. 

Ask for advice

Proximity bias can put remote workers at a disadvantage when it comes to professional development.

For example, when leadership teams are working primarily in the office, in-person employees may be more likely to be top of mind when new opportunities arise. 

While your company is hopefully taking steps to address proximity bias already, you can help move your career forward by proactively seeking advice and mentorship from others at your company.

We often avoid reaching out to others for advice because we are afraid we might be bothering them or appear incompetent. 

However, studies show that asking for advice facilitates meaningful connections with our colleagues and also helps us make a positive impression on our mentors.

The secret to making hybrid work “work” is effective communication

Many of us have spent most of our professional careers working in an office space. It will take time to unlearn habits that no longer make sense and replace them with new ways of working.

Embracing asynchronous communication tools like Snagit will transform the way we work for the better.

Collaborate with Your Team from Anywhere with Snagit Connect

It’s the easiest way to create and share video messages that keep your team in the loop without another meeting.

Learn More
illustration of snagit's screen recording interface

Danielle Ezell

Danielle Ezell is a Marketing Content Strategist at TechSmith, where she writes about effective workplace communication, offering tips and strategies for using images and videos to collaborate more effectively in hybrid and remote environments.

The best video recording mobile apps on the market right now

The best video recording mobile apps on the market right now

It’s very common nowadays for videos to be recorded on mobile phones. While this approach used to be regarded as only for amateurs, delivering low-quality results, that is really not the case anymore. Capturing video on a mobile phone is seen as being very normal nowadays and is the norm in a lot of industries. A lot of content creators exclusively use their phones to create their videos! 

This article will help you discover the best apps and some helpful tips to use when recording so you can get great videos from your mobile phone!

Edit your own videos with Camtasia

Download a free trial of Camtasia to quickly and easily edit your own videos.

Download a free trial
Camtasia icon

How to Record a Video on Mobile – 7 Mobile Video Recording Tips

With most people being virtually inseparable from their phones, and phones being capable of producing high-quality video content, it is becoming increasingly simple for entrepreneurs to use video as part of their communications strategies. 

Whether you use an Apple or an Android device there are apps available to help with editing and special effects, meaning that your phone isn’t only an effective video camera but can operate as an editing studio as well! Video has never been easier or more economical to produce. 

Quality expectations from content consumers are increasing just as quickly as the ability to record videos on mobile is – so here are some helpful tips to make sure you know how to record a video on mobile that is top quality!

Try to have quality audio 

The quality of your audio is just as important as the quality of the video itself.  You can have the best imagery recorded but if the accompanying audio is difficult to hear or clouded by ambient noise, people will be too distracted and frustrated to enjoy the visuals. 

Unfortunately, the capacity of built-in mics on mobile devices hasn’t kept pace with their capacity for video capture. The mics used are typically low quality and their placement is sub-optimal for sound capture. They are also excellent at picking up wind and other ambient sounds that add nothing but a distraction. 

For great audio, it is a good idea to use an external recording device or a directional mic. If these tools aren’t an option for you, make the most of your built-in mic by making sure your recording space is as free of background noise as possible.

Listen carefully for buzzing lights, ticking clocks, and anything else that can interfere with your audio. Getting as close as you can to your subject can also help your device’s built-in mic do its best possible work. 

Also read: the guide to cropping a video

Avoid dark areas

You don’t want your videos to be too dark, and when you’re recording video on mobile you need to be extra attentive to your lighting. Because smartphone cameras have smaller lenses and smaller light sensors than traditional video cameras, you need to shoot in areas that are as well-lit as possible. Filming in areas with sufficient lighting helps make sure that your video won’t have shadows or grainy-looking spots.

Avoid bright lights

While it’s important to have enough light for filming, the wrong kind of lighting can give you less-than-optimal results.  Filming with windows streaming light directly into the shot, or bright overhead lights can cause your footage to be unusable; full of lens flares and improper exposure. 

Soft lighting directed at the subject of your video will give much better results for your mobile video recordings. 

Avoid zooming 

While digital zoom is available on smartphones, it is not even remotely similar to the quality of a proper zoom lens. Footage captured using digital zoom when recording a video on mobile, will show a lot of distracting pixelation.  

It is best, instead, to physically move closer to your subject whenever possible. Your frame should be filled as much as possible by moving your camera (and yourself!) forward, back, or side to side. Using the zoom function should be avoided whenever possible.

Stabilize your shots

Shaky footage is no one’s favorite! It’s a dead giveaway of amateur filming and is easy to avoid. 

Stabilizing your shot can be done in a few ways. You can lean up against something to steady yourself, use a nearby flat surface to rest your phone or your elbows on, or you can add a tripod to your toolkit and use that to maintain stability in your shots.

Record horizontally, except for social media

Unless you are filming for social media, record with your mobile device in a horizontal position. Recording in landscape orientation makes sure that your footage is formatted in the same ratio as television and computer screens. It means that you won’t be watching a thin strip of video with black lines down each side when your video is shown on a standard screen! 

Edit your own videos with Camtasia

Download a free trial of Camtasia to quickly and easily edit your own videos.

Download a free trial
Camtasia icon

Use video recording mobile apps

Smartphone cameras do an excellent job but they don’t allow for all of the functionality required for professional quality video creation. Once you have completed filming you can move on to the editing process right on your mobile device by downloading one of the many apps for iOs or Android systems that support video editing.

You will be able to add titles and transitions between shots, trim your clips, add personalization, and more by downloading the right apps.

Best Mobile Apps for Personalized Video Recording

There are many apps available to help bring your mobile video production to the next level. Whether you work on iOS or Android, or even if you prefer to edit on your desktop – there are lots of options to choose from. Let’s look at some of the best video recording mobile apps on the market right now so you can choose what will work best for you!

Camera+

iOS

Camera+ is an app for the iOS platform that has been one of the most popular photography and video capture apps for over a decade. It recently got a thorough upgrade to Camera+ 2.

Pros: 

Sharing to social platforms is very easy with this app.  

There are many modes available for video recording including time-lapse, timers, and exposure control. 

This app allows you to save your editing steps to create custom filters, and uses machine learning to improve the videos you capture with just one touch during shooting and in the editing process.  

Cons:

Camera+ is only available on iOS devices.

This app only allows for video trimming from the beginning of a clip.

Filters can be used while filming video but the quality is reduced when using this feature. 

The zoom function does not create smooth transitions, but rather jumps from one level to the next. 

Cost:

Camera+ costs $4.99 

Instagram

iOS  | Android  | Windows (Beta)

Instagram is a photo and video sharing app that allows for capturing and performing minor edits to photos and videos within the app itself.  

Pros:

Videos can quickly and easily be shared with followers.

The app offers a timer function, transitions, and tools to create a smooth progression through shots. 

Cons:

Video editing is restricted to effects, filters, and trimming the beginning and end of clips. 

There is no way to adjust audio and video components to sync the two if they do not sync properly on recording.

Unless a third party app is used, all videos exported will have a watermark.

Cost:

Instagram is a free app

FiLMic Pro

iOS  | Android

FiLMic Pro is a professional app for recording videos on mobile that brings many features over from professional video cameras.  

Pros:

The video output is compatible with professional-grade camcorders.

FiLMic Pro’s user interface is top-notch.

This app offers a full range of professional features.

Cons:

The app is so robust and full of features that less experienced videographers will find themselves overwhelmed. 

FiLMic Pro is not an app that compensates for the unskilled – if you don’t have good videography skills yourself, you will not get great results. 

Cost:

FiLMic Pro is free to download but offers subscription-based pricing in app.  Subscription pricing is offered on a weekly ($2.99) or annual (39.99)basis. 

iMovie

iOS

iMovie is Apple’s own video recording mobile app and comes already downloaded on Apple devices. 

Pros:

This app continuously saves and syncs your work as you go and allows you to insert new clips after you have started the editing process.

iMovie offers seamless integration with all other Apple services.

Magic Movie can create an edit using only the best parts of your footage, complete with transitions and sound. 

Cons:

iMovie uses a lot of storage space within your device.

This app does not allow for direct voiceover recording during the editing process.

There is a limited number of output options to choose from with this app compared to others.  

Cost:

iMovie is a free app.

Movie Pro

iOS  

MoviePro is a video recording app with a solid stack of features and a lower entry point than Filmic Pro. 

Pros:

This app requires a lower investment than Filmic Pro.

MoviePro is not so full of features that it overwhelms beginners.

Cons:

Some of the advanced features available on higher-level apps like Filmic are not available on MoviePro. They may be missed by more advanced users. 

Cost:

MoviePro carries a $10 one-time fee.

Open Camera

Android

Open Camera is an Android app that prioritizes still images but confidently replaces the built-in Android camera app for mobile video recording as well.

Pros:

Open Camera is very accessible based on price point and experience required for optimal use.

This app is an easy-to-use significant improvement on the native Android camera app. 

Cons:

Functionality within the app is limited to the Camera 2 API.

Open Camera’s user interface isn’t an attractive one and lacks a sense of quality.

Cost:

Open Camera is a free app and contains no in-app purchases. It is an open-source software.

MAVIS 

iOS

Mavis is a mobile video recording app with a wide range of professional features. Some are even broadcast-level quality! It is exclusively available for iOS devices.

Pros:

Mavis has the broadest set of audio recording features available for iOS devices.

This app includes dozens of professional and broadcast-level features.

Cons:

Mavis is not available for Android or Windows devices. It is exclusively an iOS app. 

Cost:

This is a free app.

How to Convert Mobile Phones Video Recordings into GIFs

The GIF is a quick, digestible, auto-playing snippet of video, whose beauty is in its simplicity.

Creating a GIF is easier than you think. There are several options for tools that will help you make one easily from existing images or videos, either saved locally on your computer, in the cloud, on a flash drive, or from the internet.

Below, you’ll learn how to create a GIF from the video you’ve captured on your mobile phone in four easy steps using TechSmith’s Snagit + mobile app Fuse.

Also read: How to fix a blurred video

Step 1: Select the video

Open TechSmith Fuse on your device, and either record a new video by choosing Video, or select an existing video to use by choosing Library > Gallery.

If you are creating a new video, be mindful of whether you prefer portrait or landscape orientation. It may also be a good idea to review the footage to make sure you’re satisfied with your brief video before moving on.

How to Record a Video on Mobile

Step 2: Send the video to Snagit

Now that you’ve selected the video you’d like to use from within Fuse, you’ll want to open Snagit on your desktop and select the Connect Mobile Device option.

Capturing video on a mobile phone is seen as being very normal nowadays and is the norm in a lot of industries.

A QR Code will pop up. Select Share from within the Fuse app and then scan the code using the box that appears on your device’s screen. The media will be sent to the Snagit editor.

There are many apps available to help bring your mobile video production to the next level.

Step 3: Select the part of the video you’d like to convert

From within Snagit, you can play back the video. You now have two options.

  • You can remove the unwanted sections of your video, and then click to create the GIF with all of the remaining content.
  • Your other option would be to select the portion of the video you’d like to convert and then click the GIF button.

The first option is found to be easier, but it’s really a matter of your personal preference.

How to Convert Mobile Phones Video Recordings into GIFs

Step 4: Celebrate and share your glorious achievement!

Now that you have successfully created your GIF, get sharing! Post it publicly to your company website, distribute it via email, or share it on social media.

The best video recording mobile apps on the market right now

Edit your own videos with Camtasia

Download a free trial of Camtasia to quickly and easily edit your own videos.

Download a free trial
Camtasia icon

FAQs about Mobile Video Recording Apps

How to download recorded video from Microsoft Teams/Google Meet on mobile?

To download recorded video from Microsoft Teams / Google Meet on mobile you simply locate your downloaded file and import it into your video recording app. Some of the best mobile apps for video recording are shared in the article above. 

How to record video from a mobile screen?

You can use the “Connect Device” function in your Camtasia or Snagit settings to record video from your mobile screen. 

How to record video without audio on mobile?

Using a screen recorder is a great way to record video without sound that you are not shooting live. Other ways to record video without sound exist in the settings menus of most mobile video recording apps. 

Daniel Foster

Daniel Foster is currently strategy lead for Snagit, helping define the future direction for the product. He has been doing tech marketing, communication, and blogging since 2002 and has worked on product since 2015. Tweet him up @fosteronomo or grab some time on his calendar to chat.

Secret talent: spinning a yo-yo
Preferred mode of transportation: Motorcycle (Honda Shadow)
Last country visited: China

Synchronous vs. Asynchronous Communication: A Guide

Synchronous vs. Asynchronous Communication

As the norm for workplaces continues to shift, teams oriented around one shared space have become less standard. Workplaces have significantly shifted to hybrid models. According to a TechSmith study, 58% of people work hybrid, 31% are always in-office, and 7% are always remote.

The office has evolved from a common space between four walls with easy access to all employees simultaneously, to an uncontained global space spanning multiple timezones.

Having a team distributed in this way can make it difficult to arrange meetings and opportunities for collaboration, but it also holds the benefits of extended operating hours and daily coverage.

For effective communication and collaboration with a distributed team, leaders will need to weigh various communication options and consider both synchronous and asynchronous communication methods.

So, if you’ve ever asked yourself: “What does asynchronous mean,” we’re here to help. And much more.

What is synchronous communication?

Synchronous definition: Synchronous communication is the exchange of information between two or more people in real-time. It certainly must not be in person.

In some situations, real-time communication will be your best choice. For example:

  • Discussions of sensitive projects or issues
  • Providing critical feedback
  • Brainstorming or decision-making meetings
  • Project kickoffs or other instances where everyone needs to be quickly brought up to speed or a lot of dynamic variables need to be shared
  • Rapport needs to be built 
  • A crisis has happened and immediate attention is required

Synchronous communication can be valuable. A recent study found that 70% of respondents find it valuable to have decision-making meetings in real-time. 

Synchronous communication occurs in different ways. For example, face-to-face meetings, phone or video calls, instant messaging, and even coffee break conversations are all synchronous communication methods.

Types of sync communication: Phone calls, meetings, lunch chats, and video calls.

Synchronous communication advantages and disadvantages

Synchronous communication is a natural way of communicating for humans. Because of this, it can have some significant benefits and advantages in the workplace and has been the default form of communication historically.

Activities like brainstorming and solving in-depth problems collaboratively benefit from the ability to speak together, read body language, and give and receive real-time feedback. Similarly, project production time can be maximized.

Although it does feel easier to talk in real time most often, it can be quite disruptive to your focus. When someone pops by your desk the task you were in the middle of can suffer. Unwanted interruptions cost large companies $1 million yearly in lost productivity.

Infographic of the statistic: Loss of $1M/year. Six unwanted interruptions a day costs a company with 1,000 employees over $1M/year in lost productivity.

Depending on how spread out your team is, synchronous communication can cause problems with work-life balance and result in burnout because of timezone differences. 

The key is for your team to find a balance between synchronous and asynchronous communication. So let’s explore the facets of async communication.

What is asynchronous communication?

Asynchronous definition: Asynchronous communication refers to any kind of communication where there is a delay between when a message is sent and when the person on the other end receives and interprets it. It is usually not an in-person type of communication and is rarely scheduled. 

Asynchronous communication works best when:

  • An immediate answer isn’t necessary
  • Collaboration needs to happen with teammates across different time zones 
  • You want to offer context before or after a real-time event
  • A complex concept or task needs to be explained and documented for later reference
  • Communication flexibility is beneficial or important to your teammates
  • Message’s need to be stored for future reference

Examples of asynchronous communication include emails, project management systems, messaging platforms, and video recordings. 

Different types of async communication: screenshots, Sharepoint, PM apps, and info videos.

Video messages can come in handy for meetings. Screen recorders like Snagit  is a great option for creating quick, effective videos that share an idea or demonstrate a process.

Video messaging is the communication method of the future! According to a TechSmith study, nearly seven in ten respondents use video messaging sometimes or often. Another 22% are open to trying it.

Collaborate with Your Team from Anywhere with Snagit

It’s the easiest way to create and share videos messages that keep your team in the loop without another meeting.

Learn More
illustration of snagit's screen recording interface

Asynchronous communication advantages and disadvantages

Similar to synchronous communication, there are benefits of asynchronous communication methods.

One key advantage of asynchronous communication is the flexibility it offers. The reduction in pressure to respond immediately often results in better responses and happier, less stressed team members.

Asynchronous communication works well for remote teams that cross various time zones. Messages can be delivered and received at the ideal times for each individual involved.

According to the Bureau of Labor Statistics, 16.4% of companies have employees working remotely at least some of the time. That means asynchronous communication is a must!

On the flip side, since there is not an immediate response, it’s not an ideal communication method for quick feedback or if your work is blocked until you get a response. Because of the lag in response times, there can be delays in progress and inefficient use of time.

Asynchronous communication versus synchronous communication, which one is right for your business?

No simple, all-encompassing answer can solve this question. A carefully curated combination of asynchronous communication and synchronous communication will best serve a business. Few workplaces can rely solely on one or the other of these approaches to communication.  

Leaders in your workforce need to understand how to weigh both options and select the optimal method for communication in any given situation. It isn’t as black and white as some people believe it to be, and rules like “asynchronous communication is for remote work” and “synchronous communication is for on-site work” leave an awful lot to be desired in their attempts at guidance.

Putting policies and processes in place can be effective in guiding the decision-making process and creating a higher-quality, cohesive work environment.

Decision tree to show off the thought process behind synchronous and asynchronous meetings.

Who are you communicating with?

Well, like all communication efforts, one of the most important details to consider is who you are communicating with. For this component, considering factors like what generations your team belongs to, the concentration of introverts vs extroverts, and the size of the audience can help you make a great decision.

Gen X team members might prefer a synchronous meeting whereas Millennial and Gen Z staff might respond more positively to a recorded video message. A heavily introverted staff might be more effectively engaged in a brainstorm session completed using asynchronous communication, while an extrovert-leaning group likely prefers the energy involved with synchronous brainstorming sessions. 

How urgent is your communication? 

Another important consideration in the synchronous vs asynchronous communication debate is related to timing. As the primary difference between the two approaches is in the time between message delivery and response, this could easily be the variable that tips the scales in one direction or the other.  

Conversely, having a document passed back and forth with edits via email, a classic asynchronous approach, may be less desirable when you’re on a tight deadline than using a live document, like a Google doc, to edit and revise in real time with your collaborators.

Is complexity a factor?

One more important variable to consider is the complexity of the communication required and both your ability to effectively pass along the nuances and complexities and the receiver’s ability to pick them up using one form or the other, synchronous or asynchronous communication.

For these instances, and many others, there are many excellent tools available to support asynchronous communication.

Video communication is groundbreaking. A recent TechSmith study found that 98% of respondents who use video at work believe it improves the effectiveness of their message.

Tools like Snagit make it simple and streamlined to communicate layers of complex information effectively using visual methods.

Collaborate with your team from anywhere with Snagit

It’s the easiest way to create and share videos messages that keep your team in the loop without another meeting.

Download Free Trial
illustration of snagit's screen recording interface

All in all, each of these areas and likely other situation-specific factors need to be carefully considered when deciding on synchronous or asynchronous communication in the workplace. No one answer will always be right, and there may be some trial and error involved while you learn to navigate this.

Having a strong understanding of the individuals your team is comprised of, and an excellent handle on the details of each project you are working on together, will help you make the best choices for your team’s communication.

Ryan Knott

Ryan Knott is a Marketing Content Strategist at TechSmith, where he creates content about easy, effective, and efficient video creation, editing, and tips and tricks, as well as audio editing for creators of all kinds. He/him.

How to Get the Perfect Video Lighting

There are many ways to set up the studio lighting for your video.

There are many elements that contribute to or detract from a great video and lighting is one element that can make or break it. Because cameras don’t capture light in the same way that the human eye does, it is crucial to learn how to get the best lighting for video recording. 

In order to have the image on the screen appear natural your set will need a lot of lighting. But not just any lighting will do – there are specific ways to manipulate the light for optimal results and bad lighting can be very distracting. So distracting in fact that it can cause your message to get lost, or worse yet, it can make people stop watching altogether. 

Whether your goal is to look great on your next Zoom call or shoot a new video, the tips and tricks we’ll share in this guide will give you all you need to improve your video lighting.

Make amazing videos with Camtasia!

Download a free trial of Camtasia to quickly and easily edit your own videos.

Download a free trial now!

Make amazing videos with Camtasia!

Download a free trial of Camtasia to quickly and easily edit your own videos.

Get started free!
Camtasia user interface

Step 1: Optimize the lighting in the room for a video shoot

The best shooting environment is one where you have as much control over lighting as possible.

Get rid of clutter

A clear, distraction-free space is ideal for filming. When shooting in an indoor space like an office or home, be sure to complete a thorough decluttering of the space that will be seen on camera. 

Anything that takes away from the message of your video should be removed. The goal is to create a crisp clean canvas that will help to keep your audience focused and engaged. Having photos and decorative objects in the frame can easily distract your audience and reduce the effectiveness of your video, so removing them is an easy way to set your video out on the right foot. 

Pro tip: Take a photo before you start moving items so that you have a reference point for putting them back properly when filming is complete. 

Clean the space

Anything that is selected to remain in your filming space should be given a thorough cleaning. Dust and smudges on frames or furniture can be distracting. Even the floor should get a thorough cleaning if it will be visible on camera. 

Add props

This may seem odd after the decluttering step, but hear us out. The props used should fulfill a function and not distract from the message of your video. Here are a few ideas for props and how and why they should be used as part of your set. 

  • Blankets and throw pillows can be used in a living room or rec room setting to add some texture or a pop of color to a solid-colored sofa or chair
  • Fresh flowers are a very popular addition to a set. Arranged nicely and placed in a vase they can add color and perspective to a neutral space.
  • Shelves and tables should be styled, minimally and authentically, with books, plants, lamps, and other generic items. Always be careful not to use easily recognizable books or representations of licensed characters on your set. 
  • Any artwork used as part of the staging should be carefully curated. Only use pieces of art and photos that you have the right to capture and distribute on film. If you’re unsure about any of the pieces in your frame, check into the usage rights, consider other backdrop options or contact the artist directly to ask for usage rights.

Be considerate of mirrors

 Filming in locations with mirrors can be difficult, not only from a lighting perspective but also because it can be tricky to ensure that no reflections of equipment or crew members get captured in them.

Make amazing videos with Camtasia!

Download a free trial of Camtasia to quickly and easily edit your own videos.

Get started free!
Camtasia user interface

Step 2: Choose your video lighting type 

There are several options to choose from when searching for the best lighting for a video. It’s a good idea to try a few different setups and learn which one works best for you. Some will work more effectively for face lighting and others for creative or dramatic effects. The best way to learn about how to get good lighting for videos is to practice!

Key light

Description: The key light is the brightest and most powerful light for your shot. It is your main light source.

Pros: Illuminates the subject of your video

Cons: LED options can be pricey, and must be used in conjunction with a fill or backlight 

Who should use it: Live Streamers, and individuals using three-point light, two lights or four lights lighting schemes 

Fill light

Description: Fill lights are used to eliminate any shadows caused by the key light.

Pros: Eliminates shadows

Cons: Must be used in conjunction with a key light and/or backlight

Who should use it: Individuals using a three-point light, four-light, or loop lighting scheme

Backlight

Description: A backlight shines on the subject from behind.It can be hung from above or placed directly behind or to the side of the video’s subject. 

Pros: Creates separation between the subject and the background

Cons: Must be used in conjunction with other light sources

Who should use it: Anyone filming without a ring light

Ring light

Description: A ring of light, usually LEDs, which often comes equipped with a tripod and mechanism to hold your phone or camera in its center.

Pros: Can be used alone

Cons: Can be harsh to look directly into

Who should use it: Beginners or makeup tutorial creators

Who should use it: Beginners or makeup tutorial creators

Step 3: Choose a video lighting scheme 

There are many ways to set up the studio lighting for your video. Three-point lighting is a popular lighting choice for video, but two lights, four lights, and loop lighting setups can be used effectively for video lighting as well. 

Each of these options creates a slightly different result, so read below to learn more about which scheme you should use to get the best lighting for your videos.  While you can, of course, find great lighting for video recording outside, we will be focussing on lighting schemes for videos filmed indoors.  

Three-point lighting

Description: Three-point lighting uses three lights; a key light, a fill light, and a backlight. In this video lighting setup, the key light and fill light are positioned on either side of the camera, pointing toward the subject. The backlight is positioned either above or to the side of the subject. 

Pros: Separates the subject from the background and creates nice highlights around the subject

Cons: Many pieces of equipment required

Who should use it: Youtubers and Streamers or any videos with one person speaking to the camera will benefit from this video lighting scheme. 

Two lights

Description: The two lights scheme for video lighting uses a key light and a fill light. With the addition of a bounce card, this scheme can be amplified. Whether it is used alongside a natural light source or with your key light pointed at it, it will help to improve the video’s face lighting. The lights should be positioned above your subject’s height for the best lighting results. 

Pros: Flexibility within a filming location

Cons: Reliance on natural light can limit the filming timeframe

Who should use it: This type of video lighting is good for use with subjects who may want to get up and move around. 

Four lights

Description: This is an expansion of the three-point lighting system for video and introduces a background light. The background light is positioned at waist height behind the subject, pointing at the wall or backdrop they are in front of. 

Pros: Brightens the wall behind the subject, offers a more creative exploration of the use of light in video

Cons: Longer setup and teardown, more equipment required

Who should use it: Video creators looking for more creative opportunities

The Marketer’s Ultimate Guide to Video

In our FREE ebook, we’ve put together practical strategies to get out of the woods and create engaging, powerful video content on your own that reaches your audience.

Download now!

Loop lighting

Description: Loop lighting, another excellent option in lighting for video recording, uses two light sources, a key light positioned next to the camera and a backlight on the other side of the camera behind the subject. 

Pros: Minimal equipment required

Cons: Movement is restricted with this lighting scheme

Who should use it: Those creating professional videos

One light

Description: A video lighting system requiring only one light. A ring light is the best choice for a one-light studio lighting setup. 

Pros: Minimal equipment required

Cons: Less depth is created with this scheme than with multi-light options

Who should use it: Video creators who use their cell phones for filming

Step 4: Choose your light color temperature for video shoots

Not all lights are created equal. Based on the type of bulb, lights can appear “cooler” or “warmer” on camera. The human eye perceives this difference too.

Consider how a doctor’s office looks (cool fluorescent light) compared to a comfortable living room setting. Warmer light typically has a more yellow color, while cooler light has more white or light blue tones.

This concept is called color temperature, and can be measured on a scale of kelvin (see image below.)

As we stated earlier, it’s best not to mix lights of different color temperatures. I suggest finding daylight color bulbs, which are around 5000K. 

For LED, it’s helpful to be able to adjust the color by temperature to ensure even coloration. Mixed temperatures can lead to improper color balance, which can lead to unnatural-looking footage.

Mixed temperatures can lead to improper color balance.
Color temperature on a kelvin scale

Step 5: Fix glare, the enemy of video lighting

Glare on glasses can be a big issue, especially with fixtures that have harder, more direct light.

You can often fix it by raising your lights higher on their stands. If you have someone who can assist, have them raise the lights while you look through the camera viewfinder until the light is no longer visible in the glasses lens. 

If raising the lights doesn’t help, try moving your key and filling the lights farther out, while keeping them relatively equal to one another.

In the three-point lighting image above, your key would be closer to 3:15, and your fill would be 8:45.

If your subject is comfortable with removing their glasses, that’s always a good last resort, but certainly not always an option — especially if they’re reading from a teleprompter.

It’s best to accommodate your shooting subject as best you can before asking them to adjust their appearance for a technical reason.

Make amazing videos with Camtasia!

Download a free trial of Camtasia to quickly and easily edit your own videos.

Get started free!
Camtasia user interface

Video lighting FAQs

How much does video lighting cost?

Video lighting can range widely in cost. It can be free if you have the option of using a window, or you can find bundles including a full studio lighting setup for around $200 USD. 

What color bulb should I choose for video lighting?

The color of the bulb itself is up to you and what best serves the lighting needs of what you are filming. The important detail to remember is not to mix different colors of light, as that will create a low-quality video. 

How do I avoid glare in video lighting?

Repositioning your lights is the key to avoiding glare in your videos. If you notice a glare, you can either raise the lights until the glare disappears or try moving your key light and fill light further out. 

Can you have too much light when filming videos?

Yes, you can! Too much light in the wrong places can cause undesirable shadows to appear.

Editor’s Note: This post was originally published in 2017 and has been updated for accuracy and comprehensiveness.

Ryan Knott

Ryan Knott is a Marketing Content Strategist at TechSmith, where he creates content about easy, effective, and efficient video creation, editing, and tips and tricks, as well as audio editing for creators of all kinds. He/him.

How to Run More Effective Meetings with Async Video

Conceptual graphic depicting effective meeting management using asynchronous video. Eight icons of individuals at computers encircle a larger central play button, symbolizing participants in a virtual meeting. The icons are set against a gradient blue background, which transitions from light to dark, suggesting innovation and technology. The image is designed to represent the use of video for enhancing communication in remote teams or online collaborations.

Do you spend an alarming amount of time in meetings?

You’re not alone! According to this survey, we spend about a third of our work week in meetings. 

Unfortunately, most of that time isn’t making us any better at our jobs:

The good news is that meetings don’t have to be a waste of time!

Rethinking your approach to meetings and adopting an “async-first” mindset will help you take back your calendar and give yourself more time for focused, deep work.

In this post, we’ll cover:

The Future of Work is Async

New research shows asynchronous formats like video messages are emerging as a welcome replacement for meetings.

Get the Insights
Illustration showing a browser window, mobile screen, and various workplace communication icons. The browser displays a selected area within a webpage layout, a user avatar with a speech bubble, and an exclamation mark notification.

How meetings disrupt productivity

It seems simple: the more time you spend in meetings, the less time you actually have to get stuff done. But it’s worse than that. 

Meetings lead to context switching

Multiple meetings on our calendars can lead to more context switching throughout our day, which hurts our ability to focus. 

Let’s say you’re working on a presentation for a project about apples and have to pause to attend a meeting about oranges. 

Since it takes time and energy for your brain to switch between tasks, oranges won’t get your full attention because you’re still partially focused on apples. Then, when you need to get back to work on your project about apples, you’re still thinking about oranges for a while.

According to research from TechSmith, 50% of workers find the volume of meetings, messages, and other interruptions throughout their day have a negative impact on their productivity.

Meetings leave less time for deep work

Meetings can chop up our work day, leaving us with an hour or two here or 20 minutes there to complete our tasks. 

It takes time for our brains to gain the momentum they need to handle cognitively challenging tasks like creative work and problem-solving. We need stretches of uninterrupted time to focus on our most important work. 

Without time for deep work, we are less creative and make poorer decisions. 

5 Time-Wasting Meetings and How to Get Them Off Your Calendar

See how small changes to the way you share information can help you reclaim your time and sanity at work.

Get the Guide
Infographic depicting a calendar marked with various meetings and a wall clock to signify time management challenges. The calendar, set against a backdrop of clock gears, includes entries like

What are the qualities of a good meeting?

Meetings aren’t going anywhere. Sometimes, being able to talk through ideas and make decisions as a group in a synchronous meeting is the best way to move work forward.

Being intentional about when, why, and how you are having meetings will help make your meetings more effective. Good meetings tend to:

  • Have a clear goal and expected outcomes. If you can’t come up with why you’re having a meeting in the first place, it’s best not to schedule it all. 
  • Be as short as possible. Not every meeting needs to be an hour. Schedule only the time you think you need to reach your expected outcome. 
  • Have the right people in the room. Too many attendees can derail your meeting with side conversations or distractions or, worse, waste someone’s time if they don’t find the discussion valuable.

Use async video to make your meetings shorter and more effective

There’s no way around it. Running an effective meeting takes planning, but it’s worth it. 

Leveraging asynchronous forms of communication like video messages can help you make the most of the synchronous time you have with your team. 

When you’re meeting with a group to brainstorm or make a decision, there’s usually some context, history, or essential information that will help inform the discussion.

Don’t wait until your meeting starts to share that information! 

If you have slides, data, or examples you want to share with your attendees, fire up a screen capture app like Snagit and walk through the information just as you would during your meeting. 

You don’t need professional video experience, either. With Snagit, you can record your camera, microphone, and screen at the same time to create shareable videos in minutes.

Pro tip: Use Snagit’s Screen Draw feature to highlight areas of your screen while you record your videos to emphasize important information.

Your attendees will have more time to digest the information and form opinions or questions, encouraging them to participate in the discussion. 

Plus, you’re saving the time you would have spent presenting this information at the top of the meeting.

A flow chart to help you decide if you should schedule a meeting. If you need input from others to make a decision and expect many questions or discussions, you should schedule a meeting. Do not schedule a meeting if you're only sharing background or updating someone on your decision.

Types of meetings you can replace with async video

Sometimes, the most productive way to run a meeting is not to schedule one at all. 

That’s right! Many of the meetings we attend are scheduled out of habit, and it’s a pattern we need to break. At TechSmith, we even canceled all of our meetings for an entire month, and 85% of employees said they would consider replacing meetings with video in the future.

Informational meetings

Any meeting that is a one-way share of information like a status update, data shareout, or project demo is usually more productive in an asynchronous format.

Record a video with Snagit to share your updates or demo your project, just as you would over Zoom call or in-person meeting.


Use Snagit’s Picture-in-Picture feature to include your camera video with your screen recording. It will help connect your face and name to your work, which can be especially difficult when working remotely.

Answering “how do I?” questions

Let’s say you need to show a coworker how to update a page on your company’s website. You could walk over to their desk and guide them through the process. Or, if you’re remote, set up a video call and share your screen.

But whether you’re in an office, remote, or hybrid, there’s a better way to demonstrate a process: asynchronous video. 

You guessed it; fire up Snagit and hit record. Walk them through the steps as you would in a meeting. When you’re ready, click “Share Link,” and you instantly have a link to your video copied to your clipboard. 

Not only will you save time, but your coworker will also be able to reference the information whenever they need to (instead of pinging you on chat with repeat questions.)

Plus, you can re-use the video anytime you need to walk someone else through that process. Even better, if you share your videos via Screencast, you can organize your how-to’s into Collections, so they’re easy to find.  

Providing feedback

You don’t need to schedule hours of meetings or write mile-long emails to provide feedback on a project or review someone’s work. 

Use Snagit to record your screen and share your ideas with a video!

You can record anything on your screen and include your webcam video, making it simple to explain complex ideas and get your point across.

If you’re providing feedback that might be difficult to hear, record your screen and webcam at the same time with Snagit’s Picture-in-Picture feature. Your viewer will be able to pick up on nonverbal cues that can help communicate empathy or enthusiasm. 

The benefits of replacing meetings with async video

At TechSmith, we have been using async video to enhance or replace our synchronous meetings for years. Here are some of the benefits we’ve seen so far.

Work doesn’t get stuck in limbo

Taking an “async-first” approach to meetings means we’re not limited by busy schedules when sharing ideas, providing updates, or making decisions. Especially for distributed teams, time zones can make scheduling a synchronous meeting even more difficult.

And it’s proven to be a successful alternative! A TechSmith survey revealed that 98% of people who use video at work say it improves the effectiveness of their message.

When you share your Snagit videos to Screencast, viewers can ask questions or leave feedback in time-stamped comments that keep the conversation going without disrupting everyone’s day. 

Work moves forward faster when you don’t have to rely on finding a time that works for everyone to share critical information. 

Plus, when we’re not overwhelmed with unnecessary meetings, it’s easier to find time to connect when it’s genuinely needed.

More people have an opportunity to contribute

Even if you can quickly get everyone in the same room at the same time, not everyone is comfortable speaking up or providing immediate feedback during a meeting. 

Allowing your team to absorb information in their own time can help encourage participation, reduce knee-jerk reactions and lead to more thoughtful communication overall. 

Information can be archived or referenced later

According to research from the Harvard Business Review, reducing meetings can lead to fewer misunderstandings. 

Synchronous meetings have a lot of variables. From side conversations to technical issues, information can get lost in translation, even if you’re taking the best notes. 

When you share a video with your team, that information lives permanently in an easily accessible format. Someone who needs clarity on a related task can reference that video anytime for help. 

Simplify your work life and ditch unnecessary meetings

Meetings aren’t inherently evil, but we tend to schedule them more often than we need to. We don’t have time to do our actual work when we’re in back-to-back meetings all day. 

Unfortunately, many of us steal from our nights and weekends to catch up, which can lead to burnout and hurt employee engagement. 
It doesn’t have to be that way! Screen capture and recording tools like Snagit can help you leverage asynchronous communication to take back your calendar.

Take back your calendar with Snagit Connect

It’s the easiest way to create and share video messages that keep your team in the loop without another meeting.

Try Snagit for Free
illustration of snagit's screen recording interface

Danielle Ezell

Danielle Ezell is a Marketing Content Strategist at TechSmith, where she writes about effective workplace communication, offering tips and strategies for using images and videos to collaborate more effectively in hybrid and remote environments.

The Guide to Using GIFs in the Workplace

How to use gif at work

The prevalence of remote work has really changed the way we interact in the modern world. It requires us to think very differently about how we communicate in the workplace – to consider the culture we want to create and think less traditionally about how we can make that a reality.

In years past, the idea of using visual methods of communication like emojis, memes, and GIFs at work would have seemed absurd and unprofessional. However, in the quest to create connection while using communication tools that can’t translate tone or nuance, these visuals have become invaluable tools.

When we are limited to only letters, numbers, and proper punctuation, it is nearly impossible to add personality or humor into a conversation without the risk of being misunderstood.  

With remote work and globally distributed teams continuing to dominate the workforce, it is important to properly incorporate new ways of communicating that can help us better get to know one another and understand the unique personalities that we are working with – this is one very important way to continue the development of strong teams despite the distance spanned between coworkers. 

We’re all familiar by now with emojis and how they can be used to add flavor to a conversation, and you may have even tried your hand at incorporating a meme or two, but the player that you need to take off the bench to really punch up your workplace communication now? That would be the GIF. Let’s take a look at how best to use GIFs effectively for work.

Are GIFs work-appropriate?

You know the old saying, “a picture is worth a thousand words”? It might not feel like that has always been the perspective in the professional sphere but that is changing quickly. 

Visual communication has worked its way into professional communications and GIFs are an effective medium to incorporate. Using GIFs at work helps to convey meaning and nuance outside of the confines of conventional language. 

GIFs can even help you to build stronger relationships across your team and make freelancers and remote workers feel like they are a part of the team. It doesn’t hurt that they can earn you a few laughs along the way too!  

One of the primary strong points in favor of using GIFs at work is their ability to save time. 

You can literally encapsulate an entire sentence or even paragraph with the right GIF.  

And they leave very little room for interpretation – the nuances that can get lost or cause problems with conventional language in written form are nearly eliminated with the use of GIFs. 

Emotions and humor are much more easily shared via GIF format than through almost any other non-verbal form of communication. Time is money, so they say, and streamlining your communication by using GIFs at work is an easy way to boost productivity. 

Another important benefit to the GIF in the workplace is that stronger bonds are able to be forged using this tool than using standard written tools. And it is an accessible form no matter where in the world your colleagues are! 

There is a significant difference, as the receiver, between a “good job” note and a funny “good job” GIF. Any time you have the ability to make your team laugh at the same time as effectively communicating a message, you win modern workplace communications.  

It is essential, however, to approach the use of GIFs at work with caution. Any use of a GIF at work should be evaluated on a case-by-case basis. 

If ever you find yourself wondering about the appropriateness of a GIF in any specific situation, it’s a good idea to check with the HR department to be sure you are on the right side of the policy.

Also read: Everything you wanted to know about mobile video recording

What are the advantages of using GIFs at work?

We’ve seen a lot of new forms of communication come and go from year to year and decade to decade. Still, the GIF file format has been in use since 1987.  

The animation that makes the format so enticing didn’t enter the picture until 1995 but, in one way or another, the GIF has been a part of the workplace for over 30 years. It continues to be a useful and relevant way to communicate feelings, ideas, and information in an efficient and effective way.  

The GIF remains a powerful format in today’s workplace landscape, perhaps more than ever before. Here are some of the top reasons that you should be using GIFs at work. 

Create GIFs with Snagit today!

Snagit makes it easy to create professional and entertaining GIFs with one click

Download Free Trial
illustration of snagit's screen recording interface

1. Messages will be More Memorable

On average, only 20% of a message delivered in a text-only format is remembered by its recipient. But when paired with a visual the message becomes much more memorable. 

The ability to use a GIF well at work in a way that draws out emotion or uses humor can help your team connect to a message in a deep way and make what you’re trying to communicate simply unforgettable.

2. Relationships will improve

With the uptick in remote work we’ve lost some of the opportunities that have traditionally helped us to build strong relationships with our colleagues and teams. The water cooler and coffee break conversations that used to be the norm are now much less accessible. 

The opportunities for sharing hobbies, experiences, and favorite shows, things that used to help us find “our people” and build great relationships, are fewer now but not exhausted! 

The use of GIFs in the workplace can fill in this gap. Sending a message to your team that is punctuated by a funny GIF (appropriate for work) that references a show you love or something nostalgic can really help you to strengthen the feelings of connectedness within your team regardless of the geographical distance between you. 

3. Communication will be more effective

None of us at this point are strangers to the anxiety of being misunderstood or accidentally causing a problem because of a poorly constructed message. And, in all likelihood, many of us are guilty of jumping to conclusions or taking something the wrong way when reading workplace communication. 

If you’ve been a part of one of these misunderstandings, regardless of whether you were the communicator or the receiver, you know one thing for sure – the communication was not effective! 

Adding a GIF to your communication can be a great way to ensure the effective delivery of your message. A well-placed GIF in the workplace can go a long way in communicating the nuance and context that can so easily be lost, causing misunderstandings. 

It’s hard to think your team leader is mad about something if their message is accompanied by a funny GIF or a “good work team” GIF, right? 

Camtasia makes it easy to create GIFs

Generate fun and effective team communication GIFs with Camtasia

Download Free Trial
Camtasia icon

Also read: The guide to make Youtube videos

4. Work will be more fun

Remote work has a lot of advantages but one of the disadvantages is the absence of energy and fun that can come from working closely with other people. 

A joke levied from a few desks away, and shared horror at the office’s favorite show’s season finale around the water cooler can really break up the monotony of the day – but those things don’t happen when you’re sitting alone in your home office. 

GIFs at work are a great solution to this gap!  Anything you can say a GIF can say funnier, and using them in your workplace communications can really add fun back into the workday. 
With tools like Snagit and Camtasia, you can even customize GIFs specifically for your team! Sending a “great work team!” GIF is way more fun when it features the actual people on your team!

10 ways to use GIFs at work

1. Show a series of steps in a process

Sometimes a seemingly simple process has a lot of steps. GIFs are the perfect way to explain an onscreen process quickly, without having to list all the steps in text form.

GIFs are the perfect way to explain an onscreen process quickly.

2. Show cause and effect

Illustrate how one thing changes another. GIFs clearly demonstrate cause and effect in a way a static image simply can’t. A GIF that isolates essential elements makes it easy to focus and see the impact of an action.

GIFs clearly demonstrate cause and effect in a way a static image simply can’t.

3. Show before and after

When the amount of space on your screen is an important consideration, a GIF can really be a lifesaver. In a world with screens of every size, conveying all the necessary information efficiently in a small space can be difficult.

Before GIF, you had to use two pictures: a before picture and an after picture. Now, you can show them both in the same space.

Before GIF, you had to use two pictures: a before picture and an after picture.

4. Make comparisons

Similar to a before and after GIF, a comparison GIF is a powerful communication tool. By taking two (or more) seemingly separate images and mashing them together in GIF form, you recontextualize the meanings of both.

It’s difficult to find another universally recognized file format that packs so much power.

A comparison GIF is a powerful communication tool.

5. Onboarding and walkthroughs

We love this one. In fact, there’s this handy dandy screen capture program called Snagit that uses GIFs for an introductory tutorial.

The GIF exposes functionality with animated loops and a simplified user interface. Perfect for showcasing macro-level functionality without getting into the nitty-gritty.

The GIF exposes functionality with animated loops and a simplified user interface.

6. Mini-demos

The GIF can serve as a “mini-demo.” They’re perfect to show off a new feature or process and can easily replace still images for dropdown menus and checklist UIs.

The GIF can serve as a “mini-demo.”

7. Social media teasers

Want to tease a concept or solicit feedback on social media? Post a GIF and test how your engagement increases. Twitter, Facebook, and LinkedIn support the posting and viewing of GIFs in the feed.

Motion-heavy GIFs help stop the scroll and draw attention to your post.

Post a GIF and test how your engagement increases.

8. Concept illustrations

Animated illustrations can show concepts and introduce new features rather than teach steps. GIF motion draws attention, and it encourages a second look at a seemingly boring topic.

GIF motion draws attention, and it encourages a second look at a seemingly boring topic.

9. Help desk ticket

GIFs are perfect for your IT help desk. If someone in your organization is asking for computer help, it’s likely that someone else may have the same issue.

By creating a simple, helpful GIF and keeping it on file, you will be ready to help everyone who asks about that particular topic again.

GIFs are perfect for your IT help desk.

10. Quick tips or answering questions

Has someone ever asked you a question on how to do a seemingly simple task, and you find yourself writing them a novel in email form? It’s actually faster to just make them a quick GIF. Plus, then you’ll have it on hand if that same question is emailed to you again.

It’s also easier for the person to follow along. Perfect for the workplace social platform, such as Slack, Teams, or Flowdock.

Let’s take a look at how best to use GIFs effectively for work.

Bonus! GIF reactions

Did someone on your team close a big sale? Squash that pesky computer bug? Nail that latest presentation? Consider emailing them a congratulatory GIF!

Want to really celebrate? CC the entire team on your email. Nothing blows up your inbox quicker than a well-placed GIF. Your co-workers might even respond with a GIF or meme of their own.

Here at TechSmith, when someone sends out a funny GIF or meme, we all pile on and try to outdo each other. Sure, it’s a bit of a distraction, but we’re all laughing as a team and having a bit of fun at work. I am constantly amazed by the GIF mastery and meme brilliance of my colleagues.

Consider emailing your team a congratulatory GIF!

GIFs at work FAQs

Is that OK to use GIFS at work?

Yes! It is OK to see GIFS at work. They can support connection and fun but they can also make communication more effective. Just make sure the GIFs you choose are appropriate for the workplace. 

How do businesses use gifs?

Businesses use GIFs to make their communication more memorable and effective. They can be used for both internal and external business communications. 

Kara Swanson

Marketing Content Specialist at TechSmith. I know way more about tea than any human being ever should.

Understanding Video File Formats, Codecs and Containers

Video file formats are so plentiful these days.

Video file formats are so plentiful these days. It can be overwhelming to choose which file format is best suited to your project.

This quick, down and dirty guide will help you gain a core understanding of how video files differ from one another and what formats you should be using in various stages of your workflow.

What is a video format?

Let’s start with the basics – what does “video format” even mean? 

Video formats refer to the way in which the video’s information is stored on digital devices or servers. 

There are two main components to each video format; the Codec and the Container.  

Codecs

Codec is actually an acronym; it stands for compressor/decompressor. Think about all of the information contained in a video file – there are combinations of data related to images, audio, video, and meta data among others. 

The amount of data held in a video file takes up a lot of space and the codec helps to reduce the amount of storage required to house each file. While in storage, the video codec will reduce the file size by merging like data, minimizing the number of colors in a video and reducing the resolution. 

When the video is opened for viewing or editing the same codec will decompress the data.  

It is important to explain that Codecs can be “lossy” or “lossless” in their compression methods. If the codec’s method of compression involves removing or merging files, this is what would be described as lossy. It can result in the quality of your file diminishing after each edit.

Edit your own videos with Camtasia!

Download a free trial of Camtasia to quickly and easily edit your own videos.

Start your free trial!
Camtasia user interface

Lossless Codecs will store your data in a way that preserves all of the information from the original file, which is great, but there is a tradeoff for that benefit – a larger file size.  

Containers

Now we’ve explained a video Codec, one of the two components of a video format, but you may still be wondering what a video container is.  

Funny enough, the image that came to mind when you first read the word “container” is probably pretty close to what it is!  A video container is used to keep all the elements of a file together so that they can be played back synchonously. So if you pictured a box or jar when you first read the word “container” in this article – you weren’t far off! 

All video containers can hold data related to audio and video but they can differ from one another in their abilities to hold elements outside of those.  

Some video containers can hold metadata and subtitles among other things, but some can only hold audio and video elements.

Video containers can be identified by their file extension. Some common video file extensions are .mp4, .mov, and .avi, among others.     

Formats vs. codecs, what’s the difference?

Container vs Codec is a consistent point of confusion  – they do both play important roles in video file creation and management so it’s not unreasonable that people sometimes believe them to be synonymous.  

Containers and Codecs, though, are very different from one another and serve two important and unique purposes. 

The Codec encodes and compresses, then decodes and decompresses the data that makes up your video. It is about what comes out of the camera; the filming and recording process. 

An example of a Codec is H.264

The Format or Container, stores the audio, video, subtitles, and other elements that make up your video.  It’s about the end product.   MP4 and MOV are examples of video formats.  

The most common video formats

There are many different types of video file formats. We’ve gathered the details on some of the most common to help you better understand when to use which one. 

Video format 1: MP4

What is it? 

MP4 is the most common and most popular video format. It is the most universally compatible and is capable of storing audio, video, subtitles, text and still images. It is the best option for use on Facebook, Instagram, Youtube and twitter. 

Pros

This file format is universally supported by most digital devices and media players. It is compatible with both Windows and iOs and can be used on popular devices like Xbox 360, television sets and DVD players. MP4 files are relatively small in size but the video quality is high. Compression of these files only causes a very slight loss of quality.   

Cons

The MP4 file format is still being developed but its popularity and ease of access has resulted in an ease of piracy that could be concerning to some creators. This video format can be challenging to edit. Though it is uncommon, MP4s can experience issues with audio syncing due to Codec issues.  

Video format 1: MOV

What is it?

The MOV file format is quite similar to the MP4 format but was developed specifically by Apple for use with Quicktime Player. It is the best video format for use on Apple devices. 

Pros

This video format holds audio, text, and video effects and is highly regarded in the film industry because of the ability to be separated into multiple tracks. MOV files are very high quality and easy to edit. They are playable on Apple devices as well as programs in Windows and most usb-compatible televisions. MOV files are the professional standard in video editing. 

Cons

This video file format is not widely playable across devices, and the tradeoff for the high quality is a very large file size. The compression of this video file format causes some data loss which reduces the video quality. 

Video format 1: AVI

What is it?

The AVI video file format was Microsoft’s answer to the MOV. Developed in 1995, it is the one of the oldest video file formats in existence. It is an ideal format for short videos and television but is less suited to streaming and sharing because of the large file size.

Pros

AVI files are compatible with most major operating systems and web browsers in addition to being adaptable and versatile in terms of working with other video file formats as well. This video file format creates excellent audio and video quality and is even suitable for DVD recording. 

Cons

The AVI video file format is somewhat outdated and is not ideal for streaming or sharing, making it less than practical for many modern video uses. Its very large file size is coupled with some quality loss during compression. This video file format does not hold the data required to generate subtitles which, with today’s focus on accessibility, is not helping its case.

Edit your own videos with Camtasia!

Download a free trial of Camtasia to quickly and easily edit your own videos.

Start your free trial!
Camtasia user interface

Video format 1: WMV

What is it?

As AVI’s successor, WMV files are supported across Windows devices and on Apple as well, as long as Windows Media Player has been downloaded. The WMW is one of the only video file types that beats the MP4 in terms of compression capability.

Pros

WMV video files have a licensing and copyright function that makes them ideal for the sale of digital video products. They also have 1080p video support and a file size so small that it can serve many different purposes – even holding the capability to be played via Google Drive. 

Cons

The WMV is one of the least accepted video file formats by video players. Video files saved in this format can lose image quality during the compression process and there is also a lack of ability to manually select compression proportions for them.  

Video format 1: MKV

What is it?

The MKV video file format is becoming increasingly popular. It uses open-source code and holds multiple Codecs simultaneously.

Pros

This video file type supports the inclusion of audio, video, subtitles, metadata and menus. Multiple Codecs can be supported within this one file type, and there is no loss of data during compression. These video files result in an excellent quality end product.    

Cons

The tradeoff for the excellent quality is a large file size, so this video file format requires more storage than some others. MKV files also use a more complicated compression process than most video file types so there is not support across all devices, though compatibility does seem to be increasing.

Video format 1: AVCHD

What is it?

This video file type was co-created by Sony and Panasonic and was designed for use with Camcorders.  It is the highest quality video format for those shooting high end video footage. 

Pros

The H.264/MPEG-4 compression technology used by this video file format results in very small file sizes without a loss in data quality. The AVCHD can store audio, video, subtitles, menu navigation, and even a slideshow! Its newest format also supports 3D video.  

Cons

The AVCHD video file format is very limited in compatibility, having been specifically developed for use with Panasonic and Sony products.  

Video format 1: WEBM

What is it?

Another open source video file type, WEBM was developed by Google for HTML5.  It plays directly in the browser, without the need for Flash Player or another plugin. 

Pros

Because it plays in the browser itself, this video format takes less time to load than others. It is supported by the major browsers, like Chrome, Edge, Firefox and Opera. The WEBM video file type easly compresses and decompresses data, resulting in high quality video playback with a very small file size. Videos using this file type can also be embedded directly into the background of a website.

Cons 

This video file format’s requirement for HTML to enable playback means that its compatibility with mobile devices is quite weak.

Edit your own videos with Camtasia!

Download a free trial of Camtasia to quickly and easily edit your own videos.

Start your free trial!
Camtasia user interface

How to Choose a Video File Format?

The video file format you choose should be based heavily on the video quality requirements for your specific project. Some other things to consider include the length of your video, how you want to share it and how you plan to edit your work. 

For online videos

When creating a video for online playback, make sure you choose a file format that will be supported by most web browsers. This way, your video will be played natively on the browser. MP4 and WEBM are the best choices for videos that need to be web compatible. .

For home video recordings

If you are making home videos, chances are pretty good that you want them to stand the test of time. Because of that, it’s best to choose a format with high video quality and a good chance of being usable in the future. Open-source file formats would be the best bet for this, as they are more future-proof than formats that are owned by or specific to one platform. MP4 or AVI formats are good choices for this.

For Windows applications

Of course if your video needs to be compatible with a Windows application you need to choose a format that is compatible with Windows. If this is your goal, WMV is a good choice for your project.

The Marketer’s Ultimate Guide to Video

In our FREE ebook, we’ve put together practical strategies to get out of the woods and create engaging, powerful video content on your own that reaches your audience.

Download now!

Best video formats for Youtube

While many video formats can be used effectively with Youtube, it’s important to consider details like time required to upload, process and play the video – this is tightly tied to the file size associated with your video. To maximize effectiveness, Youtube itself recommends the MP4 video file format with AAC-LC audio Codec and H.264 video Codec.   

Best video formats for Instagram

There are two formats that are accepted by Instagram, MP4 and MOV, however, due to the smaller file size and lower data loss during compression the MP4 file format is preferable.  The MP4 format should be paired with an H.264 Codec for optimal results on this platform.

Best video formats for Facebook

While many video file formats will work for Facebook, MP4 and MOV are the most highly recommended, with MP4 coming out on top once again due to its smaller file size and fewer losses during compression.

Video formats FAQs

How to change a video format?

There are specialized video converters that can change videos from one format to another. Some examples are Wondershare Uniconverter, and Any Video Converter.

What format are iPhone videos?

iPhone videos are usually recorded in the MOV video file format. 

What format are Tiktok videos?

The MP4 file format is best for Tiktok.

What is the best video format for Youtube?

For Youtube, the best choice for video file type is the MP4 video file format with AAC-LC audio Codec and H.264 video Codec.

What’s the difference between an MP3 and an MP4?

The MP3 file type is a single media supporting file – it hold audio exclusively. The MP4 file type can hold both audio and video files. 

What’s the difference between a MOV and an MP4?

The MP4 is the most universally compatible video file format and can store audio, video, subtitles, text and still images.  It is the best option for use on Facebook, Instagram, Youtube and twitter. The MOV file format is very similar to the MP4 format but was developed specifically by Apple for use with Quicktime Player. It is the best video format for use on Apple devices. 

Andy Owen

Andy Owen is the Video Production Specialist at TechSmith.
Most Proud of: being a husband to Chandra, father to Elle & Kai Favorites: The Muppets, Hanna-Barbera, Friends & Firefly Dislikes: Writing in the third person...

How to Create Process Documentation in Just a Few Clicks

How to Create Process Documentation in Just a Few Clicks

Have you ever been asked to train a colleague or even just teach them something new?

Whether there’s a new hire at your organization or a coworker who is unfamiliar with a particular task, you’ve likely needed to share your knowledge at some point.

If you’re a process owner, creating and maintaining process documentation is helpful for a variety of reasons.

Not only can documenting a process save time, but it also helps ensure that tasks get done correctly by outlining a consistent set of directions. It can also help prevent bottlenecks in day-to-day operations by spreading knowledge throughout a team instead of funneling all tasks through one person.  

In this post, we’ll cover the basics of process documentation, provide some best practices, and share a step-by-step guide that will help you document a process in just a few clicks!

Here’s what you’ll learn:

What is process documentation?

Process documentation is the ongoing, internal, real-time act of ensuring all steps within any given process are written down and made available for others to reference. 

Process documents are the outcome of process documentation and serve to keep tasks flowing as smoothly as possible by providing clear and accurate instructions on how a process should be completed. 

Businesses need to have documentation like this in order to maximize effectiveness and efficiency in their day-to-day operations. 

Process documents can come in many forms, including process maps, checklists, policies, tutorials, screenshots, and forms. Process documentation frequently included links as well, sometimes to another program necessary for the process to be completed and sometimes to an excellent reference video or other such resources.  

Create Process Documentation easily with Snagit!

Snagit’s templates are the fastest way to create professional-looking instructions. Save time, increase accuracy, and improve performance in minutes.

Download Snagit

Why is process documentation so important for businesses?

Eliminate errors

Process documentation is an excellent way to reduce errors in the ongoing tasks completed within a business. 

Without process documentation, it can be quite easy to miss a step within a process. 

Sometimes this won’t have a significant impact but at other times it could completely change the outcome. Having process documents available helps ensure that a process will happen exactly the same way every time, regardless of who is completing the process and how great their memory is. 

Having process documents available and in use also helps to negate the all too common errors caused by miscommunication or altogether lack of communication. 

Not all managers will communicate the purpose of or steps in a process the same way, and process documentation is an effective workaround for this. 

Regardless of who is assigning a task and how well they explain it, having access to a process document means that the person carrying out the task has a reference for how exactly to make it happen. 

Improve efficiency

Unnecessary meetings, duplicated work, and revisions are all inefficiencies that can be reduced by documenting processes. 

With all of the details documented, there is no need for a meeting (or meetings!) to review what needs to happen during a process.  

Duplicate work is reduced because, if everyone is following a well-crafted suite of documentation, redundancies should have been eliminated and revisions become less frequent as a result of clearly laid out steps and a well-articulated outcome.  

Also read: Quick reference guide

Lower costs

Almost any time we see improvements to efficiency we can find cost reduction as well. 

Less time spent in meetings and fewer iterations of a task reduces the human cost of the process while laying out exactly what resources should be in use for each step allows a business to see whether there are systems, platforms, or programs that have become redundant and can be eliminated, thereby reducing the costs associated with them.

Create Process Documentation easily with Snagit!

Snagit’s templates are the fastest way to create professional-looking instructions. Save time, increase accuracy, and improve performance in minutes.

Download Snagit

Decrease resources associated with tasks

As mentioned above, process documentation allows for evaluation and potential reduction of the resources a business makes available. 

When the process documents clearly assign specific resources to particular points in the process the common traps of trial and error and “I wasn’t sure what to use” are removed from the equation and only what is meant to be used is used. 

Improve work quality

With nothing left up to assumption, guessing, or personal preference, process documentation can take the quality level up a notch or two for your deliverables. 

By following a well-documented process, your team will achieve a level of consistency that speaks to quality and know-how. 

And the very nature of product documentation is that of an evolving creation, so whenever efficiencies or improvements are found they can easily be integrated and operationalized. 


Increase customer satisfaction

Whether the process documents in question outline the development of a particular deliverable or the established manner in which customer service is provided, using them well will help boost customer satisfaction.  

People like quality and they like to know what to expect. Product documents help your team deliver the consistent quality service that your customers desire and deserve.

Increase employee satisfaction

No one likes to fumble their way through a process. This is especially true of employees who care about their work and strive for great results – not to mention the fact that they will typically receive feedback on their efficiency and effectiveness and likely prefer that feedback to be positive. 

By providing high-quality process documentation, you can remove any uncertainty about how a task should be executed. 

This helps give employees confidence and lets them know you are setting them up for success. That is an excellent combination for increasing employee satisfaction.

Create Process Documentation easily with Snagit!

Snagit’s templates are the fastest way to create professional-looking instructions. Save time, increase accuracy, and improve performance in minutes.

Download Snagit

Create process documentation easily 

With all the benefits you’ve just learned, you may be wondering, “but how exactly do I document a process?” If that’s you, keep reading – we have broken it down into easy steps so you can create effective process documentation with no trouble. 

Step 1: Create a brief description of the process

The best process documents include a brief thorough description of the broader sense of the process. 

When done well, this can help the end user really understand the scope and impact of the work they are about to do, and where it falls against other tasks they hold responsibility for from the perspective of priority.  

Your description should include details like the goals and timeline for process completion, as well as a method of determining priority level. 

These components will let the user know how the process completion will impact and dovetail with their other work. It is also important to share the relevant Key Performance Indicators (KPIs) for the process, as well as what other stakeholders might be involved with the process completion. 

Step 2: Define specific boundaries for the process

Once you have the description complete, the next step is to lay down the boundaries. This will let your process documentation provide clear instructions as to which teams and individuals hold responsibility for and/or are tasked with completing specific pieces of the process. 

It’s not uncommon for multiple departments to hold a piece of the process, so the documentation clearly explaining who makes what decisions and who performs which tasks can save an incredible amount of time on back-and-forth clarifying conversations. 

Step 3: Determine inputs and outputs

Next, you will need to determine and document what resources will be required to complete the process (inputs) and what the objectives are that you want to see achieved on process completion (outputs). 

When determining outputs, make sure to revisit the goals you documented in your process document’s description to make sure your outputs will see those goals achieved. 

You will use these inputs and outputs to help break everything down into smaller steps in the next stage of creating your process documentation. 

Step 4: Decide process steps

This step in creating your process documentation is one where you may find it beneficial to bring in some other individuals for a brainstorming session to make sure that you think of all the details.

Whether working with a group or solo, you’ll want to start by defining the start and end points of the process. With those identified, you can start filling in the steps required to get from point a to point b.  

Try to be as thorough as you can here, to avoid any confusion or the need for employees to guess how to bridge the gap between one step and the next. Be mindful of multiplying steps, for example, if one of the steps is a meeting, you will need to add steps to reflect booking the meeting, drafting an agenda, and sending the minutes or a follow-up email to the attendees. 

It can also be quite impactful to incorporate screenshots or screen recordings (if your process documentation will be exclusively digital) at various points as you document the steps in a process. 
These additions can add an exceptional amount of clarity to your documentation and help the team feel confident that they are on the right track. Get your free trial of Snagit to make this part quick and easy!

Create Process Documentation easily with Snagit!

Snagit’s templates are the fastest way to create professional-looking instructions. Save time, increase accuracy, and improve performance in minutes.

Download Snagit

Step 5: Communicate with your team

When you are creating a new piece of process documentation, once you have the description, boundaries, and steps laid out it is a good idea to bring in some perspectives outside of your own. 

Gather individuals from the teams or departments that will be involved in completing the process you are documenting to make sure what you have created is clear to them. 

Are there any steps missing?  Inefficiently allocated resources?  Multiple perspectives can be quite beneficial in uncovering these and ensuring your process documentation is clear and easy to follow. 

Step 6: Prepare a process flowchart

Our research has shown us quite clearly that adding visuals to your communication is a great way to ensure its effectiveness and retention. 

Some of your staff and colleagues may also just be visual learners, so adding a highly visual process flow document or flowchart to your process documentation is a step worth taking.  

To do this, simply pull your inputs, tasks, and outputs from the process document and organize them into a flowchart. It is a good idea to pass this visual representation of the workflow by your team or direct reports to make sure it is as clear to them as it is to you.

Step 7: Take note of process exceptions

Like anything else, a process won’t look the same every time it gets completed.  Some steps may only be necessary for certain situations, and irrelevant in others.  

For example, your project documentation might indicate meetings at 3 points throughout the process, but with less complex versions of the desired outcome you may only actually need 2 meetings.  

These exceptions should be clearly noted in your process documents so that there is no question or misperception about when exemptions apply and when the process must be completed exactly as documented. 

Improving Your Internal Communications

A guide to how visual content can help create a more collaborative and productive work environment.

Download now!

Step 8: Test your process

Now that you have spent the time and energy to create thorough and accurate process documents, you need to take them for a spin. 

Things tend to work much differently in practice than they do in theory, so you will need to allow space for your team to test out the documentation and provide feedback. This is an iterative process, after all, and your outcomes can only be as good as the processes in place to reach them.  Your process documents should be tested and refined as many times as needed to achieve optimal results.  

Extra tips for effective process documentation

Make it visual

Research shows that 67% of people understand information better when it’s communicated visually.

Process documents are the outcome of process documentation

Including screenshots in your documentation is one of the fastest, most effective ways to show colleagues how to do something. Our favorite tool to use for process documentation is Snagit.

Snagit allows you to easily capture screenshots and add text callouts, numbered steps, and other customizable annotations to draw attention to a particular area to convey information. 

Keep it simple

Be mindful of your audience’s cognitive load – eliminate unnecessary distractions from your content so that your audience can focus on what is important. There are several ways to do this, but in general, your guiding principle should be to boil down the communication to the essentials.

Including screenshots in your documentation is one of the fastest, most effective ways to show colleagues how to do something.

This image shows an example of a screenshot of the PowerPoint interface that has been updated to a simplified user interface graphic, showing where to click to insert a picture.

Aim for evergreen 

As you plan and work through documenting a process, try to avoid examples and text which will quickly become outdated. 

For example, try not to use version numbers in software, dates, or references that could quickly become irrelevant. Being mindful of your approach can help you keep your content up-to-date longer. 

Simplified User Interface graphics are great for this application as well. They allow you to avoid frequent updates to your content, such as cases when buttons move around in software applications.

Create Process Documentation easily with Snagit!

Snagit’s templates are the fastest way to create professional-looking instructions. Save time, increase accuracy, and improve performance in minutes.

Download Snagit

Don’t forget about routine maintenance

While we want our content to be evergreen, even the best content will eventually require updates. 

When this happens, try to edit your existing screenshots instead of a total re-do. Snagit’s library keeps a handy record of past screenshots, which means you can open and edit them as necessary. 

Don’t have your original files? No problem! Just take a screenshot of your screenshot! Snagit has some great options for editing screenshots, such as Smart Move and Replace Text, that will save valuable time. 

Schedule regular check-ins, even if they are only once a year. This will ensure that your content stays up-to-date and has all the necessary steps, even as systems and other variables change. Be sure to get feedback from relevant people in your organization. Others may have valuable insights to share.

You can create effective process documentation with no trouble.
Schedule regular audits of process documentation to ensure they get updated, even if only once a year.

Kara Swanson

Marketing Content Specialist at TechSmith. I know way more about tea than any human being ever should.

How to Create Job Aids that Skyrocket Your Team’s Performance

Job aids are simple, clear instructions on how to do something at work.

Could a job aid be the learning solution that helps your business? 

Empowering your employees with the information they need to level-up is an integral part of managing staff and running a successful business. When you identify problem areas or gaps in knowledge, it only takes a quick Google search to discover the variety of options available to educate your employees.

Online courses and eLearning are popular ways of training. But are they the most suitable for teaching the information you need your employees to know?


Training courses and eLearning solutions aren’t always the silver bullet. These are often costly, time-consuming answers to a problem, and depending on what your employees need to know, it could be a waste of time and money.

Before you invest in any learning solution, consider what your employees need to know. Could it be taught with some illustrative material? Do users need frequent access to easy-to-read materials rather than something they need to commit to memory?

If the answer to any of these is yes, what you might need is a job aid.

Job aids can be instrumental in helping people learn how to complete tasks. In this post, we will share our advice for creating job aids that will work best for your business. 

You can watch the video on this topic at the top of this post, to listen to the podcast episode, hit play below, or read on for more…

What are job aids, exactly? 

A job aid, otherwise known as a “cheat sheet”, is any material that helps you complete a task.

Job aids are essential tools to empower people with useable information to perform tasks independently. They don’t have to be formal or created on any special software. They just have to help the user through a process successfully and in the simplest way possible.

You’re probably already using job aids and don’t even know it. 

A job aid can come in the form of a virtual sticky note on your computer screen, reminding you what your computer login password is. It could be the paper assembly instructions detailing how to build that new desk for your home office. It could be a checklist, an infographic, an app, a print-out, a note scribbled onto a piece of paper – all these have the potential to function as an effective job aid.

Create amazing job aids with Snagit!

Snagit’s templates are the fastest way to create professional-looking job aids. Save time, increase accuracy, and improve job performance in minutes.

Download for free

Job aids are used over and over again and provide value to a returning user. Designed to be deliberately easy to understand and quick to use. Most importantly, job aids should be convenient to access when needed.

Common examples of job aids include:

  • One-pagers
  • Cheat sheets
  • Paper handouts
  • Instructional lists
  • Printouts
  • Performance support collateral
  • Checklists
  • Infographics
  • Videos
  • User manuals

What job aids are NOT

The key word here is “aid”. As in, assist or support. A job aid serves to assist or support staff in completing their assigned tasks by providing a quick reminder of how to do them. Anything that teaches someone how to do something new is a training tool not a job aid.   

A job aid is not a training solution, but rather a reminder of something the employee has been trained on previously and may need a slight memory jog for in order to perform well.   

Job aids are not tools either. Additions to an office that are meant to enhance comfort or efficiency are not job aids. An ergonomic mouse, state of the art lumbar support in an office chair and a standing desk are excellent supports in the workplace but they are not job aids.   

Improving Your Internal Communications

A guide to how visual content can help create a more collaborative and productive work environment.

Download now!

How is a job aid different from job training?

Job aids and job training are both very important components of supporting employee success but the two serve very different purposes. Using a job aid for training is not going to give you the outcome you are hoping for. And using a training tool when what is called for is a job aid will prove ineffcient.

While job training is focused on guiding employees through policies, procedures, software overviews, and other lengthy procedures required to fulfill their job descriptions, job aids act more like refreshers for when an employee needs to complete a very specific task like performing a single operation within a software or having a particularly targeted conversation. 

Job training sets the expectations for success in a role. Job aids help individuals complete specific tasks within their established role. 

How do job aids improve performance?

Training only goes so far, and it only stays in a person’s memory for a short time. When the face-to-face coaching session from a few weeks ago is already growing stale and you hear, “How do I do that task again?”, that’s when job aids shine. They’re available on demand with exactly the information employees need, whenever they need it. 

Both employers and employees have better days when answers are available right away. Instead of having to chase someone down for help, employees have a job aid that shows them the steps required to complete a process. No need to page through layers of documentation to find the exact instructions — a job aid is right next to their workstation so employees can complete the task correctly the first time.

Not only are job aids great at helping employees remember what they’ve learned from a training (such as processes they only need to do occasionally, and don’t need to memorize), they’re also helpful when something changes — for troubleshooting, for example, or to walk through steps of a slightly different workflow of new software versions. 

These efficiencies add up. According to Peregrine Performance Group, companies they work with have replaced a one-week training course with one day of training plus a job aid. Not only is less training needed, proficiency increased by 50%. When you take the time to write an effective job aid, you can expect these types of benefits:

  • Save time by getting work tasks done more quickly
  • Avoid making mistakes, thanks to having clear directions
  • Less employee stress
  • Reduce unnecessary back-and-forth help requests
  • Better process/standards control by sharing the same knowledge with everyone all at once
  • Less training and re-training
  • Better employee and customer experience

Plus, they’re quick — job aides can be deployed 75% faster than traditional training, and at a much lower cost, for much better ROI. 

Create amazing job aids with Snagit!

Snagit’s templates are the fastest way to create professional-looking job aids. Save time, increase accuracy, and improve job performance in minutes.

Download for free

Why your team needs job aids

If you’ve worked on a team before, you know that at some point, without a doubt, tasks come up that are outside of the norm, or that need to be completed by someone who doesn’t normally do them. In these situations job aids make everyone’s life easier. They ensure productivity by taking the guesswork out of the task at hand and freeing up mental space for more pressing responsibilities. 

Avoid communication problems

Communication challenges are a major factor impacting productivity. Whether it’s waiting for questions to be answered or looking up missing information, the impact that communication limbo has on productivity is very real. 

Having a job aid to refer to means that employees can move forward with new or unfamiliar tasks without having to wait for responses or specific verbal instruction. 

Creating job aids helps to reduce the development of silos and dependencies, and increase productivity and effectiveness.

Make knowledge-sharing faster

It happens on an ongoing basis. A new procedure is developed, a task gets passed from one staff member to the next, a new workflow comes into play or some other event requires a quick way to bring everyone up to speed. 

Well, no one wants to spend their time (or their money) in a long training or watching over someone else’s shoulder to learn what to do. If a new policy gets rolled out, everyone needs to know about it of course, but it doesn’t have to take a large investment of time to make that happen. 

Simply creating and sharing a job aid can make the knowledge sharing process so much more efficient and in many cases, it is also more effective 

Spend less time on training programs

Job aids, of course, cannot and should not replace training programs but they can serve as helpful resources that reduce the amount of time spent on those programs. 

Creating job aids can serve as a supplement to your training programs, providing the necessary information for completing specific tasks or processes without having to book time within your training curriculum to cover them.


How to create effective job aids (step-by-step guide)

Just as you would when creating training material, creating job aids needs to be done with a clear goal in mind. It’s also helpful if you follow a structured process – this will create efficiency and consistency which are both very important variables for you and your team.  When you have the right process in place, and you follow it carefully, you will be able to easily create effective aids that your team will be happy to put to use. The job aid creation process should look something like this:

  • Define the end user of your job aid
  • Gather the required information about the task you’re creating a job aid for
  • Decide on the best format to use
  • Draft your job aid 
  • Test your job aid and gather feedback
  • Finalize and implement your job aid

Define your audience

Like any effective communication tool, you need to begin the job aid creation process by clearly identifying who the aid is for.  People with different roles, levels of responsibility and innate skill sets will require different approaches, for example you would take a much different approach to a job aid meant to serve a C-Suite executive than you would one for use in the mail room.

Consider interviewing or surveying the audience in order to get a very clear picture of what they need in order to be successful. Consider how they might best take in information, what the standard tools of their job are, and the level of education they will most likely have achieved. 

Knowing your audience is a key factor in creating job aids that will actually be effective and well utilized.

Create amazing job aids with Snagit!

Snagit’s templates are the fastest way to create professional-looking job aids. Save time, increase accuracy, and improve job performance in minutes.

Download for free

Gather information

To create a job aid that is effective in reaching its goal, you have to become very familiar with the task you are creating the aid for. You will need to be sure to include all of the inputs needed to complete the task, but you can take it a step further as well. 

Consult with people who do the task you are writing the job aid for. They will be able to provide valuable insight into any common pitfalls, tricky navigation or alternative methods, and potentially even share helpful tips and tricks to assist the end user of the job aid you are writing. 

While gathering as much information as possible will help make sure your end result meets your goal, it’s equally as important to know what not to include in your job aid. Think about what information is needed for the task to be completed and resist the urge to add in any “fluff”.  

Select a format 

Your job aid is only as effective as its presentation allows. There are many job aid formats to choose from and selecting the right one will go a long way in making sure the aid actually gets used. 

If the content and visual presentation of your job aid are not spot on, your audience simply won’t use it. To avoid this, be sure to consider how the aid will be distributed and used, in addition to whether the information can be conveyed better in graphic form than simple text. 

Here are a few examples of common job aid formats to consider:

Step-by-step instructions

Also referred to as the “cookbook” method, this job aid format breaks down each step and presents them in chronological order. This format is great for tasks that don’t lead to multiple outcomes, like how to access a shared network drive.

Job aid example that shows employees the proper way to wash hands before returning to work.
This familiar job aid from the World Health Organization shows employees how to properly wash their hands before and after handling food.

Flowcharts

Flow charts are an ideal format to use when creating a job aid for a task that has many possible outcomes depending on variables within the process. Users are guided through how to proceed by following steps prescribed based on the preceeding result. Visually, these aids often use arrows or boxes to represent the different paths available. Flow charts work well for tasks like responding to a customer service request.

Reference guides

Reference guides can effectively be used to support more than one process or task.  They serve as a collection of reminders or tips to help employees who are already familiar with the task at hand but who may need a resource to turn to for quick reference. This job aid format is a good choice for things like health and safety reminders. 

Decision tables

Decision tables present the user with a grid to help guide their decision making in processes influenced by multiple variables. Information is clearly compartmentalized and shared using very concise text so that decisions can be made without confusion. These types of job aids are excellent for use in quality control processes. 

Checklists

When writing a job aid for a task with lots of action items or requirements that don’t need to be completed in a particular order, a checklist can be very effective. This format presents all of the associated actions in a list format and users can check them off as they are completed. Checklists are good for use with tasks that need to be completed on a daily, weekly, or monthly basis like closing procedures for a retail store, or month end processes for bookkeeping.

Job aid example - flight pre-takeoff checklist
Job aids can help ensure safety measures even when employees already have them memorized.

Draft your job aid

Now that you have all the necessary information gathered and you have decided on the perfect format, you can begin to write your job aid! 

It can be very helpful to begin with an outline, so that you make sure the information is organized well and you have the correct order in place. 

Take your screenshots

Job aids that use more visuals than plain text are the most effective. This can feel intimidating but we’ve got an excellent solution. If you haven’t already, download your free trial of Snagit here.  

All you have to do after downloading is push the big red button and select the area on your screen that you want to capture. If the task for which you are creating a job aid is more physical than digital in nature, you can take photos instead.

Create amazing job aids with Snagit!

Snagit’s templates are the fastest way to create professional-looking job aids. Save time, increase accuracy, and improve job performance in minutes.

Download for free

Annotate

Once you have your screenshots captured, add text, arrows, numbering, or highlights to help make the steps as clear as possible and draw attention to specific portions of the process. Snagit can help you do all of this, and even combine your various screenshots into one document easily. With tools like automated numbering you won’t believe how simple it can be to make clear and effective visual aids with Snagit.

A job aid example about how to login and pull up customer reports.
With clear step numbers, this job aid walks through screenshots on how to pull customer reports in an account record system.
Pro tip: Use action verbs to describe procedures. They’re easier to follow, instill more user confidence, and encourage momentum. For example, you’d say “Open the latch. Remove the inner liner,” as opposed to “Once the latch is opened, the liner must be removed.” 

If directions span multiple screens or photos, combine them into one document and add any text around or on top of the visuals.

Job aids are used over and over again and provide value to a returning user.
Snagit lets you combine multiple images into one document, and drag-and-drop to move images around.  

Have a consistent look 

Be sure to use a consistent style for your job aids. Fonts, colors, and sizes should be consistent and any company branding should be incorporated whenever possible. You can easily create templates for job aids within editing programs to make your process as efficient as possible. If you keep reading you’ll find a free template we have created to help you easily make job aids with a consistent look.

Make it multilingual

Your job aid isn’t going to be effective if people can’t read it. Make sure to consider the languages spoken by the staff you are looking to serve with your job aid and have the resource translated into as many languages as necessary to serve effectively.

Your job aid isn’t going to be effective if people can’t read it.
Job aids can give important reminders to staff across languages, as seen in the inspection reminder card for brewery equipment. Job aids that use pictures without any text can be even easier to use. 

Test your job aid and gather feedback

Now that you have created your job aid, there is one more step to complete in order to make sure it is effective. You need to test it!

Send your job aid to a few seasoned employees in the department that wil be using the aid and have them try it out. They will be able to identify whether any steps have been missed or a shorter path through the process is possible. Make any edits that are necessary based on testing before sending the job aid to your team. 

Finalize and implement

Your job aid is ready to be put to use! Distribute it to the team for use and provide clear instruction on when and how to use it.

Ask for feedback once it has been in use for a short time and make edits related to any valuable feedback you receive. 

It’s also important to evaluate the aid’s effectivenes. Check in with managers to see if they are receiving less repetitive questioning, or if customer satisfaction rankings have increased – whatever metric makes most sense for the goal assigned to the job aid.

Create amazing job aids with Snagit!

Snagit’s templates are the fastest way to create professional-looking job aids. Save time, increase accuracy, and improve job performance in minutes.

Download for free

Bonus: Snagit templates

Still unsure of how to get started with job aids? Let Snagit templates do the work for you!

First, click the Create button and choose Image from Template or select images from the Recent Captures tray, then right click and choose combine in template. You can select whichever templates best suit the needs of your job aid. 

Then, simply drag and drop your images and adjust them within the template. It’s that easy! For a full tutorial on making a job aid with Snagit, watch this great video below:

Job aids FAQ

What software can I use to create job aids?

The simplest of tools can be the most useful!  Powerpoint, Word, Docs, and Slides are great software options for creating job aids. Programs like Cava, Photoshop or Illustrator can also be used to create graphics.  Of course, Snagit and Camtasia are also very useful tools in creating job aids. 

How do employees use job aids?

Job aids are used by employees either to learn a new task or to access reminders about how to complete a task.

What is the difference between a job aid and a procedure?

Procedures are documents that follow a linear pattern to describ the step by step process of completing a task. A job aid presents information and instructions related to the completion of a task. A job aid, in fact, could be used to illustrate a procedure. 

Danielle Ezell

Danielle Ezell is a Marketing Content Strategist at TechSmith, where she writes about effective workplace communication, offering tips and strategies for using images and videos to collaborate more effectively in hybrid and remote environments.

Meet Context Switching, the #1 Productivity Killer in the Workplace

context switching is not the most efficient approach to working

For most of us, our workdays start with firing up our phones and computers so that we can check our emails, catch up on Slack messages, and look over our task lists. There’s a lot of opening different apps and switching between multiple tools. 

This influx of information can be overwhelming. In fact, a survey by TechSmith found that 50% of the respondents find the number of meetings, emails, and messages during a typical workday makes them less productive. It becomes complicated when every task seems to need your attention at once.

All of this bouncing around between different tools, tasks, and resources is called context switching and it’s taking over a lot of our work time – most of the time without us even knowing it. We’ve gotten so used to context switching that it might seem normal, but it comes with a high cost. 

In this article, we’ll take a look at:

What is context switching?

Until recently, the term context switching referred exclusively to the process of a computer storing the state of one process so that it could return to it later.  This is what allows us to switch fairly seamlessly from one app or program to another.  

Context switching has now worked its way into our language describing human behavior, referring to our tendency to shift from one task to another unrelated task. 

When we jump between reviewing our email inbox, checking our calendar, and answering a client call we are context-switching. Multitasking is another word we tend to use to describe context switching, though the two terms do have noted differences. 

What we eventually learned about computers is that they struggled when switching tasks. It is becoming clear that there is a real cost to context switching as it applies to human behavior as well. 

Collaborate with Your Team from Anywhere with Snagit Connect

It’s the easiest way to create and share videos messages that keep your team in the loop without another meeting.

Learn More
illustration of snagit's screen recording interface

Why do we “context switch” all the time?

Even though we know that context switching is not the most efficient approach to working, we still do it all the time.  

This is because context switching has become an unwritten expectation in the modern workforce. The constant perception of urgency and the barrage of notifications constantly interrupting us, as well as the prevalence of sporadic meetings, all keep us in the habit of context-switching. 

We have a false sense of urgency

Whether intentional or not, rapid responsiveness is frequently rewarded in the workplace. This creates the sense that, to succeed, you must adopt a sense of urgency.  

A lot of this perceived urgency centers around communications sent by messaging apps like Slack or Teams.  When a notification comes in indicating a new message, the feeling that a response is required right away is hard to shake. 

Whether we set the expectations ourselves or others set them for us, it’s easy to see the ways that the value of quick responses lends to a sense of urgency which leads to habitual context switching.

We receive notifications constantly

With research showing that 70% of Americans check their phones within 5 minutes of receiving a notification and the average person receiving 65-80 notifications each day, it is clear that this is a major contributor to the persistence of context switching in our daily lives.  

The notifications themselves are not inherently bad, but the challenge is that they have an addictive quality. The rush of dopamine that our minds receive when we get a notification is something we are conditioned to chase. 

Although you might not jump to respond to every notification that your receive, even the acts of recognizing, processing, and deciding on the appropriate action for each one is a type of context switching.  

We attend too many unnecessary meetings

In The Future of Meetings Report 2021, we learn that employees spend 31 hours each month in unproductive meetings and attend, on average, 11 – 15 meetings each week. 

Bouncing between meetings at this rate means it’s hard to find the long stretches of uninterrupted time needed for deep, focused work.

One might combat this hindrance to focused time by initiating “no meeting days” each week, which are dedicated exclusively to focused work. 

One way to protect your time is to initiate “no meeting days” each week. Another is to rethink whether that recurring meeting really needs to happen at all

What is the cost of context switching?

The high cost of context switching is a very real thing, but we continue to do it on a regular basis. It has become something that we are so used to that we often don’t even realize we’re doing it.  

On the surface, it seems so innocent – what’s so bad about answering that email quickly before hitting publish on the blog post you’re writing? It can’t possibly be a big deal to answer Sally’s question on Slack while you’re in that meeting; it’s a no-brainer you could answer in your sleep! 

In reality, though, the cost of context switching is significant.  All these small shifts that seem like no big deal really add up. Context switching has a negative impact on your productivity, of course, but the effect of context switching on the human brain actually goes much deeper than that.  

The way we feel at work is negatively impacted by this behavior, as was proven by a study completed at the University of California, Irvine. The study investigated how we feel at work and found reports of significantly heightened stress, frustration, workload, effort, and pressure after only 20 minutes of repeated interruptions. 

This is problematic because we are constantly interrupted in our daily lives. According to The Anatomy of Work Index, more than one-third of workers feel overwhelmed by the persistent ping of notifications.  

It also gives us some staggering statistics explaining just how common context-switching is in our lives. When it comes to email and video calls, 42% and 40%of people are spending more time on them, respectively, than they were a year ago. 52% of respondents say they are multitasking during virtual meetings more than a year ago and 50% feel the need to respond immediately to notifications. 

These context-switching statistics become even more pronounced when you look at generational differences. Millennials and Gen Z report feeling significantly more overwhelmed than workers overall. 

The cost of context switching can include decreased productivity, short attention spans, wasted time, and burnout. 

Decreased productivity

It should come as no surprise that switching back and forth between tasks makes us less productive – you’ve probably experienced days where you touch many, many tasks and by the end of the day haven’t fully completed a single one.  

Human brains are simply not wired to tackle the amount of context switching we force onto them – according to The Workgeist Report ‘21, 45% of workers say that context switching makes them less productive and 43% say that switching between apps and tools frequently is very tiring. 

Short attention spans

Your full attention does not follow you as you engage in context switching. As you switch from one task to the next, some of your attention remains on the original task, with the remainder following along to the next one. 

As you can imagine, as more and more switches take place, the amount of attention you are left with diminishes significantly. 

This is why you will find yourself having interjected reminders of the tasks that came before – which you still haven’t finished – while you are working on the latest activity. 

Your attention is now divided amongst all the tasks you have touched rather than being focused on the task at hand. Context switching is not what the human brain was designed for, and it’s not ideal for productivity.

Waste of time

In a 2005 study by researchers at The University of California, Irvine, it was shown that it takes, on average, 25 minutes and 26 seconds to fully return to your work following an interruption. 

When we apply that number to the number of interruptions experienced in a typical workday, what that leaves us with is literal hours each day of wasted time. Time spent doing nothing productive but rather attempting to pick up where we had left off.  

There are also time costs to context switching that relate to the stress and fatigue that result from the behavior and cause inefficiencies and do-overs. 

Context switching creates a vicious loop of too many tasks and interruptions coupled with stress and poor performance due to the volume of work.  When we stay stuck in this loop, we continue to waste time. 

In extreme cases: burnout

Our working memory is a necessary component of getting our work done, but it has a limit. We can only hold so much information in front of our minds at once, and we are constantly testing that limit when we spend our days context switching. 

If you’ve ever found yourself rereading the same email multiple times to grasp the information it holds, you have likely experienced the phenomena of brain fog. This is a way of referring to the mental fatigue experienced by the human brain when context switching is taken to an unhealthy level. 

Headaches, loss of motivation, and feeling drained and tired are all signs of burnout. These symptoms can easily begin to creep in when context switching becomes too prevalent in our day-to-day lives. 

How to prevent context switching in the workplace?

Context switching isn’t inherently bad. It’s actually a good thing to have some level of context-switching happening, which is a relief because it’s nearly impossible to eradicate it from our lives. 

The good news is you can implement strategies to help make sure that the context-switching you do is necessary and not done based on false urgency or other common culprits. Here are a few to try! 

Create “focus boundaries” for the day

Practice time-blocking

Focus time is two hours at a minimum of uninterrupted work time. It can be hard to get this time in amongst the notifications and interruptions that regularly pop up. 

A good strategy is to block your time. Go through your calendar and identify a dedicated time for everything. Keep shallow tasks, like checking email and attending meetings, in blocks together and tasks requiring deeper, more focused work together.  It’s the calendar version of “a place for everything and everything in its place.” 

Some email clients and workplace calendars can even automatically schedule blocks of focus time on your calendar.

Set up “themed days”

If you are a manager or your role requires you to work across multiple teams, it may seem intimidating to block your time in such a specific way.  If so, themed days might be a good choice to help you manage context switching.  

With the themed days approach, you assign a function, purpose, or focus to each day in your week. It’s important to make sure you set these up in a way that works well for your specific needs – there isn’t necessarily a one size fits all answer here. 

Would your week work well for you if you dedicated two days to teamwork, one to creative solo projects, and one day to admin? 

Maybe themes like Dan Sullivan’s Free Days, Focus Days, and Buffer Days model would work for you. Try a few methods and see what works best for your unique situation.

Practice single-tasking throughout the day

Setting up your schedule to reduce the cost of context switching only works if you can train yourself to stick with one task for a sufficient amount of time to get into a period of focused work. It is certainly possible, but it takes some intentional habit-building. 

Some of the habits that can support you in single-tasking are:

  • Removing distractions
  • Setting a timer (and starting small)
  • Getting rid of energy drains and “almost done” tasks first

You can’t expect to fully reverse a bad habit like unnecessary context switching overnight, but you can take steps to improve it by creating new supportive habits.

Get rid of “attention residue”

In order to fully devote your attention to a new task, you have to have actually completed the last one. If you haven’t, part of your attention will stay on that unfinished task. 

That leftover sticky piece is what’s referred to as “attention residue,” and it has been proven to be a detriment to starting new tasks.

So how can you get rid of “attention residue”? You can try batching similar tasks together – the human brain has a less difficult time with context switching between like tasks. 

It can also be helpful to build-in routines and rituals to use when you switch tasks – these can act as buffers for your brain and give it a clear signal that it is time to switch gears, which can reduce “attention residue.”

Take regular breaks to recharge

We all have times of high and low energy throughout the day, and what you may notice is that your mind wanders when you are in a period of low energy. This puts you at risk for unintentional context switching, but you can head it off! 

Taking short breaks throughout your day will help to keep your energy up and your mind on task. 

In addition to your standard lunch and coffee breaks, taking microbreaks throughout the day is a great way to keep your energy up and your mind on task. 

Microbreaks can look like a few moments of stretching, a walk around the block, or watching a funny or heartwarming video.  

Incorporating breaks, however, is a great way to keep your energy up and your mind away from the temptation of unnecessary context-switching.

Disconnect from work at the end of the day

Context switching, and its effects on the human brain don’t exist exclusively within the confines of your work day. 

If you don’t disconnect well from work at the end of the day, your brain will be tempted to linger on the activities that transpired, the things left undone, and the tasks awaiting you tomorrow. This can leave you feeling depleted and unable to achieve the focus you will need for the next day. 

To make sure you have a clean break from work at the end of the day and can rest and recuperate for tomorrow’s tasks, there are some routines and tips to try. 

Some people find organizing the work that’s incomplete at the day’s end by adding the relevant next steps to their calendar or to-do list to be a helpful way to stop the consistently running to-do list from taking up residence in their mind in the off hours. 

Others find taking a look at the coming days and their assigned work to help them feel prepared and able to effectively shut work off at the end of the day. Still, others have taken to simply acknowledging that the workday is over and find that to be quite effective. 

Find a method that works well for you and practice until it becomes a habit. 

Take control of notifications

Get rid of unnecessary notifications

Do you actually need all of the notifications your phone and desktop send you?  Probably not – and there are probably a few that you simply tune out at this point. 

It’s a great idea to go through each app you have and assess whether to leave notifications on, turn them off altogether, or adjust the style of notification to be less of a distraction. 

Let’s use Slack as an example of this. Turning off all of the app’s notifications is probably not a great idea, but there are certainly some channels that you don’t need to have push notifications for. 

Silencing notifications on more social channels and keeping them on for direct messages and project-specific channels can go a long way in reducing disruptions while also allowing you to stay aware of the details you need to receive in real-time.  

Completing this exercise with all of your apps can create a lot of beautiful silence in your day and significantly reduce unnecessary context switching.

Take advantage of “Do not disturb” mode

If shutting off notifications altogether makes you a bit nervous, but you still want to avoid the high cost of context switching, “Do not disturb” mode may serve you well.  

With this function (available on both Android and iPhone) rather than silencing notifications from specific apps overall, you silence all notifications for a period of time. 

If you are attempting the time-blocking strategy we discussed earlier, you might choose to use “do not disturb” mode during a block requiring deep and focused work, and rest assured that whatever notifications you believe to be necessary will still make their way to you over the rest of the day.

Plan time to check notifications

Just like you might schedule a time to check your email, it may be helpful to schedule a time to check your notifications. This approach reduces the immediate distraction caused by a notification because you know you have a dedicated block of time set aside to check them. It’s important to actually put this time into your calendar. 

It is also best to note anything that you need to follow up on or take immediate action on that came from your notification checking. 

Relying on your memory can be faulty of course but it also requires some attention to be used up worrying about the memory – since our whole objective is to minimize the divided attention that accompanies context switching, not writing these new tasks down would be counterproductive. 

Context switching FAQs

Context switching and multitasking, what is the difference?

Context switching is the act of toggling between various tasks, apps, and resources. Multitasking involves actively doing more than one task at a time.

For example, context switching might look like moving from your email to Slack to a phone call to a meeting and responding to a text message during a quiet spot in the meeting. Conversely, multitasking could look like formatting a report while participating in a group call. 

Can context switching be a good thing?

Context switching can be a good thing in appropriate doses. Practicing the ability to switch between tasks and be attentive to various pieces of information can help us maintain focus over long periods of time. 

What is the effect of context switching on the human brain?

Context switching is a challenge for the human brain. When we participate in elevated amounts of context switching our brains suffer mental fatigue, loss of attention, and feelings of overwhelm. The cost of unnecessary context switching is not insignificant. 

Danielle Ezell

Danielle Ezell is a Marketing Content Strategist at TechSmith, where she writes about effective workplace communication, offering tips and strategies for using images and videos to collaborate more effectively in hybrid and remote environments.

How to Write a Script for a Video (+Free Template!)

decorative image

Creating a stunning video requires a wide variety of skills and talents. One of the key factors in a video’s success happens long before any lighting decisions are made or the audio recordings need editing. Excellent videos require excellent scripts, but writing a script for a video can be one of the most difficult things for a creator. 

Because of that, we’ve put together this step-by-step guide to creating a great video script! We’ve even included a free video script template that you can use to make sure all of your videos start out with a solid foundation.

For some great scriptwriting tips, check out the video below!

Why do you need a video script?

To get more inspiration

How often have you found that getting words flowing from your mind onto paper just opens up a floodgate? Ideas and inspiration just seem to multiply once you allow them to flow. Because of this, the process of writing a video script can unlock ideas you may otherwise have missed. 

So often when we put pen to paper we are able to access pieces of our imagination that add really important elements to our end product. Writing a video script can be a springboard for all of the things that will make your video impactful.

Create and edit your own videos with Camtasia!

Download a free trial of Camtasia to quickly and easily edit your own videos.

Get started free!
Camtasia user interface

To deliver your message efficiently 

Structure and clarity are two non-negotiables for successful videos. Writing a script for your video is a great way to make sure that your message follows a logical pattern and that the viewer is able to clearly understand the point you are trying to get across. 

Writing a video script also helps to make sure that the message is delivered in a way that is in line with established brand standards – audience confusion is not efficient!

Also read: Everything You Need to Know About Mobile Video Recording

To save editing time

The script for your video will outline all of the audio and visual components that the final product should display. This could include sound bytes, illustrations, and animations among others. An editor who is able to work from a prepared video script will be able to do their job in a more timely way than the editor who is left to guess where each element belongs. 

A narrator or main character who is guided by a full script will have fewer instances of hesitation or interjections of fillers like “um”, “like”, and “uh”, which can significantly impact editing time.

To make recording easier

Recording is made infinitely easier when the process is guided by a well-developed script. If you are recording solo, having a script to refer to can help calm your nerves and keep you on topic. 

If you are recording an interview, being able to provide the script to the interviewee in advance can help them prepare, often resulting in fewer takes and less editing required to create an excellent end product.

Create and edit your own videos with Camtasia!

Download a free trial of Camtasia to quickly and easily edit your own videos.

Get started free!
Camtasia user interface

How to write a video script?

Identify your audience 

A key step in video script writing doesn’t involve a pen, paper, or a video camera. Identifying the target audience for the video being developed is an all-important first step. Your choices around language, humor and tone will vary depending on the audience identified for the video. Creating a script that is engaging for teenagers is very different than writing a script for a video targeting retirees! If you don’t know exactly who you are speaking to it is likely that your message won’t be well received.

Knowing your audience is also important when it comes to how the end product is used. A video geared toward teenagers may be only a few minutes long, recorded vertically, and placed on TikTok, while a training video for new employees would be much longer in duration and require less focus on an attention-grabbing hook. 

Set a goal for your video

Because creating a video consists of so many different elements (lighting, sets, cast, crew, sound, etc…) there are often many people participating in the process. In order to have that process run smoothly and create the desired end product, all of these people need to be working towards one unifying goal. Without this, you can run into a lot of difficulties as a result of each person holding a slightly different perspective about why the video is being made.

The key question to ask yourself at this pivotal point is “why?” Why is this video being made? Is it meant to teach people something? To unify a group of people? To establish a brand’s identity? Knowing and sharing the answer to this question will help steer your video script writing and the work that everyone else involved is doing as well.

If you are struggling to identify your video’s goal, think about the problem that the video is meant to solve. Is it to direct potential clients to a specific offer that needs some attention? Provide clearer instructions on a protocol that’s not being adhered to. Reduce workplace accidents? Increase website conversions on an underperforming site? It can be a challenge to narrow down one specific goal but it is an absolutely essential step to take before you begin writing a script for a video. 

Choose the main characters

Good storytelling is key to creating compelling videos, and what is a story without some engaging and relatable characters? Developing a character, or a set of them, for your video, not only helps your audience engage more with the content but it can also help you focus on creating an effective narrative around your message instead of simply selling an idea. 

If you are struggling to identify the main character, go back to your target audience and your goal. Think about who that audience would relate to and want to hear from in relation to the goal you have established for the video. For example, if your video‘s goal is to build trust with a company following a public failure, having the CEO as the main character may suit, whereas if your video is a solution to a recurring workplace accident, the health and safety representative might be a good choice.

Once the main character or characters have been established, you’ll build out some details about them that will help guide your video script writing. How do they relate to the product or subject matter at hand? Is their backstory relevant? If so, what is it? You don’t need a full character profile but you should go into as much detail as is necessary to help you reach the goal you have identified.

Write an outline

Starting with an outline helps to give structure to your video script. It is a great starting place to get all of your ideas out of your head and onto paper so that you can see which ones fit well in a structured video script and move you toward your goal and which ones may actually end up as distractions.

It can be tempting to jump right into video script writing but skipping this important step can cause your message to be lost and the video to appear overstuffed and disorganized. Your outline should help to establish what the beginning, middle, and end of the video script will include. You can include any details that might be helpful as you move into the next step – video script writing. 

Here’s the script formula we use to create how-to videos:

The A.A.A.A Formula

  • Attention (Grab their attention in the first line)
  • Agitation (Agitate the pain that you can solve)
  • Activity (Show them HOW to solve it)
  • Action (Call them to action and tell them how to get the solution)
The A.A.A.A Formula

Create sections

Breaking your outline down and writing a video script section by section is an excellent way to make sure your thoughts stay organized and the storyline for your video follows a logical progression. So what exactly should be included in each section of your video? Let’s take a look! 

In the beginning:

  • Start with a hook. What’s a hook? A compelling introduction to your video that delivers an accurate preview of what the viewer can expect and immediately captures their attention. You might use phrases like “Have you ever…” “Here are 3 of our top tips for…” or “If you’re looking for…” as components of your hook.
  • Make sure the viewer can recognize your brand and associate this video’s message with it. You can do this by incorporating brand colors into the scheme for the video, displaying a logo, and making sure to write your video script using brand-aligned language and tone. This helps establish your video as something familiar and trustworthy rather than a random piece of content to ignore. 

Create and edit your own videos with Camtasia!

Download a free trial of Camtasia to quickly and easily edit your own videos.

Get started free!
Camtasia user interface

Now that you’ve drawn them in, you’ll use the middle section to:

  • Deliver your message. You’ve drawn them in with the hook and established who you are, so now is the time to tell them exactly what you came here to tell them. Be sure to write this portion of your video script to be as clear and concise as possible so that the message doesn’t get watered down or confused. 
  • Share the evidence. This is a great opportunity in your video script writing to present anything to the audience that can back up or solidify any claims made with your message. Is your video script meant to introduce a new product?

Share the experiences of your beta users. Is this a training video? Establish the proven benefits of absorbing and applying the information being provided. 

And finally, the end. This section of your video script should 

include a Call to Action (CTA). This is the opportunity within your video script to tell the audience exactly what you want them to do. Whether that’s “book now”, “watch the next video”, “buy now”, or anything else, do not miss this opportunity to provide that extra bit of clarity around what you want the viewer to do with the information you have just provided. 

Writing a video script is a lot of work, but the end result will be well worth it. And the great news is, you don’t have to start from scratch every time you need to create one! A video script template can really speed up the process and help keep you on the right track with your video script writing. We’ve created a video script writing template that you can download for free here and put to use on your next project! 

Also read: The ultimate guide to instructional videos

Tips to write an amazing video script

Stay true to yourself

We’ve all had the experience of watching someone speak, whether live or on video, and being painfully aware that they are reading from a script. And you would probably agree that those experiences were not the most engaging. 

So how do you prevent that from happening with your video scriptwriting? Well, a focus on writing conversationally is a big help with this.  If you’re writing a script that you will be speaking from, write it the way that you talk normally. If the video script will be read by someone else, learn a little bit about the nuances of how they speak and interact with others and write the script for their video in a way that reflects that. 

Make sure to write your video script using language that feels comfortable, is aligned with the brand you’re representing, and feels familiar. If you are comfortable and remaining true to your natural communication patterns (or those of the speaker you are writing for) your audience will be more fully engaged than if it feels obvious that you are “putting on a show”.

Create and edit your own videos with Camtasia!

Download a free trial of Camtasia to quickly and easily edit your own videos.

Get started free!
Camtasia user interface

Go straight to the point

The average human attention span is a maximum of 8 seconds, and people are used to being entertained. Taking the time and energy to consume your content may not seem like a big ask, but in this day and age, it actually might be. 

For these reasons, it is important to get right to the point and be as concise as you can be when writing a video script. Surrounding your message with too much back story or context can be distracting and confusing for viewers. Save any of the information that you think is important to share but doesn’t fit well within a concise video script for use in future videos or other types of content.

Stick to the video script (mostly)

You are writing this video script for a reason right? And part of that reason is to make sure the message gets delivered and the video fulfills its goal. A little riffing or adlibbing here and there is ok but do try to stick to the script as much as possible. A few additions to add personality can go a long way, but too much will likely have a negative impact. 

If you or the person who will be presenting the script are likely to go off script, try to include some of the content that may inspire the adlibbing in the video script itself. This can reduce the temptation to go rogue. And if, in the end, the video script just isn’t working, a rewrite is often more effective than an improvised, unscripted video. 

Also read: The guide to creating Youtube videos

Do a verbal run-through off-camera.

A verbal run-through, or table read, is a great opportunity to take your video script out for a test drive and identify any challenges you may have missed in the writing phase. It is not at all uncommon for a word or phrase to look great on paper but sound ridiculous when spoken out loud. 

An off-camera run-through can also help to shorten sentences, cut unnecessary words, and make sure the real-life impact of the words chosen is the same as what you were hoping for during the video script’s writing.

Having someone who is a member of the target audience for the video you have scripted sit in and provide feedback at this point can also help to make sure that your video scriptwriting is going to land the way you want it to with the intended audience. 

Create and edit your own videos with Camtasia!

Download a free trial of Camtasia to quickly and easily edit your own videos.

Get started free!
Camtasia user interface

Support any B-roll with the proper callouts in your main narrative.

B-roll is a term used to describe secondary shots that are shown while the storyline continues audibly. Using B-roll footage can allow you to feature products, employees, happy customers, charts and graphs, testimonials, and other content that enhances the message presented by your video. 

Be sure to include cues and instructions for your narrator or main character to help integrate B-roll footage without causing confusion or distraction for the viewer. Phrasing like “…in the chart you see here…” can help the viewer contextualize what they see on the screen and guide the speaker to gesture or position themselves appropriately.

We’ve all seen the videos where the subject points in one direction and the B-roll footage shows up somewhere else, but that’s much less likely to happen to you with a properly scripted video. 

Don’t forget – there is no need to start from scratch every time you need to write a script for a video. If you have a video script that has worked well in the past, you can easily templatize it and keep using it!

If you need some help to get started, click here to download the free video script template we created for you. You simply document some background information, like your target audience and goals, and then fill in the blanks – what could be simpler?

Ryan Knott

Ryan Knott is a Marketing Content Strategist at TechSmith, where he creates content about easy, effective, and efficient video creation, editing, and tips and tricks, as well as audio editing for creators of all kinds. He/him.

How to Edit Videos: L-Cuts and J-Cuts

The L-cut and J-cut in this sequence make the transition between speakers feel natural.

If you are in the business of video editing, or you would like to be, there are several video editing techniques that you need to know. In this article, we’ll look at two of the techniques that you absolutely must know; the J-cut and the L-cut. 

These two techniques are used by editors to allow audiences to see the context of the dialogue rather than only the dialogue itself. You may want to incorporate J-cuts and L-cuts into your next project – let’s look at the best ways to do that. 

Edit your own videos with Camtasia

Download a free trial of Camtasia to quickly and easily edit your own videos.

Download a free trial!

What is a J Cut?

In the most basic sense, a J-cut is a split edit. The audio track from the second scene overlaps the first scene’s video. Looking at it from the viewer’s perspective, you would hear the audio of the second scene before the video cuts in. 

Because of this, a J-cut is also referred to as an “audio advance”, “audio under” or “audio lead”. This technique is often used in dialogue scenes or for evocative transitions. It has the overall effect of making the audience, whether consciously or subconsciously, anticipate what is about to happen.


What is a L Cut?

An L-cut is also a split edit. In this technique, the audio from one shot continues under the video of the next one. What the viewer experiences is hearing the audio from the preceding scene while watching video that has already cut to something else. 

If you’re looking to scene transition from an old clip to a new one without interrupting the natural flow, an L-cut is a great option.

In contrast to the J-cut the L-cut has the audience, whether they know it or not, lingering on the last scene while their focus shifts to the new shot.


Wondering why these techniques are referred to as J-cuts and L-cuts? It is in reference to how they appear in an NLE software timeline. The audio track protrudes from underneath the video track to the left for a J-cut and to the right for an L-cut. 

What is the difference between a J Cut and a L Cut?

J-cuts vs L-cuts – what’s the difference? They are very similar in that they both help to transition from one scene to the next gently. The difference though, is significant. They do provide opposite experiences for the viewer.  

In a J-cut, the viewer hears the audio for the upcoming scene before the picture changes. In a L-cut, the viewer continues to hear the audio from the previous scene even as the picture has shifted to the new scene. 

Edit your own videos with Camtasia

Download a free trial of Camtasia to quickly and easily edit your own videos.

Download a free trial!

When to use L Cuts?

L-cuts are a good technique to use when what you want to do is make a scene linger. They work really well as a way to add tension to your content or leave your viewer on a dramatic note. 

L-cuts can be seen quite often in long form content like tv shows and movies to support cliffhanger endings or make sure the viewer continues to experience the scene even after the visual space has faded to black. 

L-cuts are also a great option for use in montages. In this use case you can present the viewer with a series of images while the audio that began in the clip preceding them continues.

When to use J Cuts?

J-cuts are really versatile. They can be used as a way to help dialogue flow effortlessly or to give some interest to a potentially lacklustre opening. They are excellent at helping to keep the audience’s attention. 

Make powerful openings

If you picture the opening scenes to your favourite movies there are probably at least a few you can recall where the audio begins while the opening credits are still running through. When it’s done well, this technique gets the viewer hooked before the video’s imagery has even started. 

Express urgency 

Given the right context, a J-cut can live up to the shape of its namesake and literally act as a hook in your storytelling. It can create a sense of urgency in scenes where a question is asked just as the scene is ending – the viewer can’t wait to see what the answer might be.

The Marketer’s Ultimate Guide to Video

In our FREE ebook, we’ve put together practical strategies to get out of the woods and create engaging, powerful video content on your own that reaches your audience.

Download now!

Add dialogue to storytelling

J-cuts help dialogue heavy scenes to follow a natural pattern. Using this technique to have the first seconds of returned conversation occur over video of the first speaker can help to illustrate a natural conversational pattern with smooth transitions between speakers. This technique can give the viewer a sense of being a part of the conversation, rather than just a static observer. 

 Use narrations

Without J-cuts, scenes with narration would feel like watching an invisible talking head describe a scene to you – and that does not make for excellent storytelling. Using J-cuts (combined with L-cuts) in scenes heavy with narration helps to convey emotion and create fluidity.

Create an L-Cut in Camtasia

As mentioned earlier, an L-cut is when audio from a preceding scene plays over footage from the next scene. I have setup an L-cut on the timeline in the example below. Notice how the primary footage audio on the bottom track remains constant but the primary footage video is cut and the b-roll clip begins. This creates an “L” shape with the primary footage and its audio. Thus, we have an L-cut.

An example of an L-cut on the Camtasia timeline.

Create an J-Cut in Camtasia

Now, lets see how a J-cut, which is essentially the reverse of an L-cut, appears on the timeline.

I’ve changed the beginning of the video and setup a J-cut on the timeline. To do this, I kept the same audio from the primary footage on the bottom track, but I begin the video with b-roll. Then, I cut from the b-roll to the primary footage. The result is a shape between the primary footage and it’s audio that approximates a J.

AN example of a J-cut on the Camtasia timeline.

A step further

What we’ve seen so far are simple L-cuts and J-cuts used to begin a video, but that is by no means the only time they are useful. Let’s look at one more example in which both an L-cut and a J-cut is used to transition between two different speakers.

I’ve added another clip to my project and named it Primary-Footage-2. The new clip contains a second person that will be speaking. I need to begin with the first speaker, Speaker A, and then transition to the second speaker, Speaker B.

Edit your own videos with Camtasia

Download a free trial of Camtasia to quickly and easily edit your own videos.

Download a free trial!

To do this, begin the video with Speaker A. After a few seconds of Speaker A talking, I use an L-cut to switch the video to the b-roll. Then, near the end of the b-roll, I cut to the audio from Speaker B. After a moment or two playing b-roll and Speaker B’s audio, I will cut to the video of Speaker B using a J-cut. Check out the image below to see how this looks on the Camtasia timeline.

L-cut followed by a J-cut on the Camtasia timeline.

The L-cut and J-cut in this sequence make the transition between speakers feel natural, as opposed to a jarring jump cut from Speaker A to Speaker B.

Now that you know what they look like and how to set them up, try getting creative with some L-cuts and J-cuts in your own projects. They’re a simple way to add a professional touch to any video.

If you enjoyed this primer on L-cuts and J-cuts, you might be interested in our post about common video editing mistakes!

The Guide to Recording High Quality audio

The Guide to Recording High Quality audio

Are you wondering how to go record high-quality audio? You may think it’s as simple as buying an expensive microphone and diving in but there’s a lot more to it than that. There are many choices to make and steps to take to ensure that your audio recording is high quality and brings value to your project. Throughout this guide, we’ll share all you need to know about audio recording. Let’s start with some basics.

What is high-quality audio?

High-quality audio is best described as audio that sounds natural; as if the listener and the speaker are in the same room. In a high-quality audio recording, you will not hear hums, hisses, microphone handling sounds, plosives, foreign noises (ie a leafblower or footsteps), or overly processed effects.

Master audio recording with Camtasia!

Camtasia is the best audio recording software for any project. You can use it to record speech or music tracks – or both!

Get started free!
Camtasia user interface

The different ways to record audio

There is not just one way to capture excellent audio recordings. There are many tools and software options for recording audio. Let’s take a look at 4 different ways to record audio. 

Recording directly into audio editing software

If your audio recording will feature only one voice from one location, this is a great option. Setup for this method is straightforward, requiring nothing more than plugging in your USB mic and ensuring it is properly selected in the settings.

Download Audiate for free here to try this method. 

Recording via video conferencing software

Meet and Zoom aren’t only for hosting e-meetings! You can easily record audio through these programs if you plan to have multiple voices involved from various locations. It is important to note though that because these platforms were designed for video conferencing first, the quality of the audio recording may be less than ideal. 

Recording via a remote recording platform

Designed specifically for remote audio recording, these platforms allow for high-quality audio to be captured from multiple participants while also offering video capability so that you can see who you are talking to. Some platforms allow for the video to be recorded as well, but not all offer this. 

Recording on a portable recording device

The final option we’ll share is to record audio on a portable recording device. If you want the flexibility of being able to record with other people at your home base or on location, this is a great tool for you. These audio recording devices are easy to travel with and some models can also be used as an audio interface. 

How to choose the right microphone

Choosing the right microphone is a key factor in recording great audio – especially if you plan to record audio on your computer. Built-in computer microphones are typically of a lower quality than those found in modern smartphones. Still, luckily there are plenty of options for fantastic external microphones for use in recording top-quality audio.

Master audio recording with Camtasia!

Camtasia is the best audio recording software for any project. You can use it to record speech or music tracks – or both!

Get started free!
Camtasia user interface

Dynamic microphone

The classic “on stage” mic you would associate with a vocalist or stand-up comedian is a dynamic microphone. Their inner workings consist of coil and magnets which are quite durable making them a travel-friendly option. Dynamic mics are great for recording in noisy environments and there are effective options available that cost around $100 USD. 

Condenser microphone

A condenser microphone is a common choice for audio recording and is significantly more sensitive to smaller vibrations. These mics use capacitor plates rather than coil and magnets and tend to be very effective at capturing vocal subtleties. 

Ribbon microphone

These are currently the least common type of microphone but were used extensively in the early years of audio recording for broadcasting. Their delicate functionality relies on a conductive ribbon between two electromagnetic poles to respond to a sound source. These mics work well for recording two people speaking, because of their bi-directional polar pattern.

How to record audio on my computer?

If you choose to record audio from your computer, there are many options you can choose from. Most of these options depend on the Operating System (OS) you use; Windows or Mac. Two of the most popular options for recording audio using a computer are QuickTime Player on Mac and Voice Recorder on Windows 10.

How to record audio on Mac

Your Mac does have a built-in microphone, but as we mentioned above it is often worthwhile to record audio using an external mic instead for a higher quality result. QuickTime Player is a simple tool to use, with an intuitive interface. Follow these steps to use this program to record audio on your Mac:

  1. Open Quicktime Player
  2. Click File and then New Audio Recording
  3. Make sure that the correct microphone and quality settings are in place using the Options popup menu. Remember that the higher the quality, the larger the resulting files will be. 
  4. Ensure the volume is set properly for your audio recording
  5. Use the red circle to begin recording audio and the grey square to stop. 
  6. Save your work
  7. Edit the audio recording using functions like split, rearrange, and trim

How to record audio on Windows 10

Your Windows 10 computer comes equipped with free audio recording software called Voice Recorder. If you haven’t already, download the audio recording software from the Microsoft Store. 

  1. Launch Voice Recorder
  2. Click the microphone icon to begin recording
  3. Use the standard pause and stop icons as needed to complete your audio recording
  4. Use the icons near the bottom of your app window to trim or share as needed

Audiate is an audio recording and editing software that works with both Mac and Windows systems. You can download your 30 Day trial here.

Master audio recording with Camtasia!

Camtasia is the best audio recording software for any project. You can use it to record speech or music tracks – or both!

Get started free!
Camtasia user interface

How to record audio on my phone?

If you choose to record audio on your phone there are many options to choose from, and once again these options depend on the OS your phone runs on. Below we will cover recording audio on android and recording audio on an iPhone. 

How to record audio on Android

There is no one standard set of Apps that is relevant across all Android phones, so you will need to do a little digging to find the best fit for you and your device – there’s no one size fits for how to record audio on Android. As a first step, search your installed apps using keywords like “voice recorder” “memo” or “notes”. 

If nothing suitable appears, head to the Google Play Store and use the same terms to identify an audio recording software that will meet your needs. You will find that most of the options available use the standard symbols for Record and Stop, and are relatively intuitive.

How to record audio on iPhone

Every iPhone comes with a built-in voice recorder! To record audio on your iPhone, you will need to open the Voice Memos App. Tapping the red “record” button will start your recording and the red “stop” button will end it. Once you’ve completed your recording press “done” and then name and save your file. Once that is complete you can even share or airdrop your audio file right from the iPhone’s voice recorder app to the device you will use for editing. 

Tips to record great audio

No matter what audio recording software or audio recording hardware you have, there is no substitute for setting yourself and your space up intentionally to achieve great audio. Here are some additional tips to help make sure that your audio recording turns out great.

Silence everything else

Of course you know you need to record in a quiet space, but there’s more to that than just closing the door and silencing your notifications. Before you start recording sit in the space and really listen. Can you hear a fan whirring? Do you notice when the furnace or A/C kicks on? Do you hear footsteps or pet tags jingling from outside your door? Consider things like rustling papers, and ice cubes in a glass as well. 

All of these seemingly small background noises can easily be picked up and heard by your audio recording software and can create unnecessary editing time or distractions for your listeners. 

Put your phone on airplane mode

That’s right, it’s not enough just to silence your phone’s notifications. Your phone emits signals when receiving calls or messages, initiating searches or performing background functions that your ear may not perceive. 

However imperceptible they are to you, the signals can be picked up by your audio recording equipment and show up in your recording. Putting your phone on airplane mode in addition to silencing notifications is a simple and effective way to eliminate this. 

Minimize echo

If you’re hearing an echo on your audio recording, there are some steps you can take to reduce that. Echo happens when the sound you are making bounces off of the hard surfaces around you and gets picked up multiple times by your audio recording equipment. In order to reduce this, you can use acoustic foam or sound-dampening panels, but there are less expensive options as well. 

Adding books, curtains, or area rugs is quite an effective way to minimize echo using things you already have on hand, and if you’re really in a pinch, sitting underneath a blanket is surprisingly effective – this can be a great option if you want to record audio on your iPhone on the go! 

Get close to the sound

Don’t shy away from the mic! We talked above about getting your audio recording space as quiet as possible. This tip is a way for you to minimize the impact of those sounds you can’t completely eliminate. 

Speaking as close to the mic as possible reduces the potential that you’ll hear rogue noises when you listen back in your audio recording software. When you get close to the mic you can reduce its sensitivity settings, making it less likely for ambient and unanticipated noises to make their way to your audio recording. 

Control your breathing

Your breath is, essentially, the wind that you do not want your microphone to pick up. While barely perceptible in an in-person conversation, breath sounds are more pronounced in audio recordings and can drastically reduce the quality of your audio. 

If you’ve ever been on the phone with someone walking outside on a windy day you can understand why! The sound which is barely perceptible to the naked ear is significantly enhanced when it comes through a microphone. Be conscious of the timing of your breathing. Try things like turning your face away from the mic or pulling away slightly each time you take a breath.

Master audio recording with Camtasia!

Camtasia is the best audio recording software for any project. You can use it to record speech or music tracks – or both!

Get started free!
Camtasia user interface

Find a great place to record

Many of these tips for recording great audio, whether on an iPhone, Mac, or another device, can be taken care of by being very conscious of your location choice. The space in which you perform your audio recording can make a huge difference to the quality of audio you are able to produce. 

Choosing a space that doesn’t have a lot of hard surfaces that will create echoes reduces the amount of time and energy required in softening the space. A small carpeted room with curtains and bookshelves is a much better option than an expansive space with hardwood flooring and desks and bare walls. Using a closet can actually be quite effective for achieving high-quality audio recordings! 

How to remove background noise from your recording

Even when you follow all of the tips and suggestions we’ve provided, it’s difficult to eliminate all background noise unless you’re recording in a professional sound booth. This is problematic because background noise is the biggest offender for videos with audio – it can be the thing that makes or breaks your final product, so it is essential to get rid of it. You can do this before or after you start recording.

How to remove background noise before you start recording

One way to remove background noise before your audio recording begins is to use a tool like Krisp. If you are recording audio on a Mac or on a PC, Krisp can be used as a filter along with the audio recording software you are recording with. The noise canceling tool can reduce the effect of sudden loud noises like a dog barking in the background as well as eliminate the chatter and buzz of a busy office. 

With this tool you don’t need to have a fancy microphone or a perfectly curated space – its echo cancellation feature helps create perfectly clear, echo-free audio even if you choose to record in the bathroom! 

How to remove background noise after you record

Even if you aren’t able to eliminate background noise before recording, you can take care of it after the fact. If you are working solely with audio you can export your tracks into Audiate but if you are working with audio and video, your best bet is a tool that allows both audio and video editing. 

Camtasia is an excellent option for this and it has a built-in noise removal feature so it’s easy to reduce your audio recording’s background noise! Download your free trial here and follow these steps to remove the background noise from your audio recording: 

  1. In Camtasia, click Properties
  2. Select Analyze – this automates the noise removal process. At present, this function is exclusively for use with Windows, but if you are working with audio on a Mac you can manually adjust the Sensitivity levels to get the desired effect.

Camtasia allows for editing audio and video right in the timeline so there is no need for importing and exporting through multiple systems – it’s quick and easy to make changes!

Whether your project involves exclusively audio content or is an audio-visual masterpiece, the quality of your audio recording is crucial to its success. 

The good news is that you have all the power necessary to create excellent results whether you are recording audio on a computer or iPhone, in a quiet dedicated space, or in a busy office. With just a little bit of prep work and some robust easy-to-use tools in your pocket, you will be creating incredible content in no time.

How To Use Visual Communication and Why It Matters

Visual communication is the practice of using visual elements to communicate information or ideas.

By integrating visual content, such as short videos and static images in your communications rather than text alone you can save time and improve performance in a significant way. 

Specifically, TechSmith has proven that a business can save up to $1,200 in productivity per year for every employee who consumes content as part of their job just by integrating visual content.  

Are you ready to integrate visuals into your communications? If so, keep reading. In this article, you will learn:

Start creating images and videos today!

From grabbing a screenshot to recording a video message, Snagit helps your team speed up everyday communication tasks.

Snagit

What is visual communication? 

Visual communication is the practice of using visual elements to get a message across, inspire change, or evoke an emotion. 

Visual Communication exists in two parts; communication design and graphic design: 

  • Communication design refers to crafting a message that educates, motivates, and engages the viewer. 
  • Graphic design uses design principles to communicate that message in a way that is clear and eye-catching to the intended audience. 

What visual communication is really about at its core is selecting the elements that will create the most meaning for your audience. These elements usually include text, icons, shapes, imagery, and data visualizations. 

Some strategies that are common in visual communication are:

  • Showing the impact of your work by using data visualization
  • Outlining processes and flows by using shapes and lines 
  • Creating more memorable information through the use of symbols and icons
  • Telling stories through visuals and data 
  • Harnessing color to illustrate importance and attract attention

Why is visual communication important? 

The chances of your workforce being made up of people from one generation with one personality type and one learning style are pretty slim. 

The modern workplace landscape sees us working cross-generationally and cross-culturally, with individuals from all walks of life who have different learning styles, and different backgrounds. 

This reality makes for a very interesting group of colleagues and carries the benefit of multiple distinct perspectives. Of course, it also presents some significant challenges that employers and managers need to address in order to communicate effectively and keep the full workforce as engaged as possible.  

An individual’s reception to and retention of information provided can vary greatly depending on where they land on each of the spectrums listed above but also on how the information is provided. 

Integrating visual communication as part of your routine norms is important because it helps to bridge the gaps that traditional word-focused communication leaves.      

Becoming a good visual communicator can help improve:

  • Communication effectiveness 
  • Information retention
 

Communication Effectiveness

Information overload is a very real thing in society in general, and at work specifically. 

Between phone notifications, coworkers popping by with questions and new details to share, and the temptation to scroll social media, there are a lot of distractions to compete with! 

No matter how well thought out or important your message is, if your coworker opens the email and sees a long wall of text, assume they’re not going to read it. 

The good news is that by becoming an excellent visual communicator, you can make sure critical information doesn’t get lost, preventing misunderstandings and keeping projects on track.

The amount of resistance to communication often correlates with the amount and quality of information being communicated. 

Incorporating high-quality images and videos in your communication rather than relying solely on text to share your message can decrease the amount of time required to absorb the content, maximizing the potential for viewers to actually 1. Open  2. Take it in and 3. Reply to your communication, rendering it much more effective than an unopened text-only email.

Start creating images and videos today!

From grabbing a screenshot to recording a video message, Snagit helps your team speed up everyday communication tasks.

Snagit

Information Retention

The competition for your team’s attention is fierce and if you win it, another challenge awaits – breaking through the noise and actually having your information retained.  

There are two main benefits to visual communication where memory is concerned. 

The first benefit of visual communication relates to retention.  When a reader takes in information in a visual format, there is a greater likelihood that they will create a long term memory associated with it. 

Becoming a great visual communicator will mean that your team can easily return to the recollection of the material they saw from you, recognize its value, and be inclined to seek out more of it.  

The second benefit of strong visual communication is that it supports reading comprehension and memory at the time the material is being consumed. 

Visuals highlight the main points you are trying to communicate in an efficient and interesting way, helpingelps the viewer connect those main points with contexts that are relevant in their own lives, thereby strengthening their memory’s connection to the information.   

The part of the brain that processes visual information (the visual cortex) is much larger than the part of the brain responsible for reading words (the broca). By providing your information in a visual presentation, you make it much easier on your team to process the information effectively.

What are examples of visual communication? 

There a tons of good graphics and visual design elements that you can add to your communication stack. Here are a few of the most common:

  • GIFS
  • Screenshots
  • Screen recordings
  • Videos
  • Pie charts
  • Infographics
  • Data visualizations
  • Slide decks
  • Social media posts

Visuals keep things fresh and exciting, don’t be afraid to incorporate more than one of the examples discussed above. 

Creating images isn’t exclusive to those with formal graphic design training or with access to expensive, high-end tools. Simple screenshots are a great example of an easy way to create your own image while conveying a message in a meaningful way.

If you are not sure how to get started using visuals to help you communicate better, Snagit is a great tool that can help you transform simple screenshots into helpful images, videos, and animated GIFs.

How to use visual communication in the workplace?

Being able to communicate your message clearly is important no matter where you work. And incorporating visuals in your emails or presentations can change the way your team communicates.

According to a survey by TechSmith, 98% of respondents who use video, a form of visual communication, at work say it improves the effectiveness of their message.

Here are seven ways you can use visuals to communicate more effectively at work.

Start creating images and videos today!

From grabbing a screenshot to recording a video message, Snagit helps your team speed up everyday communication tasks.

Snagit

1. Onboard new employees

It can be time consuming to schedule face-to-face training sessions every time a new employee joins your organization. It’s also overwhelming to be a new employee with so much to learn right from the start.

Make onboarding easier by creating narrated screencasts that show how to use your organization’s standard programs. New hires will be able to re-watch them when they need a refresher, and you’ll save time by avoiding in-person training sessions.

visual communication onboarding video example
An example of using a video to onboard a new employee to complete a task.

2. Capture inspiration

Imitation is the sincerest form of flattery. So when you see a concept you like, take a screenshot of it! 

Saving good ideas with screenshots lets you build up a library of inspiration to use the next time you’re stuck for ideas. Similar to mood boards or swipe files, you’ll have images of examples or ideas you liked or didn’t like.

Snagit is a great tool to use to create screenshots, simple videos and screencasts, and animated GIFs.


3. Skip writing pages of notes

Have you ever had the problem of trying to scribble down pages of notes, only to realize you missed parts of what was said. One way to help alleviate this problem is to record the conversation (with permission, of course). 

Recording a conversation will ensure you don’t miss any details. You can also share the recording so that those who might have been absent can still get all of the relevant information. 

Handwritten notes can be influenced by the perspective of the note-taker, so it would be ideal to always have a recording handy.

4. Give clear feedback

Giving and receiving feedback on content or projects can be challenging. You often have to wait (or chase) stakeholders for feedback on projects. And sometimes when they provide their suggestions, it’s paragraphs of text which you’re left to interpret yourself. 

Using visuals to show your exact feedback can reduce the time spent sending emails back and forth and helps everyone get on the same page. This can make the approval process go much faster.

6. Report progress

Line graphs and pie charts are effective visuals, but without context, they might not be able to stand alone in an email or message.

One of my favorite visual communication strategies is to record a video rather than simply communicating with graphics. It’s a simple level-up to how you present information to your team.

By hitting record and narrating your graphs or slide presentations, you can help your audience better understand results, data, and the impact they may have on your business. This can be particularly helpful when reporting data to coworkers in different departments who may need a little more explanation or context in order to understand what the numbers mean. 

Adding graphic elements to reports can also help achieve clarity and engagement, instead of text alone.

Start creating images and videos today!

From grabbing a screenshot to recording a video message, Snagit helps your team speed up everyday communication tasks.

Snagit

7. Write better emails

Email is a necessary part of work and a crucial communication tool. But what if you could cut down the amount of text and still convey your point in a way that will grab people’s attention? 

Adding screenshots to your emails can help you create a more visual message. They are more engaging to view than blocks of text, and you can draw your reader to your main point with marked-up screenshots.

visual communication email example

Improving Your Internal Communications

A guide to how visual content can help create a more collaborative and productive work environment.

Snagit

Danielle Ezell

Danielle Ezell is a Marketing Content Strategist at TechSmith, where she writes about effective workplace communication, offering tips and strategies for using images and videos to collaborate more effectively in hybrid and remote environments.

How the 4-Day Work Week is Changing the Workplace

The four day work week has had some good reviews

The past few years have seen a lot of changes to what the rhythm of working looks like. 

Some companies have moved to remote work, while others have made significant changes to how their work weeks are structured. 

The four day work week has had some good reviews but of course, it comes with its own set of challenges as well. In this article, we’ll take a look at this new way of working from all perspectives.

Increase your team productivity with visuals!

From grabbing a screenshot to recording a video message, Snagit helps your team speed up everyday communication tasks.

Try Snagit for Free

What is a 4 day workweek?

A four day work week is no different than what it sounds like – rather than working the standard five days each week, employees report for only four days of work each week. 

The concept is implemented in various ways across different industries and organizations but is always centered around the practice of attending work for only four days each week.

Where does the 4 day workweek come from?

The concept of working four days a week rather than five is inspired by the fact that employee productivity has increased by up to 5% annually but compensation rates have not increased by more than 2% annually over the same time period.  

The number of hours worked each week has remained at a steady average of up to 43 hours – the four day working week is a way of closing that gap and helping create a better work-life balance at the same time. 

The prevalence of work burnout and anxiety

Anxiety and burnout at work aren’t limited to specific generations though. Asana’s 2022 Anatomy of Work shows that in professions whose primary commodity is information (eg. doctors, engineers, teachers, editors etc), 63% of workers experienced burnout in 2022. 

Burnout and anxiety are very real challenges facing the modern workforce.   

The two generations in the highest support of the four day work week are Millenials and Gen Z, which is easily understood when you consider that 74% and 84% respectively reported that they have experienced burnout.  

The desire for a better work-life balance 

The way employees approach their work and what they expect from their employers is vastly different than it was even 10 years ago. 

Top among their employment priorities is work-life balance, with that detail coming in as more important than even compensation. 

A four-day working week offers the opportunity for an improved work-life balance without the company experiencing ill effects.  

Increase your team productivity with visuals!

From grabbing a screenshot to recording a video message, Snagit helps your team speed up everyday communication tasks.

Try Snagit for Free

What are the benefits of a 4 Day Work Week?

The four day work week carries many benefits, ranging from productivity to ecological impacts.   

Higher productivity

If you believe that more hours worked per week results in increased productivity, you may be surprised by the results that companies have had by testing the four day work week.  

For example, employees of Perpetual Guardian in New Zealand who participated in a trial four day working week maintained the same productivity as their 5 day norms. And on top of that, they reported higher job satisfaction and company loyalty when working only four days per week.  

It’s easy to think that our local norms are the same as global norms as far as workplace standards – the American dream is built on shift work and 9-5 Monday – Friday work schedules and we are a prosperous nation – that work rhythm must be synonymous with optimal productivity, right?  Wrong.  

The most productive countries, like Norway, Denmark, and the Netherlands, see employees following a 27 hour work week for the most part.  

Productivity increases are clearly one of the benefits of working a four day week.   

Better equality

It is certainly not a secret that the struggle for work-life balance lands much more severely on women. 

Nearly 1.2 million women have had to make the choice to leave their employment as a result of their at-home demands. Additionally, more women than men fulfill multiple high-responsibility roles outside of their employment, though the expectations for efficiency and effectiveness at work are of course no different from one gender to another. 

A four day work week holds the possibility of creating a more equitable workplace by allowing more time to be dedicated to life’s responsibilities outside of work.  

This approach could go a long way in allowing women to avoid overwhelm and focus on the priorities in front of them while knowing they will have enough time to give to their other responsibilities as well. 

Better employee engagement

Employee engagement is increasingly on the mind of employers, as it has been a hot topic for the last many years. 

Unengaged employees have lower job satisfaction, lower company loyalty, and often lower productivity, so it is an important area of focus. 

Implementing a four day working week has been shown in multiple trials to boost employee engagement and commitment to an employer by 20%. 

Documented trials have also shown no reduction in productivity with a four day working week – in fact there are often improvements to it. When there are fewer hours available in which to complete tasks and projects, workers are better able to stay focused and engaged on the tasks at hand. 

Sick leaves and mental health days also see reduced usage because there is ample time already incorporated into the week to take care of wellness activities, manage stress, and fulfill pleasurable activities. All of these factors point to a higher level of engagement from employees during the four days that they are at work.

Increase your team productivity with visuals!

From grabbing a screenshot to recording a video message, Snagit helps your team speed up everyday communication tasks.

Try Snagit for Free

High ecological impact

If remote working isn’t the ideal option for your company, but you want to take steps to make a positive ecological impact, you should know that a reduced carbon footprint can be a four day work week benefit! 

Reducing your work week by one day each week translates to eliminating the effects of a full day’s commute for your workforce. If your four day work week also allows you to shut down your facility on the 5th day, you also reduce all of the energy use associated with the daily operations of your office space. 

Things like lights, computer use, cooling and heating systems, etc. aren’t needed in the same way for an empty building as they are for a building full of staff, so your company’s negative impact can be reduced by around 20%. 

Incorporating a four day work week can have a positive ecological impact in addition to its many employee and productivity benefits. 

What are the downsides of a 4-Day Work Week?

Like all changes, there are negatives to the adoption of a four day work week that fall alongside the positives.  

Complex to implement

Changing something as fundamental as the number of days work is divided over throughout a week is not a simple task. It is bound to impact areas across all departments and management levels, making the implementation of a four day work week quite a complex undertaking.  

Factors to consider specifically include scheduling, policies, communication, and client/customer expectation management among others.  

Communication is a key factor in the rollout of a four day work week and using multiple methods can be really beneficial in ensuring understanding. 

Using video and graphic communication tools during the planning and implementation can help the process be better understood.  Resources like Snagit make it quick and easy to add these tools to you communication protocols and help maximize effectiveness.

Increased pressure with deadlines

There are two angles to consider here. One is employee perception and the other is client/customer behavior. Both of these, though, can be managed through good communication and thorough consideration of all variables during the initial planning and implementation stages. 

Employees can find themselves stressed when trying to meet the same expectations and fulfill the same outcomes with one day less – which may or may not allow fewer hours to work within. 

Before the full integration of the four day work week has been adapted to, employees may feel higher pressure; feeling as though the ask to reach the same outcomes in less time is a net negative.  

Customers/clients who do not work on the same schedule as your team may contribute to feelings of increased pressure, as a message requiring quick response may be sent on a day your team doesn’t work. 

Returning to that might not feel good if expectations and communication about this specific thing have not been clearly articulated or understood. 

Simply communicating with your customers/clients about the schedule and integrating OOO messages or signature line additions can help them understand what they can expect as far as response times. This can take the weight off of your employees as well.

Increase your team productivity with visuals!

From grabbing a screenshot to recording a video message, Snagit helps your team speed up everyday communication tasks.

Try Snagit for Free


Doesn’t work with every industry

Of course, your specific industry may not be a fit for the integration of a four day work week. 

Doctors, nurses, and teachers, for example, would create a lot of negative ripples for their communities by reducing their working days. 

Other industries as well like personal support work, developmental support work, and some types of manufacturing could require significant shifts to how they operate in order to switch to working four days a week. 

This way of working can be greatly beneficial but it is not universally appropriate. 

 A few statistics on the 4 Day Work Week

According to the Society for Human Resource Management, 15% of organizations now offer four-day work weeks to some of their employees. This is an increase from the 13% reported in 2017. 

USA Today tells us that 67% more jobs on Ziprecruiter mention four day work weeks than last year. 

A four day work week is the preference of 40% of U.S. workers according to Workforce Institute at Kronos.

On a typical workday, the average office worker in the UK is productive for 2 hours and 53 minutes as reported by Vouchercloud.com. When we apply the 20% increase in productivity tied to many four day work week trials, these employers could see a significant bump to productivity.

Even in 2018, 66% of workers surveyed by Robert Half wanted a compressed workweek but only 17% of their employers offered the option. 

Based on a study from July 2020, 75% of American workers were experiencing burnout. 

Based on the current studies of the four day work week, the approach could help to reduce that unfortunately high number.  

In 2021, the average U.S. worker worked about 38.7 hours per week according to the website Balancethemoney.com.

When Perpetual Guardian introduced a four day work week, their staff reported a drop in stress levels – from 45% prior to the change, to 38% following the change.  

A four day working week helps to attract talent. According to a Henley Business School white paper, 63% of UK employers report this to be true. 

Increase your team productivity with visuals!

From grabbing a screenshot to recording a video message, Snagit helps your team speed up everyday communication tasks.

Try Snagit for Free

Is the 4 Day Work Week a good fit for your company?

The four day work week is not necessarily the right fit for all businesses and all situations. 

For those it does fit with though, the benefits of a four day work week are plentiful. There are a lot of factors to consider when you are thinking about making this shift.  

Your business model and industry

A four day working week isn’t realistic for all business models and all industries.  

If your work relies heavily on customer interaction, has a high care component, or counts on an impeccably calculated quota being met over the traditional five day model, a compressed work week may not be for you. 

If your work is more related to technology than humans, if most high impact tasks are performed on a computer, and if outcomes are more important than hours worked, then the shift to a four day work week could work quite well.

Would it be profitable?

Like any major business decision, profitability needs to be addressed. 

Be sure to consult with the right departments and the right members of leadership to get a full picture of the implications that switching to a four day work week could have. 

Use the initial conversations on the topic to help determine what areas may require some creative thinking to make profitability possible. 

In workplaces that rely on time being directly exchanged for money, profitability may pose a significant challenge when considering the shift to woking four days a week.

One size doesn’t fit all

There is no one universally effective approach to the flexibility and other benefits created by the four day work week, so be careful not to box yourself in to that single approach. 

There are many ways to incorporate flexibility and better work-life balance for your employees without creating negative impacts for your customers or your bottom line. 

Determine what the desired end result is and work toward a solution that gets you there – it may not be as simple as cutting out one day a week.

Increase your team productivity with visuals!

From grabbing a screenshot to recording a video message, Snagit helps your team speed up everyday communication tasks.

Try Snagit for Free

Ask your stakeholders

Bring a range of stakeholders into the conversation! 

Hearing from people that are involved with the work, whether internally or externally, will help you start off knowing a wide variety of perspectives and implications. 

Challenges you may never have thought of, as well as benefits that might not have crossed your mind, could be brought to light by engaging a broad group of stakeholders.  

Ask your team

Bring your team into the conversation as early as possible. An activity that is partly meant to boost morale and create a new and better normal for your employees should definitely include their perspective. 

Whether positive or negative, the implications of the change to a four day work week will be largely felt by this group and if you don’t have their buy-in from the get go, snags and difficulties might be harder than necessary to manage. 

And of course, if no one actually wants a four day week, but would prefer a different approach to flexibility and balance, that is a good thing to know before venturing too far down this road!  

How to implement the 4 Day Work Week?

Deciding whether or not the four day work week is a viable option for your workplace is an important step but it is far from the last one! 

There are a lot of considerations to make when implementing the four day work week. Two of the primary ones are a focus on outcomes over hours and the maximization of time. 

Switch to “Outcome-based thinking”

This can be one one of the biggest challenges for companies that shift to working four days a week. 

It is much more common to equate productivity with hours worked than it is to equate it with outcomes and that is a necessary mindset shift for any business looking to become a four day work week company.

Understand your outcomes

Implementing a four day work week requires clarity of expectations above all else. 

Ambiguity leaves room for misinterpretation and unmet outcomes and should be strategically eliminated. 

Setting deadlines, assigning tasks and responsibilities to the correct individual, and clearly defining what the end product / result should look like or accomplish are non-negotiables for making the shift to a four day work week. 

Using visuals in your communication can help to make sure the outcomes are clearly provided to all parties involved. A quick video or mockup can go a long way in getting everyone on the same page. 

Increase your team productivity with visuals!

From grabbing a screenshot to recording a video message, Snagit helps your team speed up everyday communication tasks.

Try Snagit for Free

Stop micromanaging

Micromanagement is a detriment to literally every good quality associated with the four day work week. 

It fosters burnout, anxiety and low job satisfaction and is almost always a waste of time. The only outcome it works toward is control. 

To make sure you have sufficient information about how the work is progressing, you can incorporate progress reports into workflows or as a standing agenda item in regular meetings.   

Ensure you hired the right skills

Having the right skills working in the right roles and trained well is even more important when we are looking at a four day work week. 

If your team isn’t equipped with the skills necessary to reach the outcomes you have established, the transition won’t go well. 

It can be helpful to evaluate for upskilling and training needs at regular intervals so that you don’t run into situations where the right skills are not available.  

Promote open communication

Although the culture around the four day working week places high value on autonomy, it is still very important for you to be available to your colleagues and your direct reports. 

Empathetic communication from you will result in open communication from them when they run into a problem or are having difficulty adjusting to this new way of working. 

Likely, this open communication will need to start with the leader in order to be fully realized and participated in across the company. 

Maximize everyone’s time

It stands to reason that maximizing everyone’s time is a key component of successfully transitioning to one day less “in the office” each week. That can be easier said than done, so here are some ideas to get you started off well. 

Cut the unnecessary meetings

The “this meeting could have been an email” meme didn’t come out of nowhere. 

There is no shortage of time wasted in meetings that are not necessary, not well run, or not designed for a specific purpose. 

Any meeting time used, particularly when working within a four day work week structure,  should hold a specific stated purpose, and be strictly kept to fulfilling that purpose. Any issues that can be handled in another way, should be.  

If you’re scheduling a meeting to share a status update, present data or any other one-way share of information, record a video in a tool like Snagit instead. 

Increase your team productivity with visuals!

From grabbing a screenshot to recording a video message, Snagit helps your team speed up everyday communication tasks.

Try Snagit for Free

Prepare, prepare, prepare

In the event that you have deemed a meeting necessary, make sure that you are as prepared as possible to lead the meeting, of course, but let’s also go one step further with that. Give your team everything they will need to be prepared as well. 

What might this look like? Providing a stated goal and agenda at the time of booking, providing any preparatory documents in advance and advising that they should be reviewed prior to the meeting, and making sure that the only people there are the ones who need to be there. 

Appoint a facilitator

When you’re trying to maximize the outcomes met within a four day working week, it is good practice to assign a facilitator for meetings. 

Their function is to guide the meeting along, keeping everything on track. They should be equipped to end circling conversations or “parking lot” discussions and keep the activities running on time. 

Time-box your activities

Time boxing your meeting is a strategy that helps your group to keep moving and also helps them get straight to solution mode. 

You can do this by assigning an amount of time to each item on your agenda and making that time as tight as possible – just enough or even a bit less than you think is reasonable. 

This helps instill a feeling of intensity that can help the brain kick into top gear right off the hop. This is a great way to make sure your meeting hits its target outcome within its assigned amount of time. 

Avoid groupthink

Groupthink is what happens in an open brainstorming session – all of the participants, at least the extroverted ones, are working simultaneously on finding a solution. This can leave out some less confident members of the team and also your introverted colleagues. 

Instead, try implementing a silent solution time where attendees have a set amount of time to write down their ideas to handle the problem at hand and then they all get collected. 

This reduces time spent discussing and circling issues and makes sure you actually get input from all team members, improving the chances of the right solution being found and no further meeting being needed on the topic.

Increase your team productivity with visuals!

From grabbing a screenshot to recording a video message, Snagit helps your team speed up everyday communication tasks.

Try Snagit for Free

End each meeting with a decision

Your agenda should always include a section of time at the end of the meeting that will be used to confirm the meeting’s results and review any next steps and action items. 

This will help to make sure that everyone leaves knowing exactly what they are responsible for and how the problem is being solved. 

This way everyone can leave the meeting knowing exactly what needs to happen next, with no time wasted revisiting or asking unnecessary questions.

Create and share meeting minutes

In a four day work week company, meeting minutes are even more important than in the traditional work structure because they provide a tangible record of the decisions and outcomes of the meeting. 

They serve as a way for attendees to revisit action items and next steps without taking up the amount of time required for a back and forth communication with colleagues to find the answer. 

This is another place where Snagit can be of great use – meeting minutes don’t have to be just text documents. You can easily incorporate screengrabs from your presentation deck, make annotations to highlight certain points, add text, and link out to other resources – get a free trial right here!

Danielle Ezell

Danielle Ezell is a Marketing Content Strategist at TechSmith, where she writes about effective workplace communication, offering tips and strategies for using images and videos to collaborate more effectively in hybrid and remote environments.