How to Do a Voice Over Like a Pro: The Complete Guide

How to do a voice over like a pro

Whether you’re making a YouTube video or recording a presentation, if you make videos — especially how-to and explainer videos — you will almost certainly need to record voice overs. In fact, depending on how many videos you create, you may have to do a lot of voice over work.

For many people, the thought of recording their voice and sharing it with the world is horrifying. Or at least genuinely uncomfortable. But it doesn’t have to be difficult or stressful!

So what is voice over recording? And how do you record voice overs that grab and keep your audience’s attention? Well, buckle up, because you’re about to find out! 

In this article, we’ll discuss the ins and outs of what a voice over is, how you can record your own, and go over some voice over tips for beginners. Here’s what you’ll learn:

The Marketer’s Ultimate Guide to Video

In our FREE ebook, we’ve put together practical strategies to get out of the woods and create engaging, powerful video content on your own that reaches your audience.

Download now!
techsmith logo

What is a voice over?

A voice over recording (or just a “voice over”) is a person speaking (but not seen) during a video — often describing, highlighting, explaining, or providing additional context to what a viewer sees.

It’s often confused (or equated) with narration. And, while they are similar, they are not quite the same thing.

Narration is a specific type of voice over that describes all of the on-screen action, often telling a story based on what’s happening. While narration is more commonly used for entertainment, non-narration voice overs are often used on instructional, informational, and educational videos.

An easy way to think about it: All narration is a voice over, but not all voice overs are narration.

Why is a good voice over important for your video?

Some might think that the audio portion of a video is less important than the visual aspects, but that’s not true. Most people that watch videos say they are more likely to stop watching a video with bad audio vs. one with lower-quality video.

In fact, a recent TechSmith study of viewing habits showed that more than 25% of video viewers watched a video all the way through because the audio was good — more than those who said professional video style was most important.

This isn’t that surprising when you think about it. While the on-screen elements of your video are what makes it a video, in many cases, it’s the voice over that helps people truly understand what’s being shown.

Muddy, muffled, or otherwise garbled or difficult-to-understand audio tracks are frustrating to viewers. And, for people who are blind, but still need the information your video provides, good audio is essential.

So great audio isn’t just important. It’s a fundamental necessity to keep an audience interested and engaged — and to ensure they get the information they need.

The Easiest and Fastest Way to Record and Edit Voice Over Audio!

Audiate makes recording and editing your voice as simple as editing text in a document.

Download now!
audiate icon

Do I need a professional voice talent for great voice over?

The short answer: No. 

Just because quality voice over is important for the success of your video, it doesn’t mean you need to go to great lengths (and expense) to get it. Some people think you need to have one of those super-snazzy radio voices to produce good voice overs for your videos, but that simply isn’t true. 

Sure, if you have the budget and you’re making professional videos, you can hire a professional voice over artist. But it’s not necessary.

With the help of this guide, you’ll soon see why most videos don’t need professional voice overs and that you really can do it yourself! But how can you record your voice over a video? First, you need to know what good voice over is.

The essential elements of a good voice over

When most of us think of great video voice overs, we probably think of actors like Morgan Freeman or James Earl Jones, usually because there’s a tendency to associate voice overs with having a really great voice. And while that can help, it’s not a prerequisite for doing a voice over.

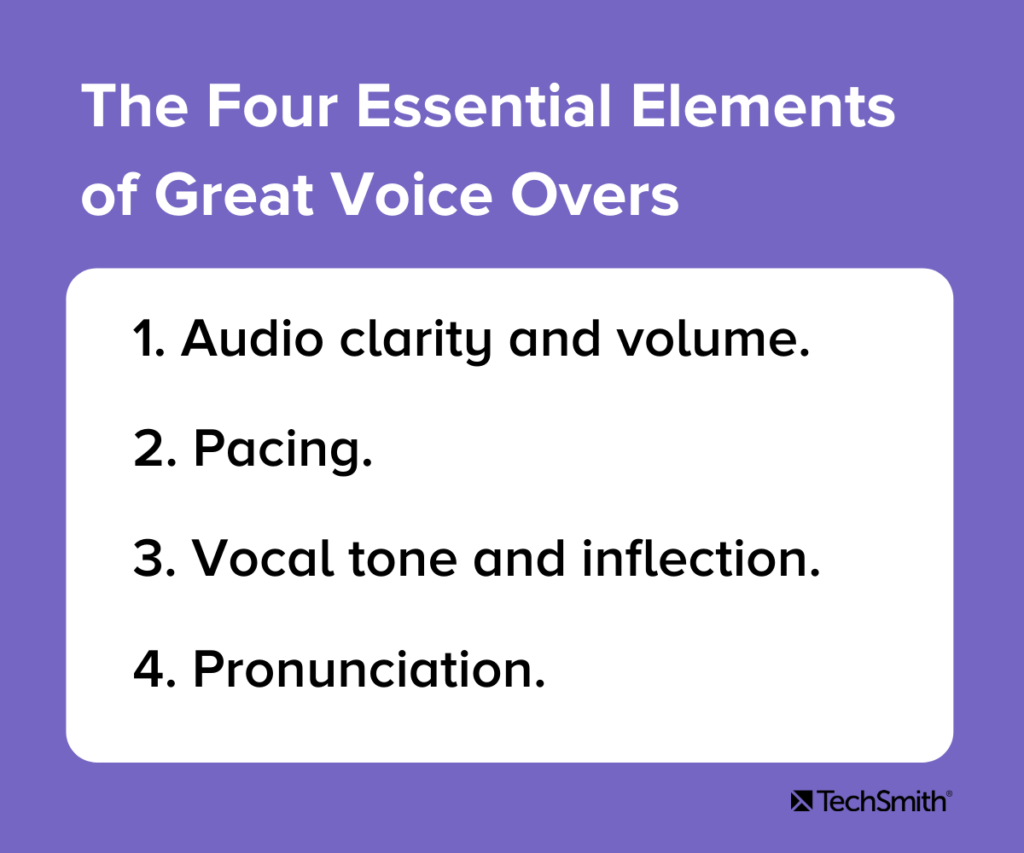
In fact, with a little know-how and some practice, almost anyone can produce a professional-quality voice over for a video. All you have to keep in mind are the key elements that make a voice over stand out: 

  • Audio clarity and volume
  • Pacing
  • Vocal tone and inflection
  • Pronunciation

1. Audio clarity and volume

The clarity of your voice and speaking at a comfortable volume may be the most essential parts of great audio.

If your voice over recording is fuzzy or muddy sounding, it will be difficult for people to understand and your audience will be distracted and unable to absorb the information or may simply switch your video off. Either way, they’ll miss your message and you’ll miss an opportunity to share your knowledge.

Similarly, if the volume of your audio is too low, it may be difficult for people to hear. And if it’s too loud, you risk distorting it. Fortunately, there is a solid sweet spot for getting the volume just right, which we’ll talk more about in a moment.

2. Pacing

Ever talk with someone who has a really exciting story to tell, but they’re so excited about it that they rush through it and when they’re done you can’t even remember what they were talking about? Or, someone who drones on and on with no end in sight, while you struggle to keep your eyes open? 

This is called pacing, and it’s really important to get right. Too fast and your audience won’t know what hit them. To slow and they’re likely to get bored. 

The best voice overs have a natural and deliberate pace, which is why you should always write a script (and practice it!) before you start recording as this will help you speak naturally. You should also remember that pacing includes things like pausing now and then to take a breath, either for effect or to give the listener a break to process important information.

3. Vocal tone and inflection

Like pacing, vocal tone and inflection refer to ensuring you speak naturally and pleasantly. You want to sound friendly and engaging, but not so much that you sound fake.

No one wants to sound like a game show host (or like Troy McClure). But, you also want to avoid a monotone robot voice which, like pacing that’s too slow, can be boring and off-putting.

4. Pronunciation and enunciation

The final element of great voice over work is ensuring that you pronounce each word correctly and that you speak clearly enough to be understood. Avoid mumbling, but don’t shout or over-enunciate, either.

Be mindful of your regional accent (yes, we all have them) and pronunciations as they relate to your audience. While it’s perfectly acceptable to “warsh” your hands in Missouri or have a great “idear” in New England, those pronunciations may confuse people from other locations.

Don’t worry, though. No one expects you to sound like a professional voice actor. The best thing you can do is speak naturally and clearly — the rest will follow with practice.

The Easiest and Fastest Way to Record and Edit Voice Over Audio!

Audiate makes recording and editing your voice as simple as editing text in a document.

Download now!
audiate icon

How can I make my voice sound better on voice overs?

This is the number-one issue most people bring up when they have to do a voice over for their video.

Most of us rarely have to hear our own voices in audio recordings. We’re used to the rich, warm sound of our own voices in our own ears and there’s no way around the fact that you sound different on a recording than you do to yourself.

So how do you stop hating the sound of your own voice? Well, you just have to get used to it.

Think of it this way: Your voice on recordings is how you actually sound to everyone around you. When you speak to others, that’s what they hear. the only one who hears a difference is you.

So, there’s really nothing to be embarrassed or feel shy about.

Everyone who does voice work has to overcome this hurdle. But, like most things, the more you do it, the easier it gets. Once you’ve done enough voice-over work, your voice will sound just as normal on recordings as it does in your own ears.

Of course, if you really can’t get over it, you can always ask someone for help. Whether that means enlisting a friend or colleague, or hiring a professional to do the work for you.

How to record a voice over

1. Preparing to record

Not all videos need a ton of preparation. Quick one-off screencasts or a fast demonstration of a new user interface for a colleague can probably be done on the fly. But, for videos where you want a more polished look or need to cover more information, a bit of preparation goes a long way.

Find a quiet place to work

You’ve probably seen what a recording studio looks like. Professional voice over artists typically have a room somewhere with walls covered in sound-absorbing foam, a fancy microphone setup with a pop screen, and a computer workstation that looks like NASA’s Mission Control.

Luckily, you don’t have to go that far to get great results. You can create a great voice recording space with minimal effort and very little expenditure.

First — and most importantly — you’ll want a space that’s free from distracting noises and where you are unlikely to be interrupted. Most decent microphones pick up even faint ambient sounds, and those sounds will make it into your recording.

If your space is at work, avoid areas where you can hear your coworkers talking, etc. Or, plan to record when no one else is in the office.

Wherever you are, be mindful of the sounds of your heating and cooling system. If you can’t find a spot where you can’t hear air rushing through your ducts, you may want to shut down your furnace or AC while you’re recording.

If your recording space is near a window, listen for sounds from outside, such as wind, birds chirping, and dogs barking. Be especially mindful of traffic sounds — particularly loud delivery trucks as these will almost definitely be picked up in your recording.

Nowhere is going to be completely silent, so find the best place you can — even if that means thinking outside the box.

For example, you might find the quietest place you can find to record is in your car (with the engine off, of course). It might not be the ideal setup, but if all you need to do is speak into a microphone, it might be the quietest environment you have access to — and you might be surprised by the results! 

Choose a microphone

Next, you need a decent microphone. We won’t go too in-depth with this here, but we do have another article detailing the best microphones for recording video.

What we will say, however, is you should definitely avoid recording your voice ovesr on your laptop microphone, if possible. While built-in mics are fine for the likes of Zoom meetings, even a low-cost external microphone will be better for a video voice over. 

You don’t need to spend hundreds of dollars, either. You can get a decent USB microphone for $50-$100, which is well worth the investment if you’ll be doing a lot of voice over work. However, even the headphones that come with your smartphone (which usually have a small built-in mic) will record a better sound than just your computer’s microphone.

If you do intend to use an external mic, we’d also recommend investing in a pop filter. They’re cheap and help minimize the distracting sounds caused by hard consonants such as “p” and “b.”

The Easiest and Fastest Way to Record and Edit Voice Over Audio!

Audiate makes recording and editing your voice as simple as editing text in a document.

Download now!
audiate icon

Choose your audio software

There’s no shortage of audio recording software on the market and most of them will offer more or less the same level of functionality. But, for the average user, these tools are often complicated and come with a high learning curve to be of any practical use.

So, with that in mind, we’d recommend checking out TechSmith’s Audiate — which comes with a seven-day free trial. 

2. Write a script

Having a script is probably the single most important thing you can do to ensure your voice over sounds professional. Nothing ruins a good voice over faster than a lot of “uhms” and “ahs” as you try to remember what you wanted to say.

The best scripts will include everything you intend to say, word for word. Taking the time to write this out before recording helps ensure that you will cover everything you want to without the risk of wandering off into unrelated topics.

To write a script, you should first outline the points you want to make and then write the full script based on that outline.

Once it’s written, read your script aloud several times before recording, and be mindful of words or phrases that may feel awkward or difficult to say. A script often sounds and feels different when it’s read out loud compared to how it sounds in your head.

This great blog post will give you more information on writing your script.

3. Do a test recording

Now that all the essential tools are in place, it’s time to record your voice over!

Before you get down to the real thing, though, be sure to run a test recording to ensure your equipment is working as it should, and your audio levels are good.

Even if nothing has changed from the last time you did a voice over, it’s still good practice to run a test first. There’s nothing worse than jumping straight into the recording, only to finish and find that something wasn’t set up properly. 

You don’t need to record the entire script for your test recording, but a few paragraphs will give you enough to ensure that the audio is clear and doesn’t include any stray or ambient noises.

Top Tip: When you listen back to your test recording, use headphones to check the audio quality. These will be much better than your computer speakers at picking up any unclear audio, feedback, or weird noises.

While you’ll obviously want the audio to sound good on the cheapest speakers, you (and your audience) will be much happier if you use headphones to check for quality. Remember, many of your viewers will probably listen via headphones, so you want to make sure they have the best possible audio.

The Easiest and Fastest Way to Record and Edit Voice Over Audio!

Audiate makes recording and editing your voice as simple as editing text in a document.

Download now!
audiate icon

Microphone placement

You also want to consider where to place your microphone. If it’s too close to the person speaking, it will pick up all kinds of weird mouth noises and air puffs. However, if it’s too far away you might sound lost in a large room.

Ideally, place the microphone about six to eight inches from your mouth, and slightly below your chin. If you’re using an LAV (clip-on mic), make sure it’s about six to eight inches below your mouth.

You should also be mindful of the surface where you place your mic. Some microphone stands will be susceptible to picking up noises from the desk or table they’re sitting on, so be sure to listen for those types of sounds on your test recording.

Check your volume levels

Getting the volume level right for your audio ensures that it’s easily heard and not distorted. If the volume is too low, your audience will have trouble hearing what you say. If it’s too high, you risk garbled audio or blowing out your people’s ear drums.

While you can always make a video louder and adjust levels when you edit, starting with the best possible audio level as you record is always your best bet.

The folks over at Premium Beat have a great post on recommended audio level settings, but here are a few basics.

  • Audio levels are measured in decibels (dB).
  • In audio editing, 0db is actually the maximum you want to achieve. It sounds weird, but trust us. 
  • For the most part, your ideal audio level is between -10db to -20db. Your audio should peak around -6db.
  • Never go above 0db, as your audio will distort or “clip.”

Most audio recording software will have indicators that let you know when your audio is in danger of being too loud and clipping.

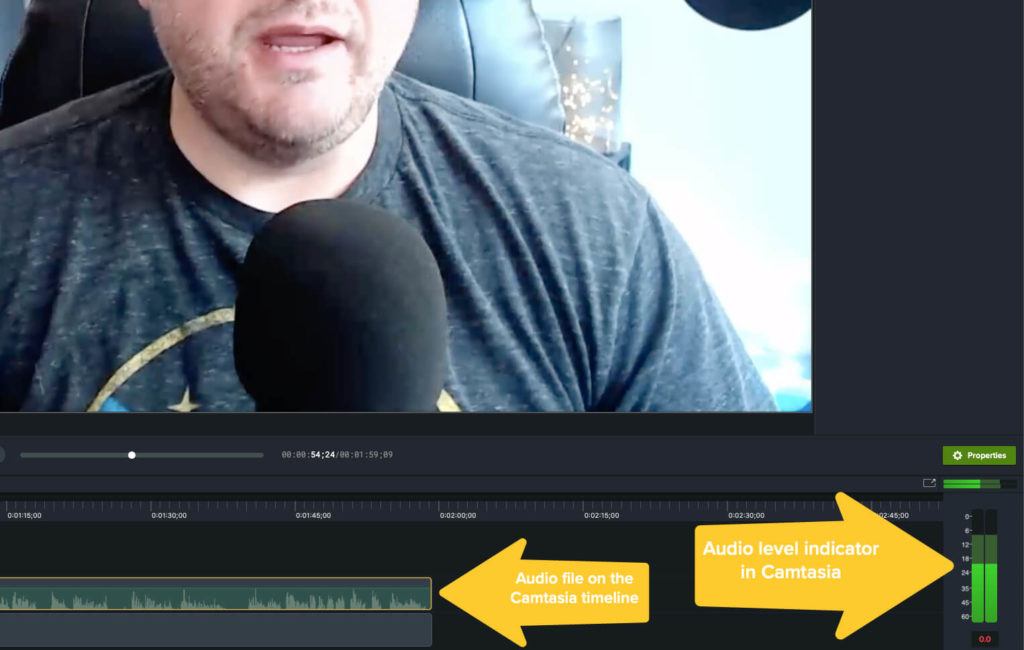
The image above shows TechSmith’s Camtasia interface with the waveform (a graphical representation of your audio recording) on the left and the level indicator on the right. The indicator shows that the audio peaked at just under -6db and is well within the acceptable levels.

4. Record your voice over

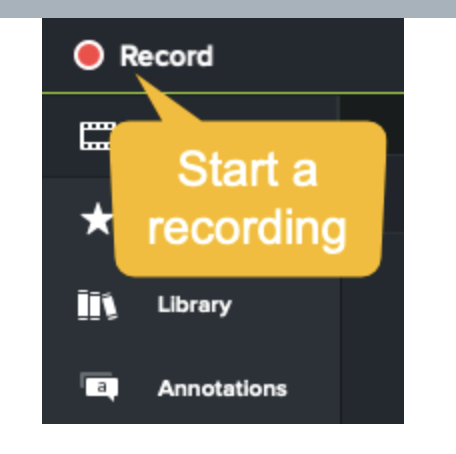
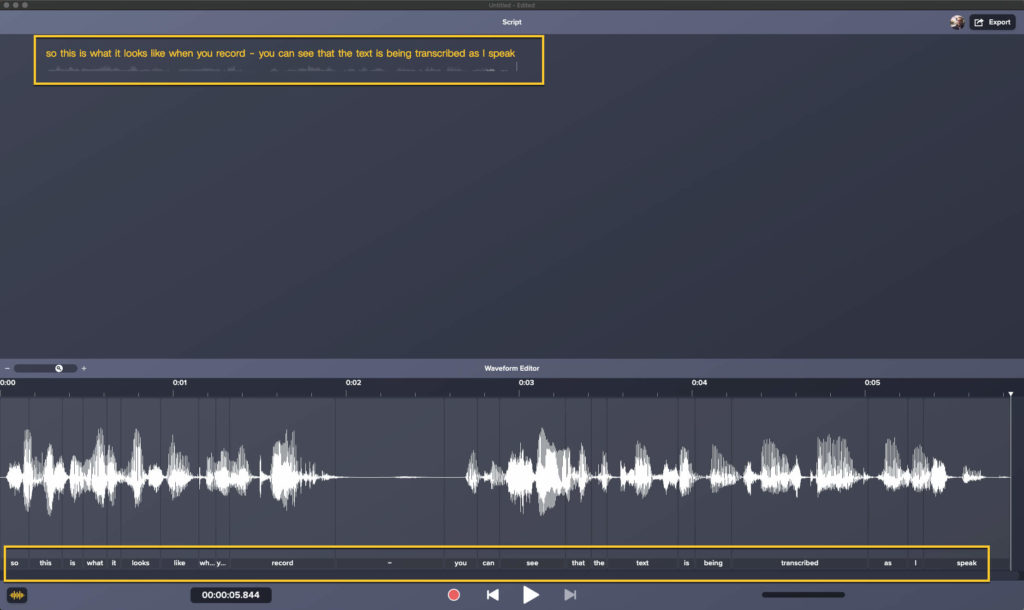
Once you’re satisfied with your microphone placement and audio levels, you’re ready to record your voice over! With Audiate, it’s as simple as clicking the record button and speaking.

As you record your script, remember these key tips for ensuring a great voice over:

  • Speak slowly and clearly: Enunciate each word, but don’t concentrate on it to such an extent that you sound like a robot.
  • Consider your tone: You want to sound pleasant, but not overjoyed or overly excited.
    • Pro Tip: Smiling while you read your script can help you sound happier and more natural.
  • Don’t stop: If you make a mistake, you don’t have to start over — you can always fix it when you edit. Just go back a sentence or two in your script and start again.
    • Pro Tip: With Audiate, you’ll be able to see and edit your voice over’s text, so you can easily go back and fix any mistakes when you’re done.
  • Take breaks: If you struggle with the script or it just gets too hard to keep going, pause your recording and take a break. Rewrite any parts of the script that may be giving you too much trouble and try again.
  • Practice makes perfect: As with anything, voice overs get easier the more you do them. Don’t give up if it’s not perfect the first time!

5. Edit your audio

When you finish recording, it’s time to edit. Even if you didn’t make any mistakes, there’s a good chance there’ll be a few things that need fixing. At the very least, you’ll want to trim the beginning and end to remove any dead space.

However, Audiate makes it so easy to edit that you’ll barely have to lift a finger. The video below gives a great overview of how to work in Audiate.

With traditional audio software, you have to hunt through your recording to find your mistakes and edit them individually. Even a short video could take an hour or more to edit depending on how complicated your edits were.

Traditional audio software only displays your recording as an audio wave, making it much more difficult to edit your audio.

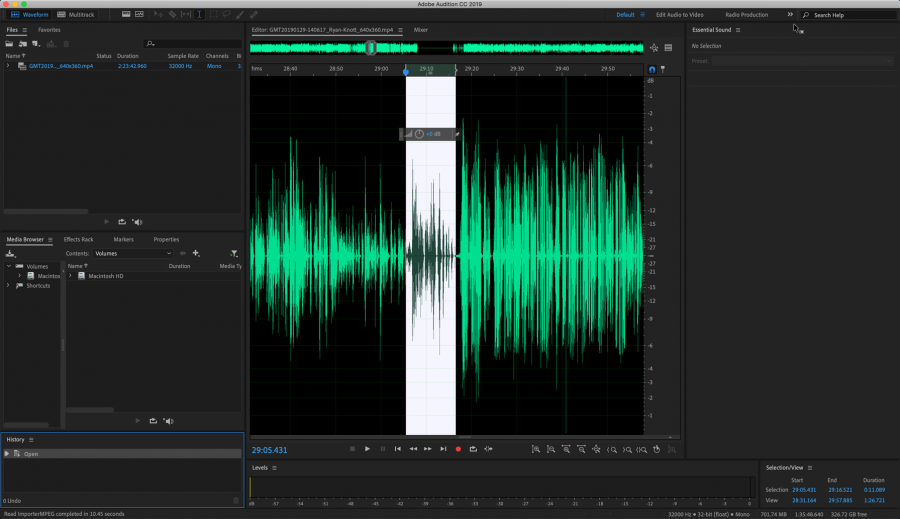
But with Audiate, you can just read the text before highlighting and deleting any mistakes you find. You might also notice that the Audiate interface (below) is much less complicated than the software shown in the screenshot above.

With Audiate, you can still edit with the wave form if you like but you can see that the text is displayed, allowing you to more easily see where to make your edits.

When editing a voice over, it’s always worth listening to the entire recording from start to finish, before making any changes.

While you might find it useful to make some notes to remind yourself of something you want to edit later on, you should try and focus on listening to the overall pacing and tone of your recording on the first listen. 

Does it sound like you hoped? Are there any parts that sound rushed, or too slow? Are any words unclear? Did you mumble? Are there weird silences or strange sounds? There’s no better time to answer these questions than on your first listen. 

Once you’ve listened o your voice over all the way through you can go back to the beginning and start editing and reducing audio noise. You might also want to cut out any abnormally long silences between sentences or statements. 

But remember, pauses are ok! In fact, they’re necessary to help break up the audio and make it feel more natural and conversational.

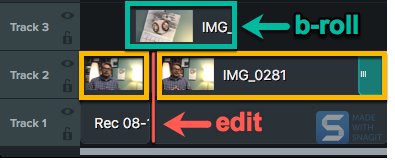
6. Import your audio into your video editor

In Camtasia, importing and working with audio only takes a couple of clicks and with Audiate, it’s even easier. You might also want to check out this post on syncing audio and video in Camtasia, but for the most part that’s it! You have just successfully recorded your voice over!

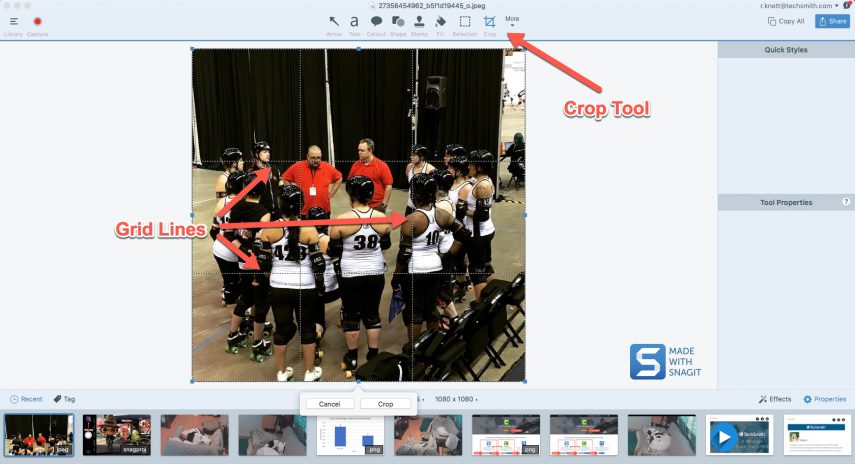
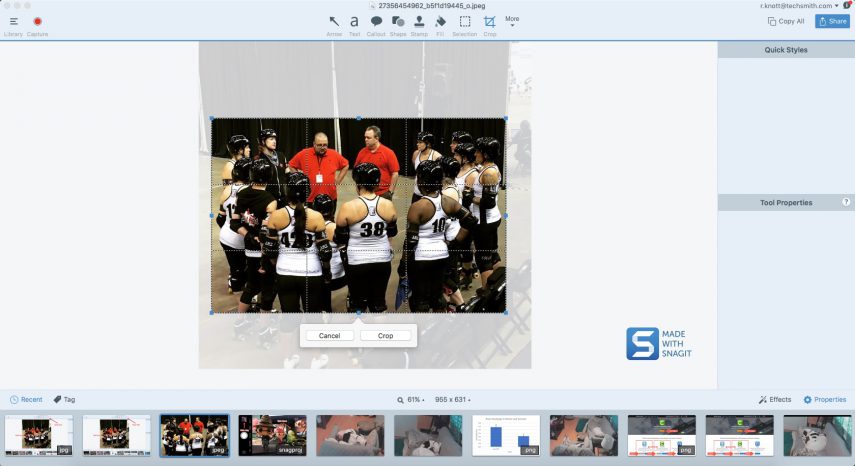
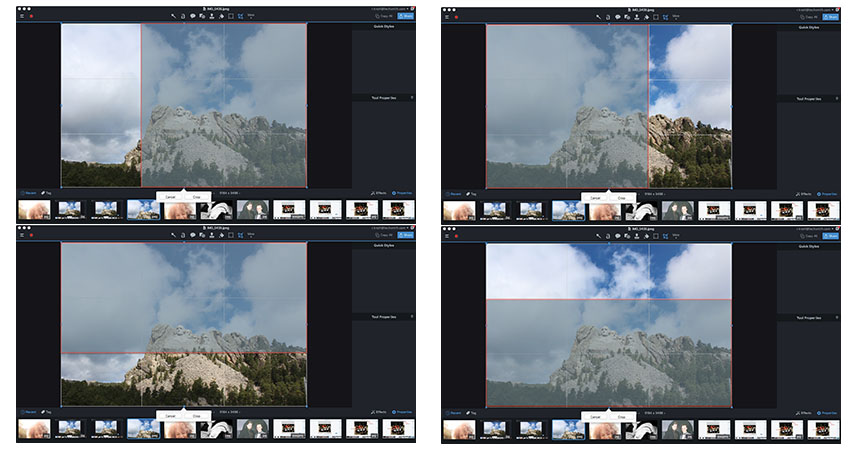
It’s worth remembering that Camtasia can also be used to add music to your video, trim your footage and even crop the frames of your videos

The Easiest and Fastest Way to Record and Edit Voice Over Audio!

Audiate makes recording and editing your voice as simple as editing text in a document.

Download now!
audiate icon

Don’t forget the captions and audio transcription

We’ve already mentioned that a large portion of your audience will probably listen to your video via headphones. But, what if we told you that there’s also a high chance that many people will watch your video with no sound at all? 

This is why adding captions and subtitles to your video, as well as providing an audio transcription, are so important. For those who can’t, or otherwise won’t, listen to the audio elements of your video, captions allow them to digest all of the information your video provides.

This is another reason why Audiate is so incredibly helpful.

With most other audio tools, you would have to send your audio out to a professional transcription service to have an audio file transcribed and timestamped. Even if you typed out a full script, it won’t have the necessary time stamps to be used as a captions file.

But with Audiate, the transcription happens automatically, complete with time stamps that can be used as captions.

Once you’ve recorded and edited your voice over, you can export that transcription as a caption file (and SRT file) and import it directly into Camtasia. Then, Camtasia will automatically insert the captions into your video. It’s practically magic! 

How’s it feel to be a voice over pro?

Recording a voice over like a pro is easy when you know what you’re doing, and you have the right tools at your disposal. 

However, taking the proper steps before you hit the record button — and then taking the time to edit your audio appropriately — will go a long way to ensure your voice overs sound professional and engaging.

And remember, practice makes perfect! The more you do it, the more natural it will become.

Making a voiceover, the FAQs

Do I need a professional recording set up to do voice overs?

No! You can do great voice over work with minimal investment. All you need to get started is a microphone and audio recording software.

How do I improve the sound of my voice?

The short answer is you just have to get used to it. But, there are a few things you can do to improve the overall sound of your voice, including speaking from your diaphragm rather than at the top of your throat.
Also, be sure to have some water handy for when you’re recording. It’s important to keep your vocal cords hydrated!

What software works best for voice over recording?

There are many options available for audio recording, but if you only need to record voice overs, TechSmith Audiate is your best bet.

Will my laptop microphone be ok for recording voice overs?

Probably not. While a laptop mic is fine for calling into a Zoom meeting, you’ll want an external microphone for your voice over recording. Fortunately, you can pick up a good microphone for between $50-$100.

Do I need to hire a professional to get a great voice over?

No! You can do it yourself with great results. You just need the right tools and a little practice.

Note: This post was updated in July 2023 to include new information.

Ryan Knott

Ryan Knott is a Marketing Content Strategist at TechSmith, where he creates content about easy, effective, and efficient video creation, editing, and tips and tricks, as well as audio editing for creators of all kinds. He/him.

YouTube Thumbnail Sizes and Best Practices

YouTube Thumbnail Sizes and Best Practices

Are you looking to get more views on your YouTube videos? While you may want to consider finding new ways to promote your content, there is one really easy and effective solution to getting more clicks: improving your video thumbnails.

Whether it’s a learning video, a product demo, or a video podcast, your video’s thumbnail is just as important as its title when it comes to attracting views. Thumbnails draw the attention of potential viewers and help them decide which video they should watch — hopefully yours!

In this blog post, we’ll walk you through the exact size your YouTube thumbnail should be and go over some best practices for creating your own thumbnails  — but first, what exactly is a thumbnail? 

What are Thumbnails?

Thumbnails are small versions of images or videos that give a visual preview of what’s inside the file. They originally got their name from being about the size of a human thumbnail, and in the world of online video, YouTube thumbnails are a bit like book covers.

People’s decisions on whether or not to click a video will often depend on the thumbnail. While an eye-catching image can draw people in, they’re more likely to scroll past boring or blurry thumbnails.

Ensuring your video thumbnails are better than those of other content creators will make your videos more likely to win video clicks on YouTube and other search engines — which is vital to building a YouTube audience.

Of course, having a good thumbnail is one thing, but you still need to make sure you have a great video behind it. If you’re just starting to make your own online video content, we recommend checking out our Ultimate Guide for How to Make a YouTube Video.

Make your own YouTube video thumbnails today!

Download Snagit to quickly and easily make your own YouTube videos thumbnails.

Download now!
Snagit icon

2023 YouTube Thumbnail Sizes

Now that you know what a thumbnail is, let’s talk about getting the perfect YouTube thumbnail dimensions.

The ideal YouTube thumbnail size in pixels is 1280 × 720, with a minimum width of 640 pixels. On the other hand, the ideal YouTube thumbnail size ratio for YouTube players and previews is 16:9.

As well as getting the size and ratios right, you’ll also want to keep in mind the file size and file type of your thumbnail. To help you get started, we’ve put together this handy guide you can refer to as you create your video thumbnails:

1280 x 720 pixels
– Minimum width: 640 pixels
– Recommended ratio: 16:9
– Maximum file size: 2MB
– Accepted file types: .JPG, .GIF, .BMP, or .PNG

Fortunately, some other video hosting platforms, such as Vimeo, support the same thumbnail sizes. This is great if you want to repurpose your videos as you can post your content on multiple platforms without needing to do twice as much work. However, there are other differences between YouTube and Vimeo that might be worth familiarizing yourself with.

Now that we’ve covered the technical details, it’s time to get creative. How do you make a great-looking thumbnail that entices potential viewers? Great question! We’ve pulled together some expert tips to help you create the very best YouTube thumbnails for your content.

YouTube Thumbnail Best Practices

Keep it simple

Be concise! YouTube thumbnails are small. And they’re even smaller when they’re viewed on a mobile device, which is extremely common since YouTube is often watched on mobile phones. In fact, as of November 2022, almost 90% of worldwide YouTube visits were made from mobile devices.

 With that in mind, try not to add too much text to your thumbnails, or text that’s so small it’s hard to read. Ultimately, anything in a thumbnail that’s difficult to see or understand is a waste of valuable thumbnail real estate.

To make sure you keep your thumbnail simple, avoid adding the entire title of your video to the image — remember that the title will appear right next to your thumbnail anyway.

You should also try to shorten your title to just a few short words, or if possible, simply use a still image with a logo. Stills are great for thumbnails because they give quick snapshots of what viewers will find in your video, without you having to create a new image from scratch.

Use contrasting colors

We’re willing to be that you’ve seen online videos make this tragic mistake before: white text on a light background or black text on a dark background.

Remember, thumbnails are small and there are usually a lot of them on the screen at any one time. Yours needs to stand out, so if a viewer can’t easily read the text on your thumbnail, it’s unlikely they’ll click on it.

The Marketer’s Ultimate Guide to Video

In our FREE ebook, we’ve put together practical strategies to get out of the woods and create engaging, powerful video content on your own that reaches your audience.

Download now!
techsmith logo

Pay attention to logo placement

Adding your logo to your YouTube thumbnails is always a good idea as it can help boost brand awareness. However, how and where you place your logo on your thumbnails is crucial.

Firstly, you need to make sure that your logo isn’t too big as you don’t want to distract from the thumbnail’s message. However, if it’s too small there’s hardly any point in adding it at all.

Adding your logo to the corner of the thumbnail image works well, especially if you have other text on your thumbnail, but you should always avoid the bottom-right corner. Why? Because that’s where YouTube displays the length of your video. If you put your logo there it’ll be covered up and make your video look unprofessional.

Avoid irrelevant or misleading images

No one likes clickbait. That’s why it’s important to ensure your YouTube thumbnail accurately depicts what your viewers will find in your video. If it doesn’t, you could hurt your reputation or brand. But worse than that, YouTube could stop showing your videos in search results if your bounce rates are too high.

A thumbnail’s purpose is to give context, so using an image that doesn’t depict what a viewer is actually going to see won’t benefit you. It’s a good idea to find the most important point of your video and highlight that by creating a thumbnail around it. 

Try to create a visual teaser of your video, but without revealing too much information. The idea here is to show just enough that users want to click through and see what you have to say.

Make your own YouTube video thumbnails today!

Download Snagit to quickly and easily make your own YouTube videos thumbnails.

Download now!
Snagit icon

Bonus! How to Make Your Own YouTube Thumbnail

Now, let’s put these tips to good use by actually creating a custom thumbnail image. We may be biased, but we’d say that one of the easiest ways to create a YouTube thumbnail is to use TechSmith’s Snagit.

Here’s a step-by-step on how to create a YouTube thumbnail in Snagit.

1. Download a free trial of Snagit.

Yes, the first step really is that easy!

2. Import your video into Snagit.

If you’ve used Snagit to record a screen or your webcam then you can skip this step. However, if you used a different recording tool, all you need to do is: 

  1. Open Snagit
  2. Click on File in the Menu Bar
  3. Go down to Import and click Import to Library…
Import Video to Snagit Library

3. Use Snagit’s convert to PNG button to turn your video still into an image.

Once your video opens up in Snagit, find the exact spot that you’d like to turn into an image for your thumbnail.

Convert Video Still to PNG

4. Add text, callouts, arrows, your logo, and more right within the Snagit Editor.

Remember all those best practices we listed earlier? Good! Now’s the time to use them. Be sure to use simple text, contrasting colors, and be mindful of where you place your logo.

YouTube Thumbnail with Text and Logo

5. Save your image to upload to YouTube for the video thumbnail.

Once you’ve created your custom YouTube thumbnail, all you have to do is upload it to YouTube before posting your video. We told you it was easy with Snagit! 

Hopefully, your new, customized thumbnail will bring you more views, clicks, and engagement!

Youtube Thumbnail Sizes, the FAQs

What is the ideal YouTube thumbnail size?

The perfect YouTube thumbnail size is 1280 × 720 pixels. This maintains an aspect ratio of 16:9 — which is perfect for ensuring optimal visibility across most screens and devices.
Remember, the width of your thumbnail should be at least 640 pixels, anything less than that might result in low image quality.

Can I change the thumbnail size on YouTube?

You can’t change the size of a thumbnail directly on YouTube, since they control how it shows on the platform. But, you can upload a new and larger thumbnail, which YouTube will automatically scale down to make it fit.

Can I add a full-size thumbnail on YouTube?

You sure can! Just remember to follow the best practices for creating thumbnails — this is where the aspect ratio is crucial and you should always aim for a 16:9 ratio.
If you go with a 4:3 ratio, your thumbnail won’t cover the width of the entire screen.

Is 1920×1080 a good size for YouTube thumbnails?

YouTube can support thumbnails with a resolution of up to 1920 x 1080, but as a small image, it’s unlikely anyone will notice the high definition. Remember, you also need to ensure the file size doesn’t exceed 2MB, which might be an issue with high-resolution images.

Lauren North

Direct Marketing Specialist at TechSmith. I enjoy painting with watercolors, visiting our National Parks, and eating nachos.

B-Roll: The Secret Sauce of Any Great Video

B-roll for a great video

If you’ve ever been drawn into a film, captivated by a documentary, or compelled to watch an advert until the very end, you’ve likely been influenced by the artful use of B-roll. Yet, despite its power to engage and enthrall, B-roll remains one of the least understood aspects of video production, especially for those who are new to the field.

But, what is B-roll? Why is it so important, and how can it make a difference in your videos? 

As its name might suggest, B-roll may play a ‘supporting role’ to the main footage (known as A-roll), but it’s a game-changer in terms of impact and storytelling. B-roll is the secret weapon that can add context, enhance the narrative, create interest, and hold your audience’s attention.

Whether you’re a marketing professional looking to make a demo video or a YouTuber looking to make an instructional video, understanding the power of B-roll and how to use it effectively can seriously enhance the quality of your work.

Simply the best way to create videos

Create dozens of engaging, trending and impactful b-roll clips from your long videos with Camtasia.

Download for free now
Camtasia icon

What is B-roll?

Imagine you’re watching your favorite documentary, and as the narrator speaks, you’re captivated not only by their words but also by the seamless flow of images and video clips complementing the story. These compelling visual elements that enhance the narrative, providing context and depth without breaking the stride, make up what we call “B-roll”. 

At its most basic, B-roll is the footage intercut with the main shots in a video production. If the main shots, or the “A-roll” (the central interviews, narrative, message, etc.) is the burger and bun to your Big Mac, then the B-roll is the secret sauce that brings it all together.

So, while the A-roll focuses on delivering the main narrative through principal footage and dialogue, the B-roll adds flavor and texture, enhancing the visual experience for your audience. It helps paint a richer, fuller picture of the narrative by supplementing what’s being said with complementary visuals.

The different kinds of B-roll footage

B-roll is a broad term that encompasses several types of supplemental footage, each serving a unique purpose for storytelling. And what’s more is, it’s everywhere! 

Whether it’s a shot of a bustling city street while a news reporter narrates or a close-up of a chef’s hands prepping a dish in a cooking show, B-roll is used all the time across virtually every type of video. From YouTube videos to Hollywood blockbusters, B-roll footage is an integral part of video production. 

So, to give you context here are some more B-roll examples:

  1. Cutaway Shots: These shots usually deviate from the central action to capture something at a medium or far distance. They’re often used to subtly reveal details to the audience that the characters don’t notice, which may set up anticipation, divert attention, or even deliver a visual punchline in a comedy production.
  2. Establishing Shots: These are often panoramic shots of the location that will set the stage for the narrative. Remember all the times you’ve seen the outside of a New York apartment block in Friends? That’s an establishing shot.
  3. Atmospheric Shots: These shots are carefully composed captures of locations, objects, or people that evoke a specific mood or atmosphere. They are, in a way, similar to cutaway and establishing shots in the sense that they work to immerse the audience in the narrative.
  4. Candid Shots: Unlike scripted scenes, these shots are typically spontaneous, capturing subjects in their natural state or behind the scenes. Most of the time, they’re found in documentaries and non-fiction productions.
  5. Dramatic Reenactments: These are dramatized portrayals used to bring narrations and interviews to life. With or without dialogue, these enacted sequences can make the content more engaging, as the narration continues as a voiceover.
  6. Stock Footage: This refers to pre-recorded footage, which could either be royalty-free or licensed. These supplemental clips serve to illustrate concepts, demonstrate machinery, insert animations, or even add humor to lighten the mood.
  7. Archival Footage: This includes historical images, recordings, and footage from archives and/or libraries that may be licensed or in the public domain. More often than not, archive footage depicts significant events, locations, subjects, and individuals.
  8. Repurposed Primary Footage: Sometimes, even A-roll can be used as B-roll. For example, a discarded take (or part of it) could be used in the editing process to enhance the narrative.

Simply the best way to create videos

Create dozens of engaging, trending and impactful b-roll clips from your long videos with Camtasia.

Download for free now
Camtasia icon

What is B-roll used for?

While you might not think much about the B-roll when you’re watching a film or TV show, these clips play a pivotal role in shaping narratives and adding dimension and depth to a story. 

It’s also an editor’s best friend as it gives them plenty of ways to enhance a scene, break up a monologue, or distribute information more fluidly. In fact, if there’s a small glitch or error in a scene you love, B-roll provides an opportunity to work around it, ensuring the final cut is nothing short of perfect. 

With all that in mind, let’s take a closer look at how B-roll is used:

  • Setting the Tone: B-roll can create ambiance, subtly guiding the audience’s emotions and perceptions.
  • Providing Editors with Choices: B-roll offers a range of alternative footage, which can be used to help enhance the narrative.
  • Offering Exposition: B-roll can communicate crucial background details or context, providing depth to the story.
  • Emphasizing Key Details: A well-placed B-roll shot can highlight important details that might go unnoticed.
  • Introducing Characters: B-roll can be used to give viewers a glimpse of a character’s personality or background.
  • Concealing Errors: If the primary footage has an error, B-roll can be used to cover it up! 

Why is B-roll so important?

While B-roll footage might appear secondary to the main action (and technically, it kind of is) it’s no less important than A-roll — in fact, it’s often the difference between a good video and a great one.

In the following sections, we will explore how B-roll adds interest, allows for seamless edits, and maximizes the value you derive from your shoots.

B-roll makes your videos more interesting

If you want to make your video more exciting, B-roll can do exactly that! Imagine that you’re interviewing a woman about sports cars and, during the course of this hypothetical interview, she explains the differences between regular tires and rimmed tires…

When you watch the footage back, you might think “Wow, this is so dull”. 

interview

Or, you might think: “This is a perfect time to insert some B-roll!”

By overlaying footage of tires while she’s talking, you’ll create a much more engaging interview, as opposed to just having her talk on screen the entire time.

tires

Here’s a tip: If someone says it, show it. 

For example, if you say the word “pizza” in your screencast, consider showing a pizza. If you’re creating a training video about “interoffice communication,” think about adding some stock footage of office workers talking, or taking a quick video of your coworkers with your phone. 

If you’re using TechSmith’s Camtasia to edit your video (and we strongly recommend you do) then you can easily add B-roll to your video timeline by placing it above your interview footage.

b_roll_timeline

B-roll is a great way to cover up mistakes and tighten the overall edit

As we’ve already touched on, B-roll is a great device for covering up mistakes and cutting unwanted footage.

Let’s say you shot a great interview with your CEO but it went on a little too long and you’re worried your audience will become disinterested. There are hundreds of reasons an interview might overrun, such as:

  • They go off topic
  • Their explanations go into too much detail
  • They cough or sneeze on camera
  • They keep glancing at their watch
  • They think about their answers for too long
  • They just love to talk! 

Now, for the sake of this example, let’s imagine you’ve got this overly-long interview with your CEO, and you need to trim it down. Anyone who’s ever been in a similar scenario will understand the anxiety that comes with such a high-stakes edit! 

For one thing, you can’t chop it all up in the edit, making it look like you manipulated the answers. However, you don’t want to leave things that could make them look bad on camera. 

So how can you trim an interview while ensuring your CEO still looks great? That’s right: By using B-roll! With a little bit of B-roll thrown in throughout the interview, you’ll be able to effectively hide your edits. Here’s how:

  1. First, edit out all the bad parts of the interview and anything that’s not relevant.
  2. Then, insert your B-roll on top of the edits.


example of b-roll

Voila! 

Now you have a condensed interview that doesn’t look like you manipulated or overly edited the footage, and we’re willing to be that your CEO will be glad you only kept the best parts. However, most people are so used to seeing B-roll during interviews, they probably won’t even notice! 

However, now that you know the trick to the trade, you’ll start seeing it everywhere. Local newscasts and documentaries on Netflix use B-roll all the time to cover up edits — especially those made during interviews.

B-roll maximizes the value you get from shoots

The value of B-roll becomes increasingly clear when you consider the efficiency it can bring to a shoot. By capturing B-roll, you are essentially investing in a stockpile of additional footage that can be used in any number of ways throughout your project. In other words, by filming B-roll, you’re making the most out of every minute you spend on set.

This means that when it comes to editing, you’ll have plenty of footage at your disposal, all of which can be used to expand your narrative, fill gaps, and add visual variety without needing to spend more time shooting. This can be particularly useful on projects with tight deadlines or smaller budgets. 

The Marketer’s Ultimate Guide to Video

In our FREE ebook, we’ve put together practical strategies to get out of the woods and create engaging, powerful video content on your own that reaches your audience.

Download now!
techsmith logo

Tips to make a great B-roll

Now that you know the full power of B-roll and what it can bring to your videos, let’s get into the nitty-gritty of how to create B-roll footage of your own. 

1- Plan ahead 

The key to shooting great B-roll starts with understanding your story and identifying the key themes or ideas you’d like to reinforce through your footage. Having a clear vision of what you want to communicate will guide you in deciding what kind of B-roll shots you need.

Before you start shooting, it’s worth making a list of potential shots that complement your primary footage. Consider the locations, actions, or objects that could add value to your narrative. Remember, B-roll should serve a purpose, not just fill space. 

If possible, create a shot list or storyboard (and write a script if you haven’t already). This helps in visualizing your ideas and makes the shooting process more organized and efficient. You could also label your shot list with ‘must-haves’ and ‘nice-to-haves’ to ensure you don’t miss any crucial footage during the shoot. 

The more you plan ahead, the more time you’ll save on set, and the better your B-roll will be.

2- Find a great location

The environment you choose for your shoot should align with the theme of your story and add a layer of depth and intrigue. When scouting for locations, think about how they can serve your narrative, contribute to the mood, and enhance the visual appeal of your footage.

Consider the variety of shots you could capture in each location. Spaces with interesting architecture, dynamic lighting, or unique features can provide a wide range of opportunities for capturing captivating B-roll. 

As well as the aesthetic of a location, you should also think about how practical it will be. Is the location easily accessible? Will there be uncontrollable noise? Do you need a permit to shoot there? Are you going to need any special equipment? Answering these questions ahead of time will save potential headaches during the shoot.

Simply the best way to create videos

Create dozens of engaging, trending and impactful b-roll clips from your long videos with Camtasia.

Download for free now
Camtasia icon

3- Try several angles

Shooting B-roll is your chance to get creative and push beyond your comfort zone. The more angles you try, the more material you have to work with in the editing room, and the more visually compelling your final product will be.

A varied collection of shots from different perspectives can add depth, interest, and dynamism to your video and work to keep your audience engaged. With this in mind, it’s well worth experimenting with different camera angles, as this is a great way to tap into the versatility that B-roll footage can offer. 

For example, rather than limit yourself to eye-level shots, try shooting from a low angle to make a subject look larger and commanding. Or, from up high to make them appear small and vulnerable. Each angle tells a different story and evokes a different emotion. 

Even the simplest scene can be transformed through the lens of a new perspective. 

4- Get more footage than necessary

While it’s important to value quality over quantity in the editing suite, it’s usually better to take on a ‘more is better’ approach when shooting your B-roll. It can be all too easy to stick to a specific shot list but having a bank of extra footage can provide both a safety net and a broader canvas to paint your narrative.

By ‘overshooting’, you’re giving your future self a wider variety of shots to work with, which can be invaluable. This allows for greater flexibility during the post-production process. Take it from us, there’s nothing worse than wishing you had ‘just one more shot’ when you’re editing. 

It is, however, still important to stay focused. While you should definitely capture lots of B-roll, you should still make sure that all of it has the potential to add value to your video. Ultimately strive to shoot more, but don’t lose sight of what you’re shooting.

Making B-rolls, the FAQs

A-Roll and B-Roll Footage, what’s the difference?

A-Roll refers to the primary footage, typically featuring the main subject or speaker and carrying the central narrative. B-Roll, on the other hand, is the secondary footage that complements and adds depth to the A-Roll, often used to provide context, create visual interest, and enhance storytelling.

How long should B roll clips be?

B-roll clips should ideally be held for at least 10-15 seconds for short videos, and up to a minute for slow-paced or feature-length videos. The amount of B-roll you need to shoot depends on the project, but a good guideline is to capture four to six times the length of the video. This will ensure you have plenty to work with while editing.

Ryan Knott

Ryan Knott is a Marketing Content Strategist at TechSmith, where he creates content about easy, effective, and efficient video creation, editing, and tips and tricks, as well as audio editing for creators of all kinds. He/him.

Image Cropping 101: The Basics

image cropping is the act of improving a photo or image by removing the unnecessary parts.

By now you know that images are essential to creating great content and clear communication. Whether you’re trying to explain something, show how something works, or add elements to help grab a reader’s eye, images add interest and can help get your point across better and faster.

Images can even help you save time.

But there’s a big difference between using an image and using the RIGHT image. And while there are many ways to decide which image is right for what you’re trying to communicate, nothing ruins a potentially great image like a bad crop.

What is image cropping?

First, cropping has nothing to do with farming, so we won’t be asking you to plow or sow or anything like that. To “crop” an image is to remove or adjust the outside edges of an image (typically a photo) to improve framing or composition, draw a viewer’s eye to the subject, or change the size or aspect ratio.

In other words, photo cropping is the act of improving an image by removing unnecessary parts.

Chances are, you’ve already done some image cropping without even realizing it. If you’ve ever taken a photo with your phone’s camera and then posted that photo on Instagram, you might probably needed to choose how much of the overall photo to include in Instagram’s square traditional image format. That’s picture cropping!

Crop images quickly and easily with Snagit

Easily crop images into specific sizes and irregular shapes, and crop multiple images at once with Snagit!

Download now!
Snagit icon

The Rule of Thirds in image cropping

It may seem illogical, but the most interesting and eye-catching photos rarely have their subject smack-bang in the middle of the image. In fact, it’s a fundamental rule of photography that your primary subject shouldn’t be in the center.

But if it’s not in the center, where does it go? That’s where the rule of thirds comes in.

The rule of thirds divides all images into three equal horizontal and vertical sections (or nine individual boxes) separated by grid lines. Generally speaking, you want to place the points of interest near the spots where these grid lines intersect.

Have you ever wondered why the view on some phones and digital cameras has a grid? It’s all thanks to the rule of thirds. As demonstrated in the screenshot above, these grid lines are there to help you compose your image. The idea is that when you’re lining up your shot, you can use them to ensure your image follows the rule of thirds.

You can also see Reo from TechSmith’s doggo department. Isn’t she cute?

But composing your image when you take a photo is just the beginning. Many times you’ll want to adjust and edit your photos even further. The first step, however, is always cropping. There are many reasons why you might want to crop a photo, including:

  • The discovery of background elements you didn’t realize were there
  • Issues with the framing or composition
  • To better focus on your subject

To crop your image, you’ll need a photo editor to act as your image cropper. For the sake of this article, we’ll be using TechSmith’s Snagit, but most editing software and apps (even the ones on mobile devices) will offer basic picture-cropping functions.

So, without further ado, here’s how to crop a picture with Snagit

Firstly, open your image in Snagit and click on the Crop tool. 

Similarly to your phone’s camera app, photo editing tools provide grid lines to help you make your crop according to the rule of thirds. The photo above is a computer screenshot of Snagit — taken with Snagit (how meta!) — and, as you can see, there’s a photo open that definitely needs to be cropped. 

In the next screenshot, you can see our adjustments:

Here, you can see that the grid lines have moved as that image has been cropped, to show how it fits with the rule of thirds now that it’s been adjusted. 

Which photo do you think is better? The original image…

… Or the cropped image?

The cropped image brings us closer to the subjects and cuts out unnecessary elements from around the outside of where the skaters and coaches are standing. What’s more, all the visible faces are in the outer or upper thirds of the image. It’s not quite perfect, but it’s definitely a lot better.

It’s important to point out that the rule of thirds does not dictate that your subject can only be in one-third of the photo area. You can easily divide the image into two-thirds areas, as well, like so:

Other image cropping tips

But the rule of thirds is just the beginning.

Take a look at this photo of two friends at senior prom:

First off, the photographer chose to show the subjects’ entire bodies because, unlike our very own rebel Ryan Knott who provided the photo, most people at prom are dressed in beautiful dresses and tuxedos. So it makes sense that they would want the photo to show their whole outfit, including the shoes.

However, Ryan’s clothes aren’t really that important (sorry Ryan!), which gives more freedom to play around with cropping to emphasize different aspects of the photo.

This cropped version brings more attention to Ryan and his friend’s face (and amazing early-90s hair!) and distracts a bit from the fact that Ryan wore his teen angst on his sleeve (or, on the lower half of his body, as the case may be).

Generally speaking, when using photos of people or animals, the closer the crop, the more “dramatic” the photo.

For example, in this photo of a smiling woman, you get a complete view of what she’s doing and where she is. We have a lot of context of her surroundings, which helps tell the story of the photo.

But in this cropped version, we’re drawn more to her face and the fact she’s focused on her phone. The setting isn’t as important as the subject herself. We’ve narrowed the story a bit to capture only what she’s doing.

Cropping it further takes the phone out of the image entirely and now we’re left with just her face to contemplate. What is she thinking about? What’s making her smile? Did we catch her in mid-laugh? By taking out parts of the overall story, we’re left to create it for ourselves.

This also provides another great example of why you might want to crop an image: to change its shape and/or aspect ratio. The original image was horizontal. The first crop turned it into a vertical image and the final crop made it square. Depending on how it’s going to be used, the shape of an image can be very important.

Ready to Embrace Asynchronous Communication?

How do we have fewer, better meetings? We decided it was time to reboot our meeting culture and communication norms at TechSmith.

Download now!
cover of report about asynchronous communication

Potential pitfalls of image cropping

So, we’ve learned the basics of how to crop a photo, but what’s the downside?

Firstly, when you crop an image and save it, you’ve deleted the original image. For that reason, we suggest saving a copy of your image and making any edits to the copy, rather than the original. At TechSmith, we’ve all lost great images to bad editing at some point, and we can’t stress this strongly enough.

Secondly, the closer you crop, the smaller the actual image becomes. If the original image is 1280×1024 pixels and you crop it down to 640×512, you have reduced the size by half. So, always make sure any cropping you do will leave an image large enough to fill the space you need to fill. 

Remember, with photos, you can’t simply adjust it back up to the size you need. If you don’t resize your photo properly, you risk losing resolution and ending up with a pixelated, blurry photo.

Third, it’s really easy to over-crop a photo. Especially when cropping close to a person’s face. Give the subject some room to breathe. In the final photo of the smiling woman above, that crop is probably a little too close, but we wanted to show what would happen when we removed the phone. If we were using that photo for publishing in another capacity, we probably wouldn’t have cropped it quite so tightly.

Finally, don’t get too caught up in rules. Play around with cropping and see what pleases your eye. Rules are rules, but rules can be broken, sometimes to great effect.

Image cropping, the FAQs

How to crop an image in Photoshop?

In Photoshop, cropping an image is a breeze. All you need to do is open your image, select the Crop Tool, drag the corners to mark out the part of the image you want to keep, and hit Enter on your keyboard. It’s easy, just be sure to save or export your image when you’re done.

How to crop an image in Illustrator?

In Illustrator, begin by placing the image you’d like to crop with File > Place, then select your image. Once the image is in place, use the Selection tool to choose the image, before clicking on Crop Image in the Control panel. Next, adjust the crop boundaries by dragging the corners, and finalize your changes by pressing Enter on your keyboard.

How to crop an image on Mac?

If you’re using a Mac then you’ve already got a secret weapon for picture cropping — the Preview app. First, find the photo you want to crop and double-click on it, this should open it in Preview by default.
With Preview open, you’ll notice that your mouse cursor turns into crosshairs when hovering over part of the image. This is the Selection Tool, which you can use to drag a rectangular shape over your photo. Once you’ve outlined the part of your image you want to keep, push Cmd + K on your keyboard to make the crop, then Cmd + S to save it.

How to crop an image in Indesign?

In InDesign, you can crop an image by first selecting a frame with the Selection tool. Then, go to Object > Fitting and choose between ‘Fit Content Proportionally’ or ‘Fill Frame Proportionally’ to adjust the image within your frame. To maintain your cropping when resizing the image later, select Auto-Fit and remember to save your changes.

How to crop an image in Powerpoint?

PowerPoint provides easy-to-use tools to help you accurately crop images. Upon selecting your image, head to the Format tab and click on the Crop tool. This will bring up some adjustable handles around your image that you can use to cut out the parts of the image you want to crop.
Once you’ve made your adjustments, simply click the crop button again to set your crop — it’s that easy!

Ryan Knott

Ryan Knott is a Marketing Content Strategist at TechSmith, where he creates content about easy, effective, and efficient video creation, editing, and tips and tricks, as well as audio editing for creators of all kinds. He/him.

JPG vs. PNG: Which is Better?

Differences between JPG and PNG

As with many of the world’s greatest battles — Batman vs. Superman, Ninjas vs. Pirates, Cats vs. Dogs — the fight between JPG vs. PNG has been raging for centuries. 

Of course, when we say ‘centuries’ we mean since the mid-90s, and when we say ‘battle’ we mean the conundrum faced by people wanting to know which file format is best for exporting their images. It’s a decision that can be as hard as choosing coffee or tea on a Monday morning. 

As with most things, PNGs and JPGs have their own pros and cons — so it’s good to understand all the different formats — but the best file type for you will depend on how you plan to use it. While PNGs offer high-quality compression, JPGs take up less space and will load faster on the web. 

The decision between JPEG and PNG isn’t just an abstract ultimatum, it’s a choice that impacts how you edit, share, print, and archive your images.

If you’re caught in the tug-of-war between JPEG and PNG, don’t panic! This post is your guide to understanding each format. Whether you’re a graphic designer, a budding photographer, or just someone who wants their photos to look good online, we’ll discuss the strengths and weaknesses of each file.

Easily resize images and screen captures

Ready to quickly resize images without losing quality?

Download now!
Snagit icon

The JPG format: makes big files much smaller

The JPG, typically pronounced “jay-peg”, was developed by the Joint Photographic Experts Group (JPEG) in 1992. The group recognized a need to make large photo files smaller so that they could be shared more easily.

Some quality is compromised when an image is converted to a JPG. This is because the compression is ‘lossy’, which means that certain unnecessary information is permanently deleted. A JPG does, however, allow you to create a smaller file size than you could with a PNG.

JPG vs. PNG side by side comparison picture of Zion National Park

Generally, a JPG should be used whenever it’s important to have a small file. Beyond initially saving an image as a JPG, there are also tools that will allow you to compress the file even further. This is useful for web images, as smaller files will boost the speed at which the web page loads.  

Although modern broadband and fiber optic internet connections are making this less of an issue, those with slower connections or less powerful computers will thank you.

Key benefits of JPEG/JPG format

The JPG (or JPEG) format is a popular (if not the most popular) choice in the digital world, and it’s easy to see why. This image format brings several key benefits to the table:

  • Efficiency: JPG files are designed to effectively compress image data, which means they occupy less space on your storage drive or website. This is great for those who have limited storage or manage websites with lots of imagery. 
  • Speed: Smaller file sizes mean faster load times, and JPGs are much quicker to download and share across different devices, networks, and online platforms. Again, if you manage a website, you’re likely to rank higher in Google search results if your website quickly loads. Even if it’s only a few microseconds faster, every little bit helps. 
  • Compatibility: Virtually every photo viewer, editing tool, and device in existence supports JPG files, making the format a safe choice for most applications.
  • Minimal Post-Production: When photos are shot in JPG format, they usually require less post-production work. Aspects like white balance, contrast, and sharpening are often already well-adjusted, saving photographers a lot of time when editing images.

The key to getting the most out of a JPG lies in understanding these advantages and how they can accommodate your needs. Through this understanding, you can ensure your images are optimized for how you plan to use them.

Easily resize images and screen captures

Ready to quickly resize images without losing quality?

Download now!
Snagit icon

The PNG format: enhanced colors and improved image quality 

The PNG file format, usually read aloud as “ping”, was created in 1994 to act as a replacement for the Graphics Interchange Format (GIF). We won’t go into why — this is about PNG vs JPG after all — so let’s just say the GIF had some limitations that prompted the creation and prevalence of the PNG.

An important benefit — and often a deciding factor for using a PNG file — is that the format supports transparent pixels. This means you can have a transparent background around an irregular-shaped object and avoid a white (or other colored) box outlining your image. 

So, if you’re looking for transparency, you’ll need a PNG.

Unlike the JPG, compression for a PNG file is ‘lossless’. As the term suggests, lossless compression retains all of the data contained in the file during the compression process, which is important when you have images that need resizing several times or require multiple rounds of edits. 

Because PNGs hold more information than JPGs, they’re often used when images are more complex (with lots of fine details) and when storage isn’t an issue. 

It’s also ideal to use a PNG for a graphic image

Key benefits of PNG format

The PNG format is another formidable player in the world of digital images, boasting features that make it a standout choice for certain applications. Here are some of the key benefits of using the PNG format:

  • High Quality: PNG employs a lossless compression algorithm. This means the quality of the photo remains high, even after compression and decompression. Unlike some formats that sacrifice quality for smaller sizes, PNG keeps images looking crystal clear.
  • Sharp Graphics: When it comes to creating crisp graphics, the PNG is a real winner. Whether you’re designing a logo or a text-heavy graphic, a PNG will keep the edges sharp and the colors vivid.
  • Creative Freedom: The humble PNG is a favorite among graphic designers for creating background effects and overlays. It supports a wide array of colors and shades, allowing for greater creativity and precision in design.
  • Transparent Backgrounds: One of PNG’s standout features is its support for transparent backgrounds. This is incredibly useful for creating images that need to be layered or placed over different backgrounds. You can even create a semi-transparent watermark, so nobody tries to pass your image off as their own. 

Understanding these benefits can help you leverage the PNG format to its full potential. Whether you’re designing a logo or a website banner, the PNG format offers powerful capabilities to ensure your images are visually stunning.

Easily resize images and screen captures

Ready to quickly resize images without losing quality?

Download now!
Snagit icon

What are the differences between JPEG and PNG files?

JPGs and PNGs each offer distinct qualities and are optimized for different uses. While these differences might seem subtle, they can have a substantial impact on your images, depending on how you intend to use them. 

In this section, we’ll explore these differences in detail to help you pick a side in the title fight of PNG vs. JPG.

Lossless vs. lossy compression

One of the major talking points when looking at JPG vs. PNG, is the compression method they use — specifically, lossy (JPG) and lossless (PNG) compression.

Lossy compression, as the name suggests, involves some degree of data loss, which is what a JPG does. When you save an image as a JPG, the algorithm deletes some data to reduce the file size. The resulting image is a balance between file size and image quality. 

While this process might lead to a slight reduction in image quality, it’s usually undetectable to the human eye. However, any data that’s deleted in the compression process will be gone forever, and this will happen every time the image is saved. This means that the more you edit and/or save an image over time, the more likely you’ll notice the reduced image quality. 

On the other hand, PNG uses lossless compression. In this method, no data is deleted during the compression process. Instead, the algorithm finds efficient ways to represent the same data, resulting in an image that’s identical to the original after decompression. While this ensures high quality and detail preservation, it often results in larger file sizes than JPG.

Your choice between lossless and lossy compression will ultimately depend on what matters most to you — storage efficiency or image quality.

File size

The size of an image can really affect storage, loading times, and data usage — especially on websites and mobile apps.

While JPGs are known for smaller file sizes, some image data is lost in the compression process, which can compromise the picture quality over time. That said, the effect on quality is usually negligible. If you’re prioritizing speed and efficiency, particularly for web usage where quick loading times are essential, JPEG’s smaller file size might be the way to go.

PNGs, on the other hand, tend to create larger files due to their lossless compression method. This quality preservation, however, comes at the cost of larger file sizes, which might be slower to load on the web.

Easily resize images and screen captures

Ready to quickly resize images without losing quality?

Download now!
Snagit icon

Transparency

JPGs do not support transparent pixels — it’s as simple as that. When you save an image in a JPG format, the transparent pixels will be filled with a solid color, usually white. This lack of support for transparency makes JPEG less suitable for images that need to be placed over different backgrounds or layered with other images.

Meanwhile, if you ever need to remove a background from an image, you’ll probably save it as a PNG, because this format does support transparent pixels. This is especially useful when designing websites and digital graphics, where images often need to blend seamlessly with different backgrounds.

In short, if you need to work with transparent or semi-transparent images, you need a PNG.

So, should I pick JPG or PNG?

There is no right or wrong answer here. It all comes down to what you need the image for. Think of your choice as an exercise in optimization, and allow the factors we’ve discussed so far to guide you in your decision.

But, just in case you’re not sure which format is best for you, let’s take a look at some of the most common ways people work with and use image files. 

PNG vs JPG for Editing

With high-resolution image quality, lossless compression, and transparent pixel support, PNGs are much better than JPGs when it comes to editing images.

While JPGs can handle simple edits efficiently, they’re no match for the intricate editing and compression capabilities of PNGs — which is why professionals will often opt for PNGs in the editing suite. They’re perfect for editing graphics, illustrations, product pictures, and icons across all mainstream editing software.

Ready to Embrace Asynchronous Communication?

How do we have fewer, better meetings? We decided it was time to reboot our meeting culture and communication norms at TechSmith.

Download now!
cover of report about asynchronous communication

​​PNG vs JPG for Archiving

When it comes to archiving images and saving hundreds (or thousands) of photos, the smaller file size of a JPG makes it the obvious choice. 

As JPGs take up less space than PNGs, you can save a lot more photos without needing loads of storage space, whether it be on a physical hard drive or on the cloud. Quantity isn’t usually more important than quality, but it is when you’re archiving.

JPG vs PNG for Printing

When printing, the choice between PNG and JPEG depends on your needs and the resources at your disposal. PNG’s high-resolution images offer superior color depth and can deliver high-quality prints on home or industrial printers. Meanwhile, lossy compression could make JPG photos become blurry or lose color when they’re printed.

That said, neither PNGs nor JPGs are perfect for commercial printing tasks, like posters and T-shirts. Why? Because these formats support RGB color, but not CMYK, which is the preferred format in the commercial printing industry. 

So, if you want to print your design on a load of tote bags, you might want to consider a different file type altogether.

PNG vs JPG for Web

When it comes to posting images on a website, you might opt for using a mixture of JPG and PNG formats.

JPEG’s smaller, compressed file size gives it an edge for website use, as faster loading times contribute to a smoother user experience and improved SEO ranking. However, PNG’s support for transparency can make it the ideal choice for including graphics, such as logos and icons, on websites. 

Still, it’s important to consider the trade-offs. While PNG may deliver higher quality, the larger file size could impact your site’s loading speed. Therefore, striking the right balance between image quality, size, and website performance is crucial when deciding between JPG and PNG.

PNG files versus JPG files, the FAQs

Are PNG and JPEG files compatible with CMYK?

No, PNG and JPEG files are not compatible with CMYK color mode. Instead, these formats support RGB color, which is used for digital screens. For printing purposes, where CMYK is often the preferred color mode, files such as TIFF and EPS are probably more suitable.

When to Use the PNG Image Format?

If you need high-quality, lossless images — particularly for digital graphics, logos, and web design elements — then use a PNG! This format is also excellent for images that need to be partially transparent or if you plan on doing multiple edits, as the format doesn’t lose quality with multiple saves.

When to Use the JPEG Image Format?

JPGs are best when you need to balance good image quality with smaller file sizes, such as for web images, email attachments, or archiving large photo collections on limited storage devices. However, keep in mind that repeated editing and saving of a JPG image may result in a loss of quality over time.

Allison Boatman

Allison Boatman is a member of the Marketing Team at TechSmith.
Follow her on Twitter @allisonboats

She can often be found aimlessly wandering around local craft stores.
Personal motto: "Work hard, stay humble."
Favorites: Alaskan Malamutes, Iceland, and 90's pop culture.

How to Remove the Background from an Image?

Remove the background from an image

Picture this: you’re working on a presentation, but there’s a problem. You want to include logos and icons in your PowerPoint, but they all have backgrounds and it’s totally messing up the clean and consistent look you’re going for. 

Sound familiar? 

We’ve all been there! And we know how frustrating it is when you have a clear idea of how you want your presentation to look but can’t figure out how to remove the background from a picture.

Easily edit your images and screen captures

Ready to quickly and easily remove the background from your images?

Download a free trial of Snagit
Snagit icon

Fortunately though, making an image background transparent isn’t as tricky as it sounds. Whether you’re using an advanced editing suite like Photoshop or a handy tool like TechSmith’s Snagit, there are plenty of ways to make backgrounds transparent. In fact, Snagit can remove the background from your image in just a few clicks! 

So whether you’re a Photoshop wizard or simply dipping your toes into graphic design, this guide will walk you through the process of background removal. You’ll have your images looking just the way you want them, in no time.

How to make a picture’s background transparent with Snagit

It’s worth noting that Snagit isn’t quite as sophisticated as a professional editing program like Photoshop, and it may struggle removing more complex backgrounds. 

However, if you aren’t familiar with the more high-end (and complex) tools, Snagit isa great alternative to make a background transparent. 

So, without further ado, let’s take a look at how to make the background of a picture transparent with Snagit. 

Easily edit your images and screen captures

Ready to quickly and easily remove the background from your images?

Download a free trial of Snagit
Snagit icon

Step 1: Insert the image into the editor

Start by taking a screenshot with Snagit, or uploading an image from the File menu. Images that have white or solid color backgrounds (or high-contrast backgrounds) usually work best.

An image of the Snagit editor featuring a black and white teacup.

Step 2: Next, click the Fill button on the toolbar and choose Transparent

Adding transparent to quick styles.

If you need to add the Transparent Fill option to your Quick Styles for the first time, it’s pretty simple. All you need to do is click the Fill Color option in the Tool Properties and select Transparent Fill.

You are now one step closer to removing the background from your image.

How to make transparent a default fill option.

Step 3: Adjust your tolerance as needed

If you find that the Fill tool is removing too much, or not enough, of your background then you might need to play around with the tolerance settings. 

Adjusting the tolerance is easy, and the simpler your background is, the easier it’ll be to get right. However, if you’ve got a complicated background with lots of colors and shades, it might be a little trickier. 

For example, if you have an image with lots of similar shades and gradients in the background you may end up with some bleeding around the parts of the image you want to keep.

Showing how to adjust the tolerance and opacity of a fill.

When adjusting the fill tolerance, keep in mind that 1% is the most strict setting, and 100% means it will pretty much wash out your entire image. 

Meanwhile, adjusting the opacity will dictate how transparent you want your fill to be. The more opaque, the less transparent it will be. In other words, if you want to erase the background from your image completely, go with 0%.

Ready to Embrace Asynchronous Communication?

How do we have fewer, better meetings? We decided it was time to reboot our meeting culture and communication norms at TechSmith.

Download now!
cover of report about asynchronous communication

Step 4: Click the background areas you want to remove

If you’re editing a screenshot or a PNG image, any background you remove will become transparent by default. However, if you’re working with a different file format, like a JPG, you’ll need to adjust your background color in the Snagit editor, or it will default to white rather than transparent.

To do this, simply click Image > Canvas Color (on Windows) or Image > Change Canvas Color… (on Mac).

Step 5: Save your image as a PNG

Once you’ve finished making the transparent background on your image, make sure you export it as a PNG file. 

Each file format is different — so it’s worth taking the time to understand image file formats — but PNG is one of the few formats that supports transparent pixels. If you don’t save your image as a PNG, your background will probably turn white. 

And that’s all there is to it! You now know how to get rid of the background of a picture in just a few steps. This is a great skill for creating a seamless look for your documents, marketing materials, and presentations.

Removing the background of a picture, the FAQs

How to remove white background from an image?

If you want to know how to get rid of a white background in an image, you’ll be glad to know that TechSmith’s Snagit makes it super quick and easy. First, import your image into Snagit and click the Magic Wand tool from the toolbar. Then, click on the white background to select it — while making sure the Background Fill is set to Transparent — and hit Delete.

How to remove white background from an image in Illustrator?

To remove a white background in Illustrator, place your image in the workspace and reveal the transparency grid by clicking on the View menu and selecting Show Transparency Grid.
Next, open the Image Trace window, select your image with the Selection Tool, and choose the appropriate preset in the Image Trace window. Then, convert the image into a vector by clicking Object > Expand, and use the Direct Selection tool to select and delete the background.
Finally export your file as a PNG or EPS, while ensuring the Background Transparent box is checked.

How to remove white background from an image in Photoshop?

Perhaps the easiest way to remove a white background in Adobe Photoshop is to use the Magic Wand tool, which is perfect for white backgrounds.
First, make sure the image layer is unlocked. Then, with the Magic Wand tool selected, click on the white area you wish to remove. Once selected, hit Delete on your keyboard before exporting your image as a PNG.

How to remove white background from an image in Canva?

To remove a white background in Canva, upload your image, click on the Effects tab, and select Background Remover. 
It’s worth noting that this feature is only available to Canva Pro users.

Danielle Ezell

Danielle Ezell is a Marketing Content Strategist at TechSmith, where she writes about effective workplace communication, offering tips and strategies for using images and videos to collaborate more effectively in hybrid and remote environments.

5 Easy Ways to Convert WebP to PNG

Convert WebP to PNG

You’ve probably come across common image file types like JPEG and PNG, but have you heard of WebP? This relatively new file format offers impressive compression capabilities and supports high-quality imaging without taking up much storage space.

Despite this, WebP files aren’t without limitations. You might find yourself needing to save a WebP image as a PNG to edit or share it. But how exactly can you convert a WebP image? 

In this guide, we’ll explain the differences between WebP and PNG. Plus, we’ll walk you through the best ways to convert WebP images to PNG formats. Whether you’re using a Mac or PC, Photoshop, or even an online WebP to PNG converter, we’ve got you covered.

Easily resize images and screen captures

Ready to quickly resize images without losing quality?

Download now!
Illustrate the steps of a process with snagit

What is WebP?

In the world of digital images, WebP is like the new kid on the block. Created by Google, WebP was designed to keep pictures and images looking sharp but with a much smaller file size than traditional formats like JPEG or PNG

If you’ve not heard of WebP until recently, then you’re not the only one. The file type was created back in 2010 but hasn’t been as widely adopted as other image formats.

So what’s the point of using WebP? And if WebP is so great, why isn’t it used everywhere? Well, as with all things, WebP has its own set of pros and cons: 

Pros

  • Smart compression: A WebP file is 86% smaller than a JPEG and 43% smaller than a PNG, according to KeyCDN. This makes WebP images great for fast-loading web pages.
  • Flexible formats: WebP is a chameleon that supports lossless (like a PNG) and lossy (like a JPEG) compression.
  • Transparency: Similar to PNG files, WebP supports transparent backgrounds. 

Cons

  • Compression is still compression: WebP images are much better at retaining image quality when they’re compressed. However, even a small amount of compression can reduce the quality of an image.
  • Web Compatibility: While modern browsers like Chrome and Firefox do support WebP, older browsers, such as Internet Explorer (IE), don’t. On the plus side, IE users will still see non-WebP versions of the same image. 
  • Software: Sharing, displaying, and editing WebP images can be tricky because the format isn’t universally compatible with all software. (At least, not yet.) This means people will sometimes need to convert their WebP images to a more universally accepted format, like PNG.

What is PNG?

The PNG, or Portable Network Graphics, is another digital image file. This one has been around the block a few times. Introduced in the mid-90s, PNG was developed as a patent-free answer to the GIF format. However, it is most commonly used to replace JPEG files.

PNGs have reliable image quality due to lossless compression. Unlike JPEG, which loses quality each time saved, PNGs maintain their original quality no matter how often you open or save them.

However, what makes PNG really stand out is its support for transparent pixels. As anyone who’s ever needed to remove the background from an image knows, PNG files are the go-to choice for images with transparent backgrounds — which are great for creating logos, icons, and other web graphics. 

Of course, with high-quality images come larger file sizes. A PNG file will often be larger than a JPEG of the same image, which can lead to slower load times for web pages. This is where WebP comes in…

Capture and edit screenshots with Snagit

Ready to quickly resize images without losing quality?

Download now!
An image of a computer interface showing a dialog box with a pink speech bubble saying 'Look at this!' pointing to a bar chart, illustrating the use of annotations in screen recording software.

WebP vs PNG, what is the difference?

Understanding the difference between WebP and PNG can help you decide which format is best for you. While they may seem similar on the surface, each format has its own unique features and uses. 

Here are some key differences between these two image formats:

  • Compression: Both WebP and PNG support lossless compression, but WebP is the star when creating smaller files. If you’re looking to speed up your website’s loading times, WebP might be the answer.
  • Quality: With top-notch image quality, the PNG format is like the HD TV of image files. However, while WebP can support similarly high-quality images, it can also be compressed further than a PNG, while only compromising a sliver of quality. 
  • Support and compatibility: PNG has become one of the most widely-used image formats on the web, and as such it’s supported across the board. On the other hand, WebP is supported on modern browsers and some software but hasn’t quite reached universal appeal.
  • Animation: Here’s where WebP shows off a bit. Unlike PNG, WebP supports animation, making it a one-stop shop for high-quality static and animated images.

Why convert WebP files to PNG files?

While WebP is the more modern, efficient, and widely-applicable image format, there are times when you might need to convert a WebP to a PNG file — the main reason being that PNGs are universally compatible. 

Almost every web browser and image editor supports the PNG format, and this broad acceptance makes it an incredibly versatile and reliable option when sharing or editing images.

So, if you’re having trouble with a WebP file, you might be able to save time and energy by simply converting it to a PNG. Fortunately, converting a WebP to a PNG is very straightforward, when you know how.

How Do I Convert WebP to PNG?

Whether you’re working on a Mac or Windows PC, using professional software like Photoshop, or a handy online WebP to PNG converter, we’ve got you covered. 

In this section, we’ll show you how to change a WebP file to a PNG across a range of devices and software.

Using Snagit

TechSmith’s Snagit is a powerful tool for sharing, editing, and capturing screenshots and videos. But did you know it can also help you convert WebP images to PNG? Here’s how:

Start by opening Snagit. If you’ve not used Snagit before, you’ll be glad to know that Mac and Windows users can download and try Snagit for free.

Click on ‘File’, then ‘Open’, and select the WebP file you want to convert.

How to turn a WebP into PNG
Converting a WebP to PNG

Once the image is open, head back to the ‘File’ menu and click on ‘Export’, which will open up a new window. 

How to save a WebP to PNG

Next to ‘File format’, you’ll see a drop-down menu. Click it, and select PNG.

How to change a WebP file to PNG

Finally, choose where to save your PNG by clicking the ‘Browse’ button next to ‘File Location’. Then, when you’re ready, click ‘Export’.

Find a WebP to PNG converter

And that’s it! In a few simple steps, you’ve learned how to change a WebP file to a PNG using Snagit. This can be really handy if you use Snagit for other tasks — such as, cropping images and resizing photos — and want to streamline your workflow.

Snagit also has loads of neat tools that allow you to extract text from images, add watermarks to pictures and even turn screenshots into short videos.

On a Mac

With a Mac, you can convert an image from WebP to PNG in just a few simple steps. Here’s how: 

  1. Open your WebP file in Preview. As this is the default image viewer on Macs, all you have to do is double-click the file, and it should open in Preview.
  2. Once your file is open, click on ‘File’ in the menu bar, then select ‘Export’.
  3. In the box that opens up, you’ll see a drop-down menu labeled ‘Format’. Click it and select ‘PNG’.
    1. If your image has a transparent background, you’ll also want to make sure that the box next to ‘Alpha’ is ticked. 
  4. Finally, choose where you want to save your PNG image and click ‘Save’.

That’s it! You’ve just learned how to turn a WebP into a PNG on Mac! This new image can now be opened and edited in a wider range of software and displayed on more browsers.

On Windows

Converting WebP files to PNG on Windows is just as easy as it is on a Mac. In fact, the only real difference is you’ll use MS Paint instead of Preview — here’s how:

  1. Open your WebP file with Paint, the default image editor on Windows. You can do this by right-clicking the file, selecting ‘Open with’, and choosing ‘Paint’.
  2. Once your file is open, click on ‘File’ in the top left corner, hover over ‘Save as’, then select ‘PNG Picture’.
  3. A dialog box will open. Here, choose where you want to save your PNG image.
  4. After you’ve selected the location, click ‘Save’. 

That’s it! Now you know how to save a WebP as a PNG — we told you it was easy. 

Easily resize images and screen captures

Ready to quickly resize images without losing quality?

A screenshot of screen recording software with various controls and an 'All-in-One' tab selected, displaying options for image or video capture, including a red 'Capture' button and settings for delays and cursor capture.

Using Photoshop

Adobe Photoshop is a popular image editing software with a wide range of advanced features and powerful editing tools.

While more recent versions of Photoshop do provide full support WebP, you might want to use it to convert your image to a PNG. Here’s how:

  1. Launch Photoshop and open your WebP file. You can do this by clicking on ‘File’ in the top menu, then ‘Open’, and selecting your file.
  2. Once your image is open, go back to the ‘File’ menu, but this time select ‘Export’.
  3. Next, click ‘PNG’.
  4. Once you’ve decided where you’d like your PNG image to be saved, click ‘Save’.

You’ve done it! Your WebP file is now a PNG, ready to be used anywhere PNG files are accepted (which is pretty much everywhere).

Using a PNG converter

If you want to skip the manual labor altogether and simply have a WebP turned into a PNG for you, you can always use a WebP to PNG converter instead. These tools are usually found online, and are a low-effort, user-friendly option for converting files. 

The first thing you need to do is choose which converter you want to use. Fortunately, there are plenty online and most of them are free, including Convertio, OnlineConvert, and Zamzar.

Each online converter will be slightly different, but the overall process of saving your WebP image as a PNG will be more or less the same.

  1. Depending on the converter you’ve chosen, you should see a button that says ‘Choose File’ or ‘Upload’, or something similar. Click it.
  2. Next, there should be an option to select the output format. Choose ‘PNG’ from the list.
  3. Then, click on ‘Convert’ or ‘Start Conversion’, or a similar button. The converter will begin converting your image, which should only take a few moments.
  4. Once the conversion is complete, there will be an option to download your new PNG file. 

And there you have it! An easy, fuss-free way to convert images from WebP to PNG.

WebP to PNG FAQs

How to convert WebP to PNG without losing transparency?

Tools like Adobe Photoshop, the Preview app on Mac, Paint on Windows, or an online WebP to PNG converter all respect the transparency of original WebP files when converting them to a PNG. By following the conversion steps outlined in this article, your PNG file will retain the transparent background of your WebP image.

How to download WebP as PNG?

If you come across a WebP image online that you’d like to save as a PNG, you’ll need to convert it first. Simply save the WebP image to your device, upload it to a file converter, select PNG as the output format, and then download the converted PNG image.

Is there a Chrome extension to convert WebP to PNG?

Yes, there are several Chrome extensions that can convert WebP images to PNG. “Save Image As PNG” is one popular example. These extensions often allow you to right-click on a WebP image and save it directly as a PNG, making the process incredibly fast and convenient.

How to download PNG instead of WebP?

The easiest way to download an image as a PNG instead of a WebP is to use a browser extension, such as “Save Image As Type” for Chrome, which allows you to save images, in a variety of file formats.

Ryan Knott

Ryan Knott is a Marketing Content Strategist at TechSmith, where he creates content about easy, effective, and efficient video creation, editing, and tips and tricks, as well as audio editing for creators of all kinds. He/him.

How to Make a Meme (+Free Template)

Make a meme

It’s unlikely that anyone with internet access has avoided seeing a meme. They’re everywhere! You can find them on social media, in blog posts, and on dedicated image sites like GIPHY.

Guess what — they aren’t just for funny tweets. You can use them in your workplace communications, too! But how did internet memes come to exist? What exactly are they? And how in the world do you even make or use one at work?

Don’t worry —  we’ve got your back! Read on to learn all about these internet phenomena and how to make your own memes.

What is a meme?

Richard Dawkins, an evolutionary biologist, first coined the term meme in his 1976 book ‘The Selfish Gene.’ He noted that they are a way for people to pass along social memories and cultural ideas to one another. Fittingly, meme is short for the Greek word mimeme, meaning “imitated thing.”

Easily make a meme!

Snagit makes creating custom memes super easy. Download Snagit and use the free meme template today!

Download for free now
Snagit icon

Most image memes are captioned photos intended to be funny, often as a way to publicly ridicule human behavior. Memes spread virally through social media sites like Facebook and Twitter, where people notice and share them with others. 

If you’re creating a meme for a social media account, you might even want to add a watermark to mark to make sure your sense of humor gets the credit it deserves!

A Willy Wonka meme

Public relations, advertising, and marketing professionals have embraced memes as a form of viral marketing. They’re hilarious, easy to create, and packaged perfectly for earning shares on social media channels. In an era where 350 million images are posted on Facebook every day, compelling and humorous images or videos could be your best shot at standing out and earning engagement.

So, you want to know how to make your own meme… Whether you’re creating one for work or for fun, we’re here to help. TechSmith’s Snagit is a great tool for creating a meme in just a few steps — it’s practically your own custom meme maker! 

How to make a meme

Step 1: Come up with your meme idea

Usually, when you go to make a meme, you’ll have an idea in mind. But if not, think of something funny.

Step 2: Choose your images 

Are you going to put your own caption on an existing image, or do you want to caption your own? 

You can save an image from the web, take a screenshot, or choose a meme template. Once you’ve got your image, you’re ready to go. You can always upload multiple images if needed for the format you want.

Step 3: Open your images in Snagit

Open Snagit and click Create, then choose Image from Template. Select the Meme option, and drag your image into the placeholder.

How to make a meme in Snagit with templates

Step 4: Edit and add text

Now you’ll want to edit your image, but remember that the imagery for most memes is kept relatively simple, so you’ll probably only really need to crop your photo and add some text. 

Memes typically use white, bold capital letters with a strong black outline. Snagit’s Quick Styles are perfect for this, and you can easily create and move text boxes anywhere on the canvas. 

Play around with text size and placement to get the image exactly how you want.

A Dwight Schrute meme about how in-person meetings aren't necessary.

Step 5: Save and upload

Save and upload your final image directly to your email, Facebook, Twitter, etc. to share with coworkers or friends.

Now that you know how to create a meme, it’s your turn! If you don’t already have Snagit, then be sure to download the free trial. Then, create your own memes and share them with friends, send them to coworkers, or use them to market your product.

But make no mistake, Snagit is more than just a meme maker — it comes with a wide range of tools that you can use to do things like remove backgrounds from pictures or extract text from an image — you can even turn screenshots into short videos

Easily make a meme!

Snagit makes creating custom memes super easy. Download Snagit and use the free meme template today!

Download for free now
Snagit icon

How to Make a Meme FAQs

Why should I make a meme?

Memes are a great way to share funny jokes or information with friends and coworkers. Plus, they’re super easy to make! No experience with any tools is needed.

Can I make a GIF meme?

Absolutely! Use the GIF feature in Snagit to easily turn any video clip into an animated GIF meme to share with others.

Can I use memes at work?

While you should be conscious of your organization’s workplace culture, memes are often a great way to switch up your communication and have fun at work. We say go for it!

Kara Swanson

Marketing Content Specialist at TechSmith. I know way more about tea than any human being ever should.

10 helpful types of video that every business can use

Video for business

Using video for business is no longer some up-and-coming trend, it’s an essential part of any business plan. Statista reports that consumers spent an average of 19 hours per week, watching online video content in 2022 – that’s 163 minutes per day! And according to a 2023 report from Insivia, viewers retain 95% of a message when they consume it via video, compared to 10% when reading text.

The figures show that not only are people watching more video content than ever before, but that it’s also an incredibly impactful and effective means of communication. 

If your business hasn’t started making videos yet, the good news is that it’s not too late. Whether you work for a big brand or own a small business, video content is great for building trust with potential customers and clients. 

In this article, we’ll explore why video is important for business and look at the 10 types of corporate video that organizations use to take their internal communications and customer outreach to the next level.

Let’s dive in!

Why is video important for your business?

Businesses need new and innovative ways to attract and retain customers. As such, videos have quickly become an essential part of modern marketing strategies. 

Why? The short answer: Video is awesome. 

The long answer: Videos can increase brand awareness and boost engagement by conveying messages in a way that’s striking and memorable, making it easier for your target audience to remember your brand. Videos can also enhance customer engagement and help build trust and credibility by showcasing the values and personality of your business. 

Additionally, videos can educate customers about products and services, explain complex ideas in an easy-to-understand format, and highlight key features and benefits – all leading to improved customer satisfaction!

So yeah, they’re awesome. But if you’re still not convinced, let’s take a closer look at why businesses need video.

Make your own videos today!

Make professional-quality videos quickly and easily with Camtasia. Record your screen or upload an existing video, then bring the “Wow!” with effects, music, and much more.

Download for free now
Camtasia icon

Video is widely accessible

One of the great things (and possibly the greatest thing) about the video format is that it’s available to almost everyone. With the rise of the internet and social media, businesses can now create and distribute videos to a large audience, at a low cost. This means businesses can easily increase their reach and visibility. 

By sharing videos on YouTube, Vimeo, Facebook, Instagram, Twitter, and similar platforms, businesses can expand beyond their existing customer base. What’s more, viewers can share videos with their friends, family, and followers (shout out to influencers!), which can increase the reach of content and generate organic web traffic.

All of that means way more opportunities for businesses to engage with their target audience and reach potential customers around the world – something that entrepreneurs could have only dreamed of years ago. 

Video adds value to a business

The power of video in boosting business value knows no bounds. Which is why savvy marketers are increasingly turning to video content to reach a wider audience and make a bigger impact.

Not only is it a format that’s easy and affordable to create and distribute, but research shows video content can increase conversion rates by up to 86% when featured on landing pages.

On top of that, videos can even save businesses time, money, and resources. For instance, rather than answering the same questions over and over again, businesses can create instructional videos that customers (and employees) can refer to when they need help. This can free up company time that can be used on more important tasks.

Leveraging the power of video is essential for staying ahead in today’s business landscape. Whether you’re looking to improve your social media presence or educate potential customers about your products, video content is arguably the best way to engage your audience and increase your business value.

Video tells a story

Video can also add significant value to businesses by telling stories that connect with audiences on a deeper level. Storytelling is a powerful tool for evoking emotions and creating a sense of empathy and understanding – and no other medium can tell a story quite like a video can. 

Through this emotional connection, businesses can build trust and loyalty with their customers. This presents an opportunity for businesses to showcase their products or services in a way that’s unique and memorable. In turn, this creates a distinct experience for the audience that sets the brand apart from its competitors. 

By using video to tell their story, businesses can establish a long-term relationship with customers, which will ultimately lead to customer growth.

Make your own videos today!

Make professional-quality videos quickly and easily with Camtasia. Record your screen or upload an existing video, then bring the “Wow!” with effects, music, and much more.

Download for free now
Camtasia icon

Video can help train employees

By creating training videos, businesses can provide their employees with consistent training materials, ensuring that everyone receives the same information and is equipped with the knowledge and skills needed to perform their job effectively.

Video training can also be more engaging and effective than traditional training methods, such as classroom lectures or written materials. Through video, employees can see and hear real-world examples and demonstrations, making the training more interactive and memorable. This can lead to better retention of information and a more effective learning experience.

Businesses can also save time and money by using training videos, as they can be created once and used repeatedly. This reduces the need for in-person training sessions or updating written materials, and is particularly helpful for businesses that rely on remote communication.

The different types of videos for businesses

So videos are important, useful, and awesome – that much we know. But there are many different types of videos that businesses use, and all are used to achieve different goals.   

For example, while product demo videos can showcase product features to potential customers, explainer videos are great for introducing brands and explaining services in a way that audiences find engaging. 

By understanding how different types of business videos can achieve specific goals — such as increasing brand awareness, driving web traffic, or boosting sales — you can make informed decisions about which types of videos to create for your own business. 

Let’s take a closer look at the top 10 formats for corporate videos: 

1. Screencast videos

A screencast video is a recording of your computer screen and will often (but not always) include audio, such as the sounds of your computer or your own voice – or both! 

Screencast videos can be used internally or externally and can either be a stand-alone video, or used as a feature in another video. For example, you could use a screencast to show a colleague something simple, like how to crop a video, or as one small part of an all-encompassing training video. 

With such versatility, screencasts have several use cases, including: 

  • Creating quick, disposable videos for colleagues and clients
  • Recording meetings
  • Providing clear feedback
  • Making basic tutorials
https://youtu.be/lT_Bub45gYY

Production time

Due to their wide range of uses, the amount of time spent creating a screencast can vary depending on the complexity of information it’s conveying and the audience. 

For instance, a screencast titled ‘Rocket Science for Very Important People’ is going to take a lot more time to create than a basic screencast intended to teach your grandma how to use Zoom.

Knowing your audience, and understanding the information you need to convey is the key to figuring out how long a screencast will take to make. Something simple could take 10 minutes, whereas a more complicated one could take several hours. 

Video length 

Similarly, the length of a screencast can vary depending on what you’re presenting and who you’re presenting to. However, you should always aim to keep your screencasts as concise as possible.

If you plan to narrate your screencast, it’s always worth taking the extra time to write a script. This will keep you focused on the key points, and help you avoid making mistakes. 

Metrics that matter

Viewer feedback is one of the most important metrics to consider when gauging the success of a screencast and how helpful its content is. 

Be sure to always seek feedback from your audience – and listen to it! Whether you ask people for their thoughts directly or encourage viewers to leave comments, feedback can help you identify areas to work on for future screencasts.

Make your own videos today!

Make professional-quality videos quickly and easily with Camtasia. Record your screen or upload an existing video, then bring the “Wow!” with effects, music, and much more.

Download for free now
Camtasia icon

2. Social media videos

Videos for social media can be presented in a variety of formats and styles. These types of video are designed to share on platforms such as YouTube, Facebook, Instagram, and Twitter.

Each social platform has its own technical specifications for video content, such as aspect ratio, maximum length, and file size. To save yourself time (and any potential frustration) make sure you know the requirements for the platform you intend to use before you start filming. 

That said, there is one feature that all social media videos should have — regardless of platform — which is captions. That is, assuming your video features someone talking in it. 

This ties back to the accessibility of videos, because you never know where someone will be watching your content, or on what device. While they might be watching a video on their laptop at home, it’s just as likely they’re watching it in a public space on their phone. 

This is why adding captions (or subtitles) to your social media videos is absolutely critical – because many of your viewers will watch videos with the volume turned down. 

Production time

What’s great about social media videos is that many businesses can repurpose pre-existing videos that were created for different reasons, such as event promos and product updates. 

This means that with just a little editing (in most cases), you can post content online that’s already been made. A lot of businesses may not even realize just how much social content they have that’s ready to go. This is a super quick and easy way to get your message out there and increase brand awareness. 

Depending on whether you’re using existing content or creating something from scratch, making social videos can take anywhere from 30 minutes to a couple of days.

Video length 

When it comes to social media videos, brevity is key. You’ll want to aim for a maximum length of 2 minutes, but ultimately: the shorter, the better. 

The most effective social media videos are those that can quickly capture the attention of viewers and get to the point in 30 seconds or less. By mastering the art of trimming videos so they’re short and sweet, you’ll be a social video rockstar in no time.

Metrics that matter

With so many social platforms, there’s no one-size-fits-all approach for measuring the success of your social media videos. Based on each platform, you’ll want to track metrics such as views, likes, shares, and comments to get an idea of how well your videos are performing. 

It’s also worth keeping an eye on engagement metrics — such as how long viewers are watching your videos for and whether they’re clicking through to your website — to ensure that the video is achieving the goals you hoped it would. 

Don’t be afraid to experiment with different types of videos or formats to see what resonates best with your audience. And remember, social video is all about building relationships and starting conversations, so prioritize engagement and building connections over views.

3. Promotional Videos

Promotional videos can be a powerful tool to advertise events, products, and services. Ultimately, these videos exist to generate leads, but they should give your audience a feel for your brand while pitching your offering.

Promo videos should include a brief but detailed overview of what you’re promoting, and a call to action (CTA) that encourages viewers to take the next step. Whether you want your audience to register for an event, subscribe to a newsletter, or buy a product, you need to make it as easy as possible for them to take action. 

So why is video marketing so important for business? Because they’re a powerful way to establish a personal connection with your audience and generate excitement about your events, products, and services.

Production time

Depending on how important and/or complex your product, event, or service is, the time it takes to produce a promotional video could range from one hour to a number of days. 

Video length 

Without wanting to over-simplify, promotional videos are fundamentally ads (though the best promo videos don’t feel like adverts). With this in mind, it’s best to keep your promotional videos short and sweet. Anything between one to three minutes is ideal.  

Metrics that matter

There are two metrics you need to keep an eye on with promotional videos, the first being the play count. A successful promo video is one that manages to reach audiences far and wide. However, a trillion views doesn’t mean much if nobody is taking the next step, which is why it’s also essential to include a CTA and watch the click-through rate. 

Make your own videos today!

Make professional-quality videos quickly and easily with Camtasia. Record your screen or upload an existing video, then bring the “Wow!” with effects, music, and much more.

Download for free now
Camtasia icon

4. Onboarding Videos

Once you’ve made a good promotional video that’s converting leads into customers, you’ll need to think about how you can optimize their first interaction with the company. It’s important to make new customers feel welcome and ensure they understand everything about your product or service. 

This is a crucial step in the sales cycle — one that can make or break a customer’s loyalty — and it’s also where onboarding videos come in. These videos show customers the ropes to help them get started and hit the ground running.

It’s essential to take the time to create high-quality onboarding videos that are easy to understand and provide real value to your customers. This will help ensure that they start off on the right foot and have a positive experience with your brand from day one. 

Production time

Because they’re so important to new customers, it’s essential that onboarding videos get the time and attention they need to be done right, which is why they can take a few days to make. 

Remember, you reap what you sow, and the time you put into creating a great onboarding video will pay you back tenfold.

Video length 

In the same way that the production of an onboarding video shouldn’t be rushed, nor should the consumption of the information it conveys. While you should try to keep all your videos as concise as possible, it’s important to give your audience clear instructions on how to use your product or service – and this can take time. 

This makes it more important to keep your viewers engaged throughout the video. It’s not easy to get people to give up 10 minutes of their time, so try to keep it compelling and fun.

Metrics that matter

With onboarding videos, it’s important to track audience engagement and make sure your video is watched all the way through. 

You should also check if any parts of the video have been replayed multiple times, or by multiple people. This could suggest that part of your video is unclear, or that they’re having difficulty using a particular feature.

Make your own videos today!

Make professional-quality videos quickly and easily with Camtasia. Record your screen or upload an existing video, then bring the “Wow!” with effects, music, and much more.

Download for free now
Camtasia icon

5. Explainer videos

Explainer videos do exactly as the name suggests: they explain things. 

These videos are usually short and are often used to explain products, services, and concepts in a way that’s simple and engaging. They typically use clear and concise language and are often combined with visual aids, such as animation or illustrations, to break down complex ideas to make them easier to understand and digest.

Explainer videos are often used by businesses to introduce their product or service to potential customers or provide a quick and easy-to-understand overview of a topic. They can be used on a variety of platforms, such as a company’s website, social media, or email marketing campaigns. 

The goal of an explainer video is to grab the viewer’s attention, explain the benefits of the product or service, and encourage them to take action, whether it’s to sign up for a free trial, make a purchase, or share the video with others.

Production time

Creating an explainer video can take more time and effort than other types of videos because they may require detailed planning. On average, it can take about 20 to 24 hours to produce a high-quality explainer video. 

However, don’t let this put you off however! It’s important to remember that new and returning customers, as well as potential leads, all stand to benefit from your content – so it’s well worth the investment.

Video length 

We’d recommend keeping the run time of an explainer video between two to five minutes. To do this, you’ll need to ensure that the content is not only informative but also dynamic and engaging enough to keep the attention of your viewers. 

A well-crafted explainer video can help you effectively convey complex concepts or ideas in a way that’s easy for your audience to understand and remember. By keeping the running time under five minutes, you’ll be able to do so without overwhelming them with too much information at once.

Metrics that matter

Engagement is the ultimate metric to measure the success of your explainer videos, but there are also other essential factors to consider. 

You should pay close attention to any parts of your video that viewers watch more than once. This could indicate that a specific section requires more clarity, or that the content is particularly valuable to your audience. By monitoring these metrics, you can identify areas for improvement and make data-driven decisions about your video content.

Remember that explainer videos are a powerful tool for educating and engaging your audience. By analyzing viewer behavior and feedback, you can refine your messaging and create more effective content over time. So, don’t just use metrics to measure success; use them to reflect on, learn from, and improve your content. 

Make your own videos today!

Make professional-quality videos quickly and easily with Camtasia. Record your screen or upload an existing video, then bring the “Wow!” with effects, music, and much more.

Download for free now
Camtasia icon

6. Demo videos

A demo video is a powerful tool for showcasing your product’s capabilities while visually demonstrating its functionality in action. 

The goal of a demo video is to show the benefits and features of your product, rather than just telling your audience about them. This is especially effective for software, where recording your screen directly can provide an immersive experience for your viewers.

With a demo video, you can give potential customers a taste of what it’s like to use your product before they even sign up for a free trial. A well-crafted demo video can help you stand out from the competition and can lead to increased engagement, conversions, and ultimately, sales.

Production time

​​Demo videos are typically given a prime spot on company websites, so it’s essential that they’re crafted carefully. As with any media meant for customers, this can result in a longer production time, as well as several rounds of editing and revisions. 

It’s also really important to ensure that the concept and script are perfectly aligned and that all the necessary stakeholders provide their input. These alone can be two of the most time-consuming parts of creating a demo video. 

While they might take considerable time and effort to create, a polished demo video will be an incredibly effective marketing tool, so it’s definitely worth it! 

Video length 

The length of a demo video is an important factor to consider when it comes to engagement. On one hand, you want to make sure that your video is long enough to cover all the important information about your product. On the other, you don’t want to make the video so long that viewers lose interest.

Striking this balance between being brief and comprehensive is key. For optimal engagement, we’d recommend keeping your demo video within the two to five minute range. This way, you can provide a concise, yet informative overview of your product that is more likely to be watched, shared, and acted upon by potential customers.

Metrics that matter

When evaluating the performance of a demo video, the play and engagement rates are the two primary metrics to consider. Since demo videos usually convey a lot of information in a short amount of time, it’s important to ensure that viewers watch the entire video. 

By analyzing the number of re-watches, you can identify which parts of the video may have been unclear to viewers or which features generated the most interest and excitement. Such feedback can be used to optimize future videos or even influence future product development. 

The ultimate guide to making amazing videos

Watch our video and get great advice on how to start making videos, promotion, and more.

Watch more
techsmith logo

7. Customer story videos (aka testimonial videos)

Testimonial videos, also known as customer story videos, feature your customers sharing their experiences with your product or service.

To make these videos, we suggest interviewing your customer and editing the footage to tell a compelling story. These videos are an effective way for potential customers to identify with real-world situations and see the tangible benefits of your product or service.

Customer story videos also highlight the problems or pain points that your customers faced, and showcase how your company’s solution provided value and solved those problems.

Production time

Testimonial videos can typically take one to two days to film and edit, depending on factors such as the location of the customer and whether or not you have to travel to them to get the footage. 

If you have an in-house video team, it might be worth sending them to the customer to ensure that the video is consistent with your brand’s production style – rather than asking the customer to film it themselves. This can also make the process easier and more convenient for the customer, who is essentially doing you a favor by providing a testimonial.

However, if traveling to the customer’s location isn’t feasible, you might consider asking them to film their own testimonial. This could be a great option if you work with corporate clients that have their own video team, or if your clients are the Cohen brothers.

As a backup plan, this ensures you still have valuable customer feedback to share with prospects, even if the production style is a little different.

Video length 

As a general rule, testimonial videos usually range between five to 10 minutes long. This should be plenty of time to communicate the customer’s experience and the value of your product or service, but not so long that your audience loses interest. 

Metrics that matter

Measuring play rate and conversion metrics is crucial when it comes to customer story videos. Your play rate provides valuable insight into how many viewers are actually interested in watching the video. 

Meanwhile, monitoring your conversion rates will allow you to see how many viewers were convinced to take the next step, such as subscribing to a service or making a purchase. These metrics can help you refine your marketing strategies and optimize your videos for better results.

Make your own videos today!

Make professional-quality videos quickly and easily with Camtasia. Record your screen or upload an existing video, then bring the “Wow!” with effects, music, and much more.

Download for free now
Camtasia icon

8. Training videos

A training video provides guidance on how to perform a particular task or process. These videos can be used internally and externally, and can teach audiences how to do virtually anything. Yes, anything! We told you video is awesome… 

These instructional videos can cover a wide range of topics, from basic skills such as logging into a program to more complex processes such as how to make a split screen video. By demonstrating and explaining the task visually, training videos can be an effective tool for providing hands-on learning and ensuring consistency in training across teams and departments.

Production time

Internal training videos typically take longer to produce than customer-facing videos because they often require specific information, and intricate details, and may need to comply with certain guidelines and regulations. 

The production time can also vary depending on the complexity of the task being taught, and the level of detail required in the video – so there’s a lot to consider! 

The final video needs to be easy for employees to access, understand, and should be interactive and engaging to maximize knowledge retention. With so much to think about, the time required to produce training videos can vary depending on the complexity of the task and the resources available.

That said, we’d say you can put a decent training video together in as little as 1.5–3 hours (for relatively simple videos). 

Video length 

When crafting internal training videos, your first priority should be to ensure you deliver all the essential information, even if it means extending the length of the video. 

As training videos are usually meant for internal consumption, there shouldn’t be as much pressure to create something highly polished. Instead, take the time to cover all relevant information in detail, and don’t shy away from diving deep into the subject matter. 

If your video ends up being fairly long, say between five to 10 minutes, then so be it. What’s important here is to effectively communicate and transfer knowledge to your team. 

Metrics that matter

As training videos are most often used for onboarding new employees, it’s important people watch them from start to finish, which is why it’s crucial to monitor the play and engagement rates. 

This also presents an ideal chance to assess your video content. For example, if certain sections are being re-watched, it might indicate that specific information is difficult to understand, which can signal areas for improvement in future videos.

9. Presentation videos

A presentation video, sometimes referred to as lecture capture, is a recording of a presentation that’s made available after the event. 

This type of video could be as simple as an audio narration combined with a PowerPoint presentation, or an on-stage presentation, or lesson, such as a college lecture. By recording and sharing your presentations, you can extend the reach of your message and provide valuable content to a wider audience.

Whether you’re using presentation videos for educational purposes, internal training, or marketing efforts, they can be an effective way to engage with your audience and share your message in a way that is easily accessible and digestible.

Production time

As with so many of the videos we’ve discussed, the time it takes to produce a presentation video can vary greatly depending on the subject being discussed, the audience it’s intended for, and how polished you want it to be. 

Behind every TED Talk there’s a production crew, multiple cameras, lighting technicians, and a whole lot of other people – not to mention the speaker, who will have written and rehearsed a script. Then, once a video has been recorded, it needs to be edited, shared online, and promoted. So, as you can imagine, TED Talks take a lot of time…

However, if all you need to do is record a presentation and send it to a relatively small group of people, then you might just need a camera and a few light edits before it’s ready – and that might only take a couple of hours. 

Make your own videos today!

Make professional-quality videos quickly and easily with Camtasia. Record your screen or upload an existing video, then bring the “Wow!” with effects, music, and much more.

Download for free now
Camtasia icon

Video length 

The length of your presentation video is likely to be as long as your presentation, but these too should be kept short where possible. The benefit of having a video of a presentation is it can be cut down to only the most essential bits of information. 

While trimming a video may not always be appropriate, you can still shorten your video without undermining your message. Be sure to cut out any ‘dead time’ such as small mistakes, loading screens, and “uhms” & “ahs”. 

You can also make presentation videos feel shorter by making them more engaging. For instance, professional presenters will know if their audience becomes restless, and use it as an opportunity to make a joke or invoke some audience participation. 

In fact, the best presenters can predict when this might happen ahead of time, and include something in their presentation or script that will reignite the audience’s attention. This is exactly what you need to do when making a video presentation.

Metrics that matter

With presentation videos, you’ll want to make sure that your audience is watching the entirety of your content from start to finish. If they’re not, it might suggest your video is either too long or not quite engaging your audience.

10. Microvideos

If you’ve ever wondered how to make short videos for business, the key is to make them as short as possible – which is exactly what microvideos do. 

These short, instructional videos focus on teaching a single and narrow topic. When you create a microvideo, it’s important you show only what is essential in order to understand the concept.

Production time

Creating a video that’s laser-focused on a narrow topic may require a good amount of planning, but a solid plan will make the filming and editing phases much easier. So while a microvideo should take no more than one minute to watch, it could take up to an hour to produce one. 

However, the value of being able to share knowledge and information in less than one minute is high! 

Video length 

According to eLearning and Development Consultant Josh Cavalier, a good length for a microvideo is between six and sixty seconds. Yeah, it’s super short, but they’re called microvideos for a reason. 

Metrics that matter

When it comes to assessing the success of a microvideo, you’ll need to refer to the most human metric of them all: feedback. 

Don’t be afraid to ask your audience what they thought of your video, and how helpful they found it. If you’ve only taken 60 seconds (or less) of their time, then it will be easy for them to provide succinct and comprehensive feedback that you can use for future videos.

Ryan Knott

Ryan Knott is a Marketing Content Strategist at TechSmith, where he creates content about easy, effective, and efficient video creation, editing, and tips and tricks, as well as audio editing for creators of all kinds. He/him.

How to Create a Green Screen Video Effect

How to create a green screen video effect

Green screen technology, the cornerstone of Hollywood blockbusters and daily weather forecasts alike, might seem out of reach for anyone without the budget of a major film studio or the technology of a local TV station. Yet, harnessing the power of chroma key — that’s the fancy term for ‘green screen’ — is probably easier than you think. 

Creating high-quality green screen videos doesn’t call for a lavish set or an extensive technical crew. All it really needs is a smartphone or webcam, some fabric, the right video editing software, and a sprinkle of technical know-how. 

But before we rush into the ‘how-to’, let’s get comfortable with the ‘what’ and ‘why’ of it all. Such as, what exactly is a green screen? And why would you want to use a green screen effect into your video projects?

How does a green screen work?

Green screens work by blending two images or video streams together based on color hues. So, why green? Well, the fact that green (especially bright neon fluorescent green) is the least likely color to match a person’s skin tone or clothes.

Here’s how it works: you record your subject in front of a green backdrop, then use special editing software to replace every pixel of that specific green color with another image or video. This substitution process allows the software to seamlessly put a different background behind your subject.

For example, imagine you or your subject standing in front of a weather map. Viewers can’t see the green screen, because the map ‘replaces’ it. Despite being filmed in a studio, it appears the subject is in front of an actual changing map, allowing for immersive and dynamic visual content.

In essence, green screens provide a shortcut to create complex visual scenes without the need for expensive and time-consuming sets. They offer a magic portal to any environment you can think of, either real or imaginary. As such, green screens often prove to be the most accessible way to bring creative visions to life.

Make your own videos today!

Make professional-quality videos quickly and easily with Camtasia. Record your screen or upload an existing video, then bring the “Wow!” with effects, music, and much more.

Download for free now
Camtasia user interface

How to set up your own green screen background

If you want to know how to make a green screen background, you’ll first need to get a few things together to really pull it off, including:

  • A green or blue piece of cloth/fabric
  • Camera equipment
  • Lighting
  • Video editing software

In this section, we’ll talk a little more about how to make, find, set up, and use each piece of kit. Let’s jump in! 

Step 1: Get a backdrop

To make your own cheap DIY green screen, you’ll need to get hold of a bright green muslin cloth – the brighter the better! It’s important to get a shade that distinctly contrasts your skin tone (and clothes), ensuring you don’t blend into the background. While blue screens do exist, they can cause complications if you have blue eyes or plan on wearing blue clothes. 

If you’re looking for more of a hassle-free setup, you might consider buying a collapsible green screen panel. For example, you can buy these collapsable green and blue screens from Amazon. At just 5′ x 7′, these screens are pretty compact, making them perfect for on-the-go shoots.

how to create a diy green screen video effect

While we’ll talk more about shadows and lighting later, for now, it’s worth noting that you’ll need to stand as close to the screen as possible, without casting a shadow on it. You’ll also need to keep your limbs within the screen’s boundaries. Extending arms or hands beyond the backdrop may result in them abruptly cutting off in the final video.

The ultimate guide to making amazing videos

Watch our video and get great advice on how to start making videos, promotion, and more.

Watch more
techsmith logo

Step 2: Get some stands ready

Now that you’ve got your vibrant green fabric, you’ll need to find a way to prop it up, which means considering your stand options. Stands are essential pieces of kit for hanging green screens and positioning lights.

However, finding the right stand for you and your project is likely to hinge on several factors, such as the weight of your equipment, the space available, and, of course, your budget.

If you’re trying to keep costs to a minimum, photography tripods are as versatile as they are affordable. They usually come with 1/4-inch screw tips, which are handy for mounting lights, clamps, or supporting backdrops. 

For more expansive screens, you might need to invest in a backdrop stand. These typically come with two tripod-like stands and a telescopic crossbar for hanging fabric screens. These might not be the most sturdy pieces of kit, but provided you’re not filming in the middle of a storm (and with a green screen, you don’t need to!) they should do the job. 

Of course, if you’ve got the budget then there’s no harm in going all-out for some heavy-duty C-stands. Although expensive, these stands feature three independent, 120-degree rotatable legs for superior stability. Just one of these stands can support the weight of a telescopic arm on its own, making them perfect for when you need big heavy lights to light up your green screen.

Make your own videos today!

Make professional-quality videos quickly and easily with Camtasia. Record your screen or upload an existing video, then bring the “Wow!” with effects, music, and much more.

Download for free now
Camtasia user interface

Step 3: Pick your camera

Next, you’ll want to pick a camera or webcam that shoots HD-quality video (720p or higher) at a decent frame rate (24 fps or above). Make sure your camera saves files in a format that your green screen software can import. We’ve had good success using an iPhone, but almost any digital camcorder will work. 

When you’re just starting out, recording footage on your smartphone might seem like a daunting task. That’s why we’ve put together some tips and advice for shooting videos on your mobile device, covering everything you need to know about audio, shot composition, and lighting.

However, whatever camera you decide to use, TechSmith Camtasia makes it easy to import and edit videos, as well as create visual effects — you can even add closed captions quickly and easily. 

Step 4: Set up your lighting

Shadows can be the enemy of great green screens, so you want to be sure your background is as well-lit as possible. You should also use a flat green background, as the flatter the green screen is, the easier it will be to remove or replace when you’re editing.

While perfecting your lighting may take a little trial and error, it’s well worth the results.

lighting-green-screen

Don’t worry too much about getting a perfectly lit set, though. The Remove a Color effect (which we’ll talk more about in a moment) in Camtasia is quite forgiving of background shadows. You might need to spend a few minutes tweaking the settings, but it shouldn’t take long to get right.

More advanced lighting for DIY green screen

If you’re having trouble getting the background to disappear, or there’s a slight halo around your subject, you might need to upgrade your lighting. The more balanced your lighting, the better the effect will be.

The easiest thing to try is a couple of hardware store clamp-on work lights with high-output LED bulbs, and something to clamp them onto. Aim the lights so that the green screen is evenly lit and doesn’t have dark or bright areas. Focus your efforts on the area directly behind the person you’re shooting — you’ll be able to crop out the excess space later.

To cast a lot of light, you need a few bulbs in each fixture. You could build your own video lighting rig for less than $100 (see the video below). Or if you’re not into DIY projects, you can shop around for a video softbox. CowboyStudio is a good place to start, but be sure to look for “continuous lighting” as opposed to flash or strobe lighting. 

Whether you buy or build, it’s best to use a diffusion filter for each light. That will help keep your lights from throwing shadows.

This quick video shows you how to build your own lighting kit on the cheap. Even if you’d rather buy your lighting setup, this video features some useful tips of the trade for making your subjects look more natural.


Step 5: Get the right software

In Camtasia, you can use the Remove a Color effect to easily remove your green screen in just a few clicks. But that’s not all, with Camtasia you can change the speed of your video, add music, and create a wide range of other advanced visual effects

In case that’s not enough, Camtasia also offers easy-to-use video templates, as well as a wide variety of assets and helpful resources to take out the guesswork of video editing so that you can become a pro in no time. 

Make your own videos today!

Make professional-quality videos quickly and easily with Camtasia. Record your screen or upload an existing video, then bring the “Wow!” with effects, music, and much more.

Download for free now
Camtasia user interface

Tips to make the most of your green screen

As you’re gearing up to create your very own green screen magic, it’s important to note that your approach, and the techniques you use, matter as much as your tech. In other words, the key to creating professional-looking green screen effects isn’t just about having high-end equipment, it’s about how you use them. 

In this section, we’ll explore some top tips for ensuring you get the most out of your green screen setup. Whether you’re a seasoned videographer or just starting out, these expert insights will help you elevate your projects and make your videos come alive. 

Avoid reflective and green surfaces

When working with a green screen, it’s absolutely crucial that you avoid using reflective or green surfaces within your shooting area. This includes clothing, props, and even shiny jewelry or glasses. Why? Reflective items can mirror the green screen’s color, leading the editing software to confuse them with the backdrop, causing parts of your subject to ‘disappear’ in the final video.

Similarly, green items – whether it’s a tie or a coffee mug – will become ‘invisible’ when you apply the chroma key effect, as the software will replace all things green with your chosen background. Ensuring your scene is free from green and reflective materials will result in a cleaner, more professional output.

Use makeup

Makeup might not be the first thing you think about when talking about green screens, but it plays an essential role in optimizing your video quality. Why? A person’s face can produce a shine that might reflect some of the green. This can not only cause issues in post-production, but it might also make them look terribly pale and sick! 

For best results, consider using matte makeup, which absorbs light and minimizes any reflections that could interfere with your green screen effect. This results in a smoother blending of your subject with the background and a more polished look in your video. Remember, a little bit of prep can go a long way in post-production!

Use a coved green screen

A coved green screen acts as both the wall behind your subject and the ground beneath them. It provides a green background that seamlessly extends from wall to floor in a smooth curved transition. This design eliminates shadows and visible edges, ensuring a more effective chroma key effect.

While a flat green screen will be perfectly fine for a wide range of projects, a coved setup is particularly useful when shooting full-body shots or scenes with dynamic movement. The continuous background allows for a wider range of motion without running the risk of your subject stepping off the green screen.

By investing in a coved green screen, you can enhance the illusion of your chosen environment and achieve a more professional final product.

Make your own videos today!

Make professional-quality videos quickly and easily with Camtasia. Record your screen or upload an existing video, then bring the “Wow!” with effects, music, and much more.

Download for free now
Camtasia user interface

Keep the camera stable

Keeping the camera steady is an important part of any shoot (excluding movies like The Blair Witch Project) and working with a green screen is no different — in fact, it’s probably even more important!

Unintentional movements can disturb the alignment between your subject and the background, which can lead to a jarring visual experience for your viewers. For this reason, investing in a solid and reliable tripod is essential as it will provide a stable base for your camera, ensuring consistent framing while eliminating shaky footage. 

While handheld shots have their place in videography, we wouldn’t recommend them for green screen work as you need incredible precision to correctly align a subject with a virtual background. It’s doable but it can be incredibly difficult. 

So, for the sake of easily and seamlessly integrating subjects with virtual environments, keeping your camera steady is the best way to create a polished and professional video. 

Check your ISO settings

Your camera’s ISO settings play a vital role when working with a green screen. ISO determines the camera sensor’s sensitivity to light, and manipulating it correctly can significantly impact the quality of your footage.

A high ISO setting allows for shooting in low-light conditions but can introduce ‘noise’ or graininess into your footage. When working with a green screen, this noise can complicate the chroma key process and lead to unclear edges around your subject.

To counter this, you should try using as low an ISO setting as possible. You’ll need more light, but you’ll end up with a much crisper image, which will help ensure a smoother green screen effect. 

Keep the subject in focus

Similarly to keeping your camera stable while filming, maintaining a sharp focus on your subjects is just as important. While this rule can be broken in other facets of videography (shout out again to The Blair Witch Project), it can’t be when it comes to filming with a green screen. 

When a subject is out of focus, the edges around them become blurry and blend with the background. This makes it harder for the editing software to differentiate between your subject and the green screen, leading to less accurate and potentially glitchy visual effects in the final video.

To avoid this, make sure that your camera is accurately focused on your subject before your film starts rolling (though we hope you’re using a digital camera for this!) 

DIY Green Screen FAQs

What is a green screen?

Green screens are used to replace the background of a video with a digital or virtual backdrop and are often the most natural-looking way to integrate a subject into your video.
Instead of putting each visual element in its own frame (picture-in-picture), the green screen allows you to blend them. When done right, an audience will never suspect they were two separate video streams.
In more technical terms, “green screen”, “blue screen”, “chroma key”, and “chroma key compositing” all refer to the same concept. Whatever you call it, it’s a post-production technique for compositing (layering) two images or video streams together based on color hues (chroma range).

Why use a green screen?

You’ve probably seen a weather reporter use a green screen to highlight weather patterns, effortlessly pointing to areas on an interactive map that isn’t physically present. But the magic of the green screen goes beyond facilitating a clear forecast. It enables meteorologists to add a personal touch, making their broadcasts more engaging and viewer-friendly.
Regardless of whether you’re a weather reporter or not, a green screen opens up a myriad of opportunities for personalizing your videos. It offers you a unique way to connect with your audience, making your content more relatable across a wide range of different videos.

What videos can be made with a green screen?

Green screens unlock a lot of potential for enhancing the visual effects of a video by creating special effects and transporting characters to different settings.
From indie films to Hollywood blockbusters, and weather forecasts to YouTube videos — the practical applications of green screens knows no bounds. Essentially, any video that requires a customizable background or special effects can benefit from a green screen.

Why are green screens green?

The main reason green screens are green is because it’s a color that doesn’t usually match skin or hair tones, reducing the risk of the subject blending into the backdrop.
The particular shade of green found on green screens is also easily detected by cameras and editing software, which helps simplify the background replacement process. Plus, digital cameras are extra sensitive to green, which helps in creating a cleaner and more polished video effect.

How to Resize an Image the Right Way

How to resize an image?

Whether you want to build user documentation, give a presentation, or create a website, high-quality, appropriately-sized images will help you demonstrate competence and build trust with your audience.

There are many ways to resize an image, but not all will have the same results. If you don’t resize it correctly, your image could end up looking stretched, blurry, or pixelated, making your finished product appear sloppy and unprofessional. 

If you work with images often, knowing how to resize them correctly is critical. The good news is, it’s also quite simple!

Here’s what you’ll learn in this post:

Easily resize images and screen captures

Ready to quickly resize images without losing quality?

Download a free trial of Snagit
Snagit icon

Why it’s important to resize images without losing quality

With the power to grab attention, evoke emotions, and convey messages, images have become crucial to online marketing and communication. 

Whether you’re adding product photos to your website or posting on social media, poor image quality will undermine your business. This is why knowing how to resize an image without losing quality is critical in maintaining the visual appeal and effectiveness of your content.

It can be easy to forget, but the quality of your imagery greatly impacts your audience’s experience. Think about it; there’s a reason people don’t watch pirated movies… 

While high-quality images can make content look professional (and credible!), blurry or distorted images do the opposite, and work to make your content appear amateurish or untrustworthy. Even for something as seemingly trivial as the profile picture on your social media account, the quality of your images can directly impact how your audience perceives you and your brand.

This is why understanding how to resize an image and keep quality can make all the difference. With proper resizing techniques, you can ensure your images retain their sharpness, clarity, and color accuracy, no matter what dimensions you need them to be. 

This allows your images to continue to engage your audience, convey your message effectively, and represent your brand in the best possible light. 

It’s also worth noting that being able to keep image quality when resizing isn’t just about aesthetics, it also helps speed up the load times of websites, which boosts SEO ranking and improves the overall user experience. In other words, it’s a win-win-win! 

Easily resize images and screen captures

Ready to quickly resize images without losing quality?

Download a free trial of Snagit
Snagit icon

How to resize an image without stretching it

When working on a document in a program like Microsoft Word or Google Docs, it’s tempting to drag the corners of an image to make it larger or smaller. 

Don’t do it!

How to resize an image without stretching it?

Dragging the corners of an image to resize it can make your image look distorted and blurry.

When scaling your image, it’s crucial to maintain the ratio of width to height, known as aspect ratio, so it doesn’t end up stretched or warped. If you need a specific width and height, you may need to both resize and crop your image to get the desired result.

We’d recommend using an image editor to resize your photos correctly. For basic image editing, including cropping and resizing, TechSmith’s Snagit is the perfect solution. 

Open your screenshot or image in the Snagit Editor, select “Image” from the top menu, then “Resize Image.” Before changing the dimensions, notice the lock symbol to the left of height and width.

How to properly resize an image

Prevent an image from appearing stretched by locking the aspect ratio when changing the width or height.

With the lock activated, Snagit maintains the image’s original proportions. Now, you can adjust the height or width of your image to the desired dimensions without needing to worry about stretching or warping it.

How to resize an image without losing quality

There’s a big difference between making a photo smaller (which is pretty easy and risk-free) and making it larger (which should be done with more care). 

Most of the time, reducing an image’s size or dimensions won’t affect the image’s quality. However, making an image larger than its original dimensions can be tricky as it can have a detrimental effect on the overall quality. 

How to resize images

In fact, rather than trying to increase an image’s size — which is almost never a good idea — you should start with a high-resolution image, one that’s larger than you need it to be. Why? Because all you have to do then is simply crop it or make it smaller without worrying about the image quality. 

However, it’s important to note that this is only true of bitmap images such as JPEGs, GIFs, or TIFFs. Vector files such as EPS or SVG can be resized and made larger or smaller without any loss in picture quality. 

Bitmap files tend to be photos or screenshots while vector images are typically graphics such as the one at the top of this post.

Tips to resizing images 

Dimensions

When adjusting the dimensions of an image, there’s no one-size-fits-all solution for the ‘perfect’ width or height. In fact, the best dimensions for an image will depend on several factors, such as the placement of the image on your website and the device most commonly used by your visitors (desktop or mobile), among others.

Generally speaking, dimensions between 600 to 1200 pixels should be a good fit for most screens without compromising on quality. However, you should tailor these dimensions based on your specific use case. 

For example, the dimensions needed for an image to be used in a blog post will most likely be very different from those of a webpage banner. Ultimately, the goal is to ensure that your resized image looks crisp and clear, without causing any layout issues or slowing down your website’s load times. 

Remember, maintaining the correct dimensions is an essential part of how to properly resize an image, helping you to avoid distortion and maintain visual appeal.

Ready to Embrace Asynchronous Communication?

How do we have fewer, better meetings? We decided it was time to reboot our meeting culture and communication norms at TechSmith.

Download now!
cover of report about asynchronous communication

Lowest file size vs quality

The key to resizing images is finding the sweet spot between reducing the file size and maintaining the perfect quality. While you want images to load quickly and take up minimal storage space, you also want to make sure they look good.

As a general rule, we’d suggest aiming for a file size of 100KB or less. This size tends to provide a good balance between image quality and file size, in most use cases. While there’s a chance your image will lose some of its quality when reducing its file size, when done right, it’s unlikely anyone will notice.

Ultimately, anyone who knows how to shrink an image without losing quality will know that it’s a process that involves a bit of give-and-take. Be prepared to experiment with different settings in your image editing software until you find the right balance.

Easily resize images and screen captures

Ready to quickly resize images without losing quality?

Download a free trial of Snagit
Snagit icon

JPG vs PNG

Understanding the differences between JPG and PNG files (and all file formats) is essential for finding the best format for your images as both file types have their own characteristics and specific use cases. Knowing when to use each can significantly affect the outcome when you’re learning how to resize a photo without losing quality.

JPG files are typically easier to resize and compress compared to PNG files. If you need to compress a PNG file, it’s often better to convert it to a JPG beforehand. This change can help maintain high image quality while significantly reducing the file size.

There is, however, one very important exception to this rule. If any parts of your PNG image are transparent, you’ll need to keep the image as a PNG to maintain the transparency. Why? Because JPG files don’t support transparent pixels. However, you can still optimize the image by adjusting its pixel size while balancing file size and quality toin order to preserve the transparency feature.

On a similar note, if you’re trying to create an image with a transparent background, you might want to check out our article on how to remove the background from an image.

Resizing an image, the FAQs

Does resizing an image affect its quality?

It definitely can! Generally speaking, making an image smaller won’t impact the quality, but an image can suffer quality loss when scaled beyond its original size.

What is the difference between image size and image file size?

It can be easy to confuse image size with image file size. The image file size refers to how much space the file takes up on your computer and is measured in bytes. However, image size refers to the image’s dimensions, commonly measured in pixels, inches, or centimeters.

What does DPI mean?

DPI stands for “dots per inch” and describes the resolution of an image. PPI or “pixels per inch” is also used to describe image resolution.

What is an aspect ratio?

The aspect ratio is the width of an image compared to its height. For example, a photo with a 1:1 aspect ratio would be square, with equal width and height.

Why does my image get blurry when I make it smaller?

When you shrink an image, you reduce its pixel information, which can lead to a loss of detail and make it look blurry. This blurriness will be most noticeable if the image is re-enlarged, as the missing details can’t be restored. However, some resizing techniques can help minimize this blurriness.

How to change the image size without stretching it?

To change the image size without stretching it, you should keep the aspect ratio — the proportion between the width and height of the image — the same.
Most editing tools have an option to ‘maintain aspect ratio’ when resizing, which automatically adjusts the height when you change the width, and vice versa.

How to unstretch a photo?

Unstretching a photo is easier than you might think — all you need to do is change the aspect ratio back to its original settings. You can do this in an image editing tool by manually inputting the original dimensions, or using an ‘undo’ function when possible.
It’s important to note, however, that if the image in question has been saved and closed in its stretched state, some image data (and therefore quality) may have been permanently lost.

Editor’s Note: This post was originally published in January 2017 and has been updated in June 2023 for accuracy and to include new information.

Danielle Ezell

Danielle Ezell is a Marketing Content Strategist at TechSmith, where she writes about effective workplace communication, offering tips and strategies for using images and videos to collaborate more effectively in hybrid and remote environments.

Mastering Work Transitions: A Comprehensive Guide to Effective Handovers

Illustration of two suitcases with work on one side and sunshine on the other.

Have you ever noticed how the days leading up to a vacation seem to speed up and quickly become packed with urgent tasks and deadlines? Then to top it off, you have to find time amidst the chaos to prepare a meticulous handover that ensures everything will run smoothly during your absence.

Whether it’s a vacation, parental leave, or any extended leave of absence, people will always need to take time off work — and rightfully so! However, despite how regularly people take time off, the art of producing an effective handover seems elusive and often becomes more complex than it needs to be.

But fear not! With our seven-step guide, we’ll arm you with everything you need to facilitate smoother and more efficient handovers so that you can truly enjoy your time off, knowing that your projects and responsibilities are in good hands.

Communicate better with your team now!

Snagit is the secret tool to a successful hybrid and remote-first workplace.

Download now!
Snagit icon

1. Establish documentation and effective knowledge sharing

Try to get into the habit of regularly (and meticulously) documenting recurring workflows and processes. This kind of detailed documentation can prove invaluable when you need to delegate tasks to colleagues, even at short notice. 

Similarly, maintaining an organized filing system for documents, files, and other information is essential, especially when preparing for a handover.

Even if your company is yet to implement a unified filing system, you should keep your files logically organized and easy to find. Doing so will make even the most complicated tasks easier for anyone stepping into your role. 

When creating a comprehensive handover, you might also consider providing videos and screen recordings that complement your text guidance. For example, video content can often do much more than text alone when it comes to explaining how to perform certain processes and use specific tools. 

If there’s a lot to cover, then providing short videos is usually better than creating one really long one. However, sending someone lots of different video links can be messy and overwhelming. This is where Screencast Collections comes in. 

Ready to Embrace Asynchronous Communication?

How do we have fewer, better meetings? We decided it was time to reboot our meeting culture and communication norms at TechSmith.

Download now!
cover of report about asynchronous communication

With Screencast Collections, you can quickly share a set of media with just one link. You can also set a collection up to enable members of your team to contribute and upload content to it, which is a great way to encourage knowledge sharing and keep content up to date for the next time someone is away. 


2. Give yourself a head start

If you’re planning to delegate all your work on the last day before your vacation, before rushing home to pack, then we’re afraid to say that’s not the most effective handover strategy. 

Allocating sufficient time to produce a handover is absolutely crucial for ensuring it’s as successful and seamless as possible. How much time do you need to prep? Well, that will depend on a few things, including: 

  • The duration of your absence
  • The familiarity of your replacement with your role
  • The projects and tasks due while you’re away

Given that vacations and planned absences are usually scheduled in far in advance, there should always be enough time to ensure a smooth, if not flawless, transition. 

While you should start planning, or at least thinking about, your handover on the day your time-off request is granted, you should also discuss it with your team or designated substitute at least two weeks before your vacation. This will help ensure everyone is prepared for your time off.

3. Implement a handover protocol

A handover protocol will be your new best friend for both you and the person stepping into your shoes. This relatively simple document should outline the most critical elements that you’re handing over, including: 

  • Ongoing projects
  • Pending deadlines
  • Key contacts
  • Access to essential documents and manuals 

This is a kind of working-progress checklist that you can keep updated as your vacation approaches. It’s a simple concept, but one that will be worth its weight in gold in ensuring nothing is overlooked or forgotten. 

Communicate better with your team now!

Snagit is the secret tool to a successful hybrid and remote-first workplace.

Download now!
Snagit icon

4. Use screen grabs & recordings

They say that a picture is worth a thousand words, but when it comes to handovers, they’re worth a thousand hours! 

Rather than spend time writing lengthy descriptions to explain tasks and processes, consider using screenshots and short screen recordings. Visual instructions can save a lot of time and effort for both you and your substitute. 

Visuals also provide additional context and nuance to your instructions that could be overlooked in a text-based document. While screen recordings are great for explaining how to use software or navigate a website, screenshots can make for excellent step-by-step instructions.

With a screen recorder like TechSmith’s Snagit, you can enhance screenshots with annotations, bullet points, and graphics. Snagit even lets you create informal screen recordings, allowing you to demonstrate typical workflows and processes. 

5. Opt for a personal handover (and record it!)

Whether you’re operating from an office or working remotely, aim for a direct exchange with your stand-in during the handover. A face-to-face conversation, either through a video call or in the office, will make for a much more effective handover compared to one that relies solely on digital instructions and documents. 

You might even consider scheduling several short appointments instead of one lengthy session. In doing so, you’ll prevent fatigue (for you and your substitute), which might otherwise lead to important details being overlooked.

If you’re involved in particularly intricate work then we would definitely recommend breaking your handover up into manageable chunks, allowing time to answer questions and clarify any uncertainties. 

If you do end up giving your handover via a Zoom call, then be sure to record it! This will prove to be a valuable resource that your stand-in can refer to while you’re away, as and when they need to. 

6. Notify key clients & stakeholders of your absence in advance

Before you start packing your suitcase, be sure to tell your clients (and important stakeholders) that you’ll be taking some time off, and use that opportunity to introduce them to your substitute. 

As well as being a professional courtesy that shows consideration for your clients and the people you work with, it will also prevent any unwelcome surprises or confusion on the client’s side.

Communicate better with your team now!

Snagit is the secret tool to a successful hybrid and remote-first workplace.

Download now!
Snagit icon

7. Set up out-of-office notices for emails and phone

As well as notifying people that you’ll be away, you’ll also need to schedule your out-of-office (OOO) message. 

We’d suggest writing and scheduling this in advance as well. Because if you leave it to the last minute, you might forget about it altogether! And who could blame you? The last day in the office is always a whirlwind, which is why it’s best to tick this task off early on.

There’s also some key information that both your out-of-office email and voicemail should mention, including: 

  • Duration of your absence
  • Contact information for your replacement

Be sure to proofread your message too before it goes out. Any typos or errors that you miss could make you look unprofessional to anyone that notices. 

Rather than setting up an OOO voicemail, you might find it’s more useful to redirect your number either to your replacement or a central office. Whoever you redirect your calls to, be sure to let them know in advance! 

Primary goals of a work handover

There are a lot of people that stand to benefit from a well-executed handover, including you, your colleagues, your company, and your clients. 

With your responsibilities and projects in safe and capable hands, you can rest easy during your hard-earned time off. In an ideal scenario, your clients will hardly notice your absence! 

But most importantly, you’ll return to an orderly workspace after your vacation without any missed deadlines or stalled projects. After all, a chaotic and stressful first day back can quickly erode the restorative effects of a vacation — and who needs that?

Danielle Ezell

Danielle Ezell is a Marketing Content Strategist at TechSmith, where she writes about effective workplace communication, offering tips and strategies for using images and videos to collaborate more effectively in hybrid and remote environments.

What Makes a Good Tutorial Video?

What makes a good video tutorial

In a world that’s increasingly digital, people are turning to the internet to discover new skills, learn how to use products, and quench their curiosity. 

It’s no surprise that, according to a study by Google, users are three times more likely to watch a tutorial video on YouTube than read written instructions for a product. Why would anyone want to drudge through paragraphs of dense text when they can watch a step-by-step video that visually guides them through the process?

Tutorial videos, and instructional videos, have become an integral part of the digital learning experience. They serve as a handy tool, not just for individuals seeking knowledge, but also for businesses striving to communicate effectively with their customers. Be it technology, healthcare, education, or entertainment, tutorial videos can simplify complex concepts, and turn tedious tasks into engaging experiences.

Make your own tutorial videos today!

Download Camtasia and FREE templates to quickly and easily make your own tutorial and training videos.

Download now
Camtasia icon

But what is it that makes a tutorial video truly stand out? What elements need to be incorporated to ensure that the video is not just informative, but also engaging and easy to follow? In this guide, we’ll delve into the essentials of creating good video tutorials, and show you how to make a tutorial video, step by step. 

Whether you’re an entrepreneur looking to explain your product, an educator aiming to make learning fun, or simply someone trying to share your skills with the world, we’ve got you covered.

But before we dive into the ‘how’, it’s important to understand the ‘what’. By knowing exactly what a tutorial video is, you’ll have a stronger foundation to build on and be in a better position to fully grasp the key components of creating a fantastic tutorial video.

What is a tutorial video?

At its core, a tutorial video is a multimedia resource that is specifically designed to teach or guide viewers on how to complete a task, understand a concept, or use a product or service. It’s a dynamic digital tool that provides clear, concise, and visually engaging instructions to help viewers learn.

The true magic of a tutorial video lies in its ability to answer the ‘how-to’ question in the most efficient way possible. Tutorial videos do much more than just deliver information, they walk viewers through processes one step at a time. By providing practical insights, this thorough approach reinforces the learning experience and delivers real value to the viewer. 

What’s more, they’re incredibly versatile — a video tutorial can be about anything imaginable! If there’s knowledge that needs sharing, a process that needs demonstrating, or a concept that needs explaining then a tutorial video can do just that, regardless of the subject matter. 

While a business might use tutorial videos to explain how their product works to their customers or create training videos for their employees, a baker could show you how to make the world’s tastiest chocolate cake. From how to send an email, to how to send objects into space — there’s no limit to what a video tutorial can teach.

And, as 31.3% of internet users watch at least one tutorial video each week, there’s no doubt that people find them useful for learning new things.

Make your own tutorial videos today!

Download Camtasia and FREE templates to quickly and easily make your own tutorial and training videos.

Download now
Camtasia icon

How to make a tutorial video?

If you’re looking to create tutorial videos of your own, then there are several steps you need to take to ensure the content you create is the best it can be. Essentially, this all boils down to providing value to your viewers. 

As a concept, putting your viewers first is simple (and it really is simple) but there are some best practices to follow that will help ensure you’re keeping your content focused on providing the right information in the best possible way. 

Let’s take a look at the key steps to producing a good tutorial video: 

Write a script

Once your storyboard is ready, you’ll need to write a script. This will serve as the backbone of your video; guiding the content, the flow, and overall tone. An effective script transforms your storyboard from a mere outline into a fully fleshed narrative, setting the stage for content that will keep your audience’s eyes glued to the screen.

Be sure to use simple language that’s easy to understand. Remember, the goal is to educate your audience, so be sure to avoid jargon and complicated phrases that could be confusing.

You’ll also want to make sure that the video you create accurately reflects you or your brand. So you should write in the same style and tone of voice that you would use when speaking to your customers. 

Once you’ve written a first draft, we’d recommend reading it out loud at least once to make sure it sounds natural. The way we write is often different from how we speak, so you might need to make a few changes to avoid sounding like a robot — or worse, boring!

For the actual content of your script, start with a brief introduction that outlines what the viewers can expect from the video. Then, lead into the body of the video, where you detail the steps or processes. Be sure to break down complex tasks into smaller, manageable steps, making it easier for your audience to follow along.

Finally, it’s important to conclude with a summary of the key points and a clear call to action (CTA). If you want your viewers to subscribe to your newsletter, tell them. If they could benefit from your other videos or resources, share them. This is your chance to suggest what they should do next!

While not strictly necessary, depending on the complexity of your video, you may also want to consider creating a storyboard. This is the fundamental plan for a video and will help you keep the content on track, rather than relying on impromptu ideas while filming. 

You can watch the video on this topic at the top of this post, to listen to the podcast episode, hit play below, or read on for more…

The Marketer’s Ultimate Guide to Video

In our FREE ebook, we’ve put together practical strategies to get out of the woods and create engaging, powerful video content on your own that reaches your audience.

Download now!
techsmith logo

Set up your equipment

Crafting a great tutorial video isn’t just about having an excellent script or a comprehensive storyboard. The quality of your video also depends significantly on the technical aspects, namely the equipment you use and how you use it — but you probably knew that already. 

While we don’t believe that the quality of a video rests solely on expensive equipment, making sure your video has good audio and visuals can make it more engaging and professional, ensuring your message is delivered effectively. 

Whatever equipment you’re using, the key to getting the most out of it lies in how you set it up. Even the best camera in the world isn’t going to capture anything in a room with no light. With that in mind, let’s talk a little more about how to set up your equipment for the best results:

Microphone

The importance of clear, crisp audio in a tutorial video cannot be overstated. Your audience needs to hear your instructions clearly to follow along effectively. 

If you can, it’s worth investing in a good-quality microphone that can capture your voice without any distortion or background noise. But, you don’t have to spend a fortune. You can get some very good quality microphones for less than $100. 

Position it close enough to capture your voice clearly, but far enough to avoid any harsh sounds. Be sure to run a few mic checks to ensure the sound is just right.

No matter what microphone you’re using, you should always try to record your audio somewhere nice and quiet. The less external noise your mic picks up, the better it’ll be for your video. 

Webcam

A high-resolution webcam can deliver a clear and sharp image that adds a professional touch to your tutorials. However, the money you spend on an expensive camera will be wasted if you don’t set it up properly.

Before you push the record button, be sure to place your webcam at eye level. This will make your video feel more natural as it gives the impression that you’re speaking to your audience face-to-face. You should also ensure your background is free of clutter, and ideally a neutral color.

Lighting

Getting the perfect lighting in your video is arguably much more important than getting the best webcam. With good lighting, you’ll add depth to your footage and ensure you and your products are clearly visible. 

Natural light is always best, but if your busy schedule keeps you busy in the daytime — or you’re in the North Pole for winter — then you might want to consider getting a ring light or softbox. 

Be sure to face your source of light (so that viewers see more than your silhouette) and make sure it evenly illuminates the area you’re recording to reduce harsh shadows and overexposed areas.

Make your own tutorial videos today!

Download Camtasia and FREE templates to quickly and easily make your own tutorial and training videos.

Download now
Camtasia icon

Edit your tutorial video

Creating a tutorial video is only half the battle; the other half lies in the editing. It’s here where you’ll polish your content, reinforce your message, and make your video truly engaging. Even the smallest enhancements can significantly improve the viewer experience. 

Here, we’ll discuss several key editing aspects that can take your tutorial videos to the next level. Let’s get started! 

Add a table of contents

Including a table of contents in your tutorial video helps viewers navigate your content with ease and find the parts of the video that they’re most interested in. This is especially useful for longer videos that answer multiple questions or explain processes with several steps. 

Some tables of contents will simply display the timestamps of different sections at the very beginning of a video. However, with tools like Techsmith Camtasia, you can easily create interactive tables of contents that allow users to quickly jump between sections at the click of a button. 

Highlight/emphasize important aspects of your tutorial

Emphasizing key points or steps in your tutorial helps viewers recognize the more important aspects of your video without getting lost in the details. 

Zooming, spotlighting, and adding annotations are just some of the creative editing tools in Camtasia that you can use to draw your audience’s attention and highlight specific points or parts of the recording.

Another great way to highlight important parts of a presentation or screen recording is to make the most of Camtasia’s cursor effects. By enlarging, highlighting, or creating a spotlight around your cursor, you can effortlessly draw the viewer’s attention to specific on-screen actions, making complex processes easier to follow. In doing so, you’ll ensure that the most important information isn’t missed.

Make your own tutorial videos today!

Download Camtasia and FREE templates to quickly and easily make your own tutorial and training videos.

Download now
Camtasia icon

Add some background music

Adding music to your video can go a long way to making your tutorial more engaging. While the right music can help set the tone and fill in any silence, it’s important to make sure it doesn’t distract from the visual content or your narration. 

If the background music is too loud, or too “in your face” (or ears!), it can do more to detract from your video than add to it. With this in mind, you might need to adjust the volume of the music and make the actual video louder, to maintain the right balance between audio tracks. 

It’s also important to choose audio that complements the tone of your tutorial. You’ll be glad to know that Camtasia offers a massive library of royalty-free music, categorized by genre and mood, that you can use as the background to your video. 

Add captions

By adding captions to your videos, you ensure that your content is accessible to the widest possible audience. From people with hearing impairments to those watching your video on their phone in a public space, captions help ensure that everyone can follow along with your content no matter who or where they are. 

Captions also improve comprehension as it’s easier to follow along and digest information when it’s being read as well as said out loud. Tools such as Camtasia, and TechSmith Audiate, can help you create captions for your videos automatically — so there’s really no reason not to include them in your video! 

Number each step

If your video contains a lot of different steps, we’d recommend numbering each of them as you go along, as this will help viewers follow along more effectively. Numbers provide structure to your content and can make complex procedures easier to understand — a bit like numbered subtitles in a how-to guide. 

Add transition sounds

As well as adding numbers to each step, transition sounds can help show the change between one step and another, which will help improve the overall flow of your video and make it come across as more professional. 

While this may seem like a small thing, sometimes it’s the smallest details that have the greatest impact — especially when you pay attention to all the details. 

However, you should also be careful not to overdo it. As with a lot of editing effects, too much tampering can make your video look amateurish, and you’ll risk distracting and confusing your audience. With this in mind, it’s usually better to add effects (audio and visual) with a “less is more” approach.

Make your own tutorial videos today!

Download Camtasia and FREE templates to quickly and easily make your own tutorial and training videos.

Download now
Camtasia icon

Publish your tutorial video

If you’ve managed to come this far in creating a captivating tutorial video, then we salute you! But there’s still one more step you need to take before you can put your feet up: publish your video tutorial!

These days there are so many different places where you can upload your video, and your publishing platform of choice can dramatically affect your video’s visibility, engagement, and overall success. 

With that in mind, here’s a quick roundup of some of the platforms where you can host your video:

YouTube

YouTube is the second largest search engine in the world, making it an excellent platform for video tutorials. Publishing your own videos is as easy as logging in, clicking on the ‘Create’ button, and selecting ‘Upload video’.

Because YouTube has such a massive user base, there is an opportunity for your videos to reach a huge audience. However, there’s also a chance it will get lost in the endless stream of great video content. So don’t forget to add an enticing title, a detailed description, and relevant tags to help your video reach the right people.

For more tips, we also have a beginner’s guide on how to make a YouTube video

Social Media

Social media platforms like Facebook, Instagram, LinkedIn, and Twitter are also great places for sharing your video tutorials. It’s worth remembering that each platform is used by different people and for different reasons, so choose the one that aligns best with your target audience. 

Uploading a video is usually as easy as clicking on the ‘Post’ or ‘Share’ button and selecting your video file. Social media platforms can also propel audience engagement rates, and the ability for users to quickly share content can help your tutorial spread virally.

TechSmith Screencast

TechSmith Screencast is a specialized platform for sharing screen recordings and videos. With seamless integration with Camtasia, you can easily publish your tutorial videos directly from your editing suite. Just click ‘Share’ and choose ‘Screencast’. 

The benefits of Screencast include easy video management, the ability to control who views your content, and the option to embed your videos on blogs or websites. While your video probably won’t go viral, there may be a time that you don’t want the world to have access to your content. 

Screencast is a great choice if you want a dedicated, professional space for your videos where they can be easily shared, viewed, and engaged with.

Make your own tutorial videos today!

Download Camtasia and FREE templates to quickly and easily make your own tutorial and training videos.

Download now
Camtasia icon

Tips to make a great tutorial video

So now you know the basics of how to make a tutorial video, and where to publish it. While you’re probably raring to get started — and practice is the best way to hone your video making expertise — there are a few more things we think you should know. 

In this section, we’ll explore some tips that will help your video tutorials go from good to great. 

Pick a good title for your tutorial video

Giving your video the right title is more important than you might think. As it’s the first point of contact between your video and potential viewers, the best titles intrigue users and encourage them to click on your video. Meanwhile, a poorly chosen title may cause users to scroll past it, even if the content is top-notch.

Compelling titles are concise, descriptive, keyword-rich, and should give viewers a clear idea of what to expect from the video. Include keywords that your audience might use when searching for the information your video provides. This will improve your video’s visibility not only on YouTube but also on Google. 

For example, if you’re creating a tutorial on using a specific feature in a software program, a good title might be “How to Use Feature X in Software Y: A Step-by-Step Guide”. This title is straightforward, informative, and likely matches the search queries of users looking for guidance on that particular topic.

It might be a relatively simple step, but it’s not one that you can afford to miss. If you do plan on uploading your video to a platform like YouTube, you should also spend some time working on a good video thumbnail to further entice potential viewers. 

Use both video and narration

Leveraging video and narration in your tutorial is a powerful way to deliver information more effectively. This dual-channel approach caters to different learning styles, ensuring your tutorial can be understood and appreciated by a broader audience.

Video visuals provide a concrete demonstration of the steps or processes being taught. Seeing the steps in action can make the procedure much easier to follow, especially for complex tasks. Whether you’re using screen recordings, animations, or live-action footage, the visual elements of your video are crucial for showcasing the ‘how-to’ part of your tutorial.

Meanwhile, the narration provides essential context and explanation that visuals alone can’t deliver. It offers the opportunity to explain why certain steps are taken, provide background information, and give additional tips. A clear and well-paced narration enhances the viewer’s understanding and helps maintain their engagement throughout the video.

However, it’s vital that the video and the narration work together in harmony. What’s shown should align with what’s being said, with each element reinforcing the other. When it’s done right, the combination of video and narration can make your tutorial engaging, informative, and easy to follow.

Make your own tutorial videos today!

Download Camtasia and FREE templates to quickly and easily make your own tutorial and training videos.

Download now
Camtasia icon

Invest in a good microphone

Sound quality plays a significant role in the overall impression and effectiveness of video content. Poor audio can distract from your message, make your tutorial harder to follow, and even cause viewers to click away. 

On the other hand, the best microphones for recording video will capture sound more accurately and deliver clearer, more professional-sounding audio. They reduce background noise and enhance the clarity of your voice, making your narration more engaging and easier to understand.

So, naturally, investing in a professional microphone will make a huge difference to the quality of your audio and will work to keep your audience focused and engaged. 

That said, it’s important to note that while a good microphone can improve your audio quality, it’s not a necessity for making a great video tutorial. If you’re just starting out, or working on a budget, there are plenty of ways to improve your audio without breaking the bank, such as:

  • Using a quiet, echo-free room for recording
  • Speaking clearly and slowly
  • Using editing software to clean up your audio 

At the end of the day, the most important thing is the value you’re giving through your tutorial. Provided you’re delivering useful, clear, and engaging content, viewers will appreciate your video, even if the audio isn’t studio quality.

Making tutorial videos, the FAQs

How long should a tutorial video be?

The ideal length of a tutorial video depends largely on the topic. However, it’s generally best to keep videos as short and sweet as possible. Aim for between 3–5 minutes for simple topics and up to 15–20 minutes for more complex subjects, always focusing on clarity and value.

Can I make a tutorial video for free?

Yes, you can! There’s a wide range of free software for screen recording and video editing, though they usually offer limited functionality. For anyone looking to create a lot of videos, more powerful software, such as Snagit and Camtasia, can be well worth the investment — and both offer free trials!

How do I record my screen for a tutorial video?

Software like Camtasia or Snagit allows you to capture your entire screen, a selected area, or a specific window, and have the ability to capture audio and webcam footage simultaneously.

Do I need fancy software or equipment to make tutorial videos?

Not necessarily… While professional tools can enhance your video quality, you can create effective videos with basic software, a decent microphone, a thought-out plan, and good lighting. The most important element is clear, helpful content that provides value to your viewers.

Kara Swanson

Marketing Content Specialist at TechSmith. I know way more about tea than any human being ever should.

How to Get More Comfortable on Camera

Learn how to get comfortable on camera

In today’s digital age, video communication has become a major part of day-to-day life. From virtual meetings and online interviews to social media, video content creation and even Facetime calls with friends and family, we use video more than ever before. However, the expectation to be on camera — and the apparent normality of it — doesn’t necessarily make it any easier. 

While knowing how to be comfortable on camera has become an essential skill for many, there are still those who struggle with camera shyness. In fact, the very idea of being on camera can, for some, be quite terrifying.

This feeling of digital stage fright can be difficult to overcome, however with a few simple techniques and a little practice, anyone can become comfortable and confident on camera. 

Don’t believe us? 

Well, it’s worth remembering that some of the world’s greatest actors and performers have never gotten over their stage fright (including Adele and Ewan McGregor) but they have learned to control it.

So whether you’re an introvert by nature, feel self-conscious on camera, or simply don’t know where to start, this article will provide you with tips and tricks to help you feel at ease and confident when you’re in the spotlight.

Make Professional Videos Easily

Camtasia is the best screen recorder and video editor on the market. Create content your viewers actually watch.

Download now
Camtasia icon

What is camera shyness?

Camera shyness is a natural feeling

Feeling uncomfortable on camera is perfectly natural. In fact, the very act of being on video brings out three very common fears associated with performance anxiety, including: 

  • Camera shyness: This is often about self-image and the fear of being judged for how you look on camera.
  • Public speaking anxiety: On the other side of the same coin, this is the fear of being judged while speaking in front of a group of people.
  • Stage fright: While similar to camera shyness, stage fright is about action and is the fear of performing in front of an audience. 

Video communication brings together all three of these fears, creating a perfect storm for social anxiety. When you’re on camera, your image, voice, and actions are all recorded and on display, which can exacerbate existing self-consciousness and highlight nervous ticks – even the ones you didn’t know you had! 

It’s also worth noting that video often feels more permanent and formal than other forms of communication. For instance, when you’re speaking in person, you have the benefit of nonverbal cues, such as body language, and the ability to adjust your message in real time. 

For many, the permanency of being recorded can add to the fear of making irreparable mistakes. It’s scary stuff – but knowing what part of being on video causes you the most anxiety can help you focus on making steps to feel more comfortable.

Camera shyness is very common

If you feel camera shy, it’s important to remember that you’re not alone – it’s actually incredibly common. As the line between our personal and professional lives continues to blur, more people are communicating via video than ever before. 

This doesn’t mean that everyone loves being on video (quite the opposite) but it does mean that a lot of people are managing to overcome their anxieties, which means you can too!

So let’s get one thing straight: Feeling camera shy is not a flaw and you’re not a failure for feeling uncomfortable on the screen – you’re just human. It’s completely natural to feel affected by the common fears we’ve mentioned above. In fact, recognizing how these anxieties affect you is the first step to overcoming them.

Make Professional Videos Easily

Camtasia is the best screen recorder and video editor on the market. Create content your viewers actually watch.

Download now
Camtasia icon

Try taking some time to think about what it is that makes you feel most uncomfortable about being on camera. Are you worried about being judged by your appearance or the sound of your voice? Does the idea of public speaking give you chills? Once you’ve identified the root cause of your discomfort, you can start to take steps to address it and develop strategies to feel more comfortable on camera.

Remember, too, that everyone has their own unique set of anxieties and insecurities, and there’s no one-size-fits-all solution to overcoming camera shyness. But by recognizing that your discomfort on video is a common issue and taking the time to understand why it scares you, you can start to develop a plan to conquer the camera.

You can watch the video on this topic at the top of this post, or listen to the podcast episode, by hitting play below, or read on for more…

Tips to be more comfortable on camera

Now that you have a better understanding of why you might feel uncomfortable on camera and how to move forward, let’s explore some practical tips for being on camera and feeling more comfortable on video. From making small adjustments to your environment, to learning techniques to calm your nerves and present yourself more confidently, we’re going to look at how to get comfortable recording yourself.

While it can take some time and practice to feel completely at ease on camera, incorporating these tips into your video-making process can make a big difference in how you feel and come across to your audience. 

So, take a deep breath, grab your camera, and let’s get started!

1/ Plan out your main talking points

The key to dealing with pressure is being prepared, and making sure you know exactly what you want to say before making a video, giving a presentation, or hosting a meeting, is a great way to stay ahead of the game. 

Think about it, you’ll be much more relaxed when you’re not trying to think of what to say next. While you might want to consider writing out a full script, even having a bulleted list of talking points will go a long way to help prepare — both practically and mentally — for being on film. 

In other words, being prepared will make you feel prepared, and when you feel prepared, you’ll feel more confident. It’s that simple.

Make Professional Videos Easily

Camtasia is the best screen recorder and video editor on the market. Create content your viewers actually watch.

Download now
Camtasia icon

2/ Rehearse!

Another essential part of being prepared to make a video is rehearsing it. We don’t just mean rehearsing your script in front of the mirror (though that will help as well) but rehearsing the whole process from start to finish. 

For the best results, you should try creating a kind of ‘dummy video’ to not only get used to being on camera and practicing what you want to say, but to familiarize yourself with the tools and software you’ll be using. 

Whether you’re recording a training video or giving a live presentation via Zoom, it’s really important to know what you’re doing. 

There’s nothing worse than finding yourself flailing at the beginning of your video because you’ve accidentally put your microphone on mute and you can’t figure out how to share your screen. It’s the kind of vicious cycle that will only make you feel more nervous and flustered. 

And keep in mind, as you get more comfortable on camera, you’ll likely be able to skip this step and just get to creating the real thing.

It is, of course, just as important to rehearse your script but that doesn’t mean memorizing it word-for-word. Instead, focus on key points and the message you’re trying to convey.

This is a great trick for how to act natural on camera, rather than a script-reading robot! You’ll also be less likely to trip up if you do forget a point, as rather than trying to remember lots of words and sentences, you’ll only be trying to remember ideas, concepts, and talking points. Trust us, it’s much easier this way – and it’s better for your audience. 

3/ Make sure the camera angle is flattering

One of the best ways to look professional on camera (and feel it!) is to ensure you’ve got a good camera angle. In case you’re wondering how to angle your camera for a video or virtual meeting, most people look best when the camera is at — or slightly above — their eye line.

If you have a webcam that’s separate from your laptop, then you probably have some flexibility about where you can place it. If not, you can buy adjustable laptop stands to get a better angle – or you can place your laptop on a stack of sturdy books!

It’s a small thing that can make a big difference. 

As a side note, it’s also worth ensuring you’ve got perfect lighting in the room where you’ll be recording. One of the easiest ways to do this without fancy equipment is to record videos in a room with plenty of natural light, at a time when it’s not too bright (and not too dark – but you knew that already).

The Marketer’s Ultimate Guide to Video

In our FREE ebook, we’ve put together practical strategies to get out of the woods and create engaging, powerful video content on your own that reaches your audience.

Download now!
techsmith logo

4/ Dress for the occasion

When you’re interacting with people via video, whether that’s through a live virtual meeting, or a pre-recorded video, it’s important to dress the part. In the same way you wouldn’t wear cargo shorts to a black tie event, you probably shouldn’t wear a tank top to conduct an online training course. 

This isn’t about adjusting your image to suit your audience, we’re merely suggesting you wear something that you’ll be comfortable in. No, that doesn’t mean wearing sweatpants, it means wearing something that will make you feel confident and empowered – something you feel good in. 

When recording on video, remember that solid colors tend to record better on video than patterns do. We also suggest avoiding all-white and all-black clothes as these can throw off the white balance on your camera. 

5/ Talk slower

This is one of the most useful tips for how to speak confidently on camera, and it sometimes gets overlooked. Speaking slowly (though not too slowly) is not only great for ensuring what you say will be understood, but it makes you look professional and at ease – while simultaneously helping you relax under the spotlight.

That might sound crazy, but talking fast is a key symptom of nervousness – you know it and your audience know it. By speaking slowly, you’ll appear calm, and while you might not be calm at first, it won’t take long before you actually start to feel it. It’s really quite incredible. 

One great way to regulate the speed of your speech is to pause between thoughts and remember to breathe. If you talk too fast, it might be because you’re breathing too fast – or maybe you’re not breathing enough! But breathing and speaking are very closely interlinked, so by keeping your breathing in check, you’ll be regulating your speech without even realizing it.

Keeping your breathing under control will also help slow your heart rate and work to calm your nerves, so it’s a win-win! Of course, if you’ve made a video but you think you are talking too fast (or too slowly), you can change the video speed in while you edit your video.

On the other hand, if you’re more concerned about the volume at which you speak, don’t be.  When it comes to recording videos, you can easily make your video louder when editing it to increase the volume. That said, the best way to ensure your heard loud and clear is to add subtitles to every video you make

6/ Take advantage of screen shares

If one of the issues you have with being on video is being able to see your own face on camera (we know how distracting it can be!) then you might find it useful to share your screen rather than show your face. 

By just sharing your screen, or by creating a screen recording, you can focus on the audio part of the recording and worry less about the angle of your camera, the lighting, and the clothes you’re wearing. 

With Camtasia , you can record your screen and your webcam at the same time. This isn’t something you have to do, but once you’ve got used to recording your screen and the sound of your own voice (which is always an adjustment!), you might want to get used to seeing yourself while recording. 

There’s no need to rush into anything you don’t feel comfortable with, but this could be a great way to slowly ease yourself into being on video and normalizing the very act of seeing yourself on screen.

Make Professional Videos Easily

Camtasia is the best screen recorder and video editor on the market. Create content your viewers actually watch.

Download now
Camtasia icon

7/ Use hand gestures

Being on camera can make you feel on the spot, which might lead you to freeze up or feel like you don’t know what to do with yourself. This is especially true for knowing what to do (or what not to do) with your hands. 

Now, we’d love to say something like, “Don’t think about it!” but we know it’s not that simple. So instead, we’re going to say “Use them!” 

Yes, use your hands. Hand gestures are one of the cornerstones of body language and a crucial nonverbal cue for conveying context and information. We use our hands all the time when we’re talking to people face-to-face, and talking to a camera shouldn’t be any different. 

While it can be difficult to start treating a camera like a person, especially if you’re not in a virtual meeting, it will start to feel more natural with practice. Before long, you’ll be using your hands online without even realizing it – just like you do in real life! 

8/ Just keep making more and more videos

Does practice make perfect? Yes it does. 

If you’re reading this, then it’s because you want to improve your on-camera skills. Well, one of the best ways to do that is to not avoid being on camera but rather get on camera as often as you can. Think of it as a kind of exposure therapy to help normalize being on video. 

Take the opportunity to make different videos, such as instructional videos and YouTube videos, in different environments. You might also find that editing your videos, adding effects, and learning how to use different tools, such as how to blur parts of your screen or add music to your video, is a fun way to get used to seeing more of yourself on camera.

For the ultimate test, you could even try live streaming a video. You don’t need to stream to an audience if you don’t want to, but the more videos you make, the faster you’ll feel comfortable recording them.

9/ Don’t take yourself too seriously!

As with many things in life, it’s important not to take yourself too seriously when you’re on camera. If you can try and shift your perspective to think of recording yourself as a fun way to communicate with people (because that’s what exactly it is!) rather than some stuffy formal affair, you’re going be much more relaxed. Who knows, you might even enjoy it! 

Our fear of being on video often comes from a fear of being judged, or worrying about how we’ll come across to others. By loosening up and embracing yourself for who you are, you’ll be taking away some of the pressure you put on yourself. 

Remember, nobody’s perfect, and most people don’t expect you to be.

Another way to not take yourself too seriously is to focus on the fun and playful aspects of being on video. Whether you’re creating a video for work or just for fun, try to approach it with a lighthearted attitude. Make silly faces, crack jokes, and experiment with different backgrounds or camera angles. 

By allowing yourself to have fun with the process, you’ll start to associate being on camera with positive emotions rather than anxiety or stress.

Make Professional Videos Easily

Camtasia is the best screen recorder and video editor on the market. Create content your viewers actually watch.

Download now
Camtasia icon

10/ Go easy on yourself!

On the subject of not taking yourself too seriously, go easy on yourself! We can often be our own worst enemies when it comes to being critical of our achievements. But, if you’ve managed to make a video while feeling anxious and uncomfortable, you’ve done an incredible thing. 

Now’s the time to pat yourself on the back, not scold yourself. And while you’re at it, remind yourself that you’re going to get better at being on video with every camera appearance you make. 

If you’re brave enough to watch your videos back (and remember, a lot of actors don’t watch their own movies) then it’s worth noting that anything “bad” you notice about yourself or your performance will probably go unnoticed by the other people watching it.

Camera shyness FAQs

Why am I so camera shy?

Feeling camera shy is totally normal, and can be the result of different factors. The reasons you might feel camera shy could be completely different from someone else but there are ways to deal with virtual stage fright. The first step to feeling confident on camera is to understand what you feel most nervous about, and why.

How to stop being camera shy?

To feel less camera shy, work on identifying why you feel uncomfortable on video. Then try developing strategies to address those specific fears, such as practicing making videos, writing a script, finding the best camera angles, and using relaxation techniques to calm your nerves.

Ryan Knott

Ryan Knott is a Marketing Content Strategist at TechSmith, where he creates content about easy, effective, and efficient video creation, editing, and tips and tricks, as well as audio editing for creators of all kinds. He/him.

How to Make a Product Demo Video that converts (+Free Template)

How to make a product demo video

Did you know that by the time someone is looking for a product demo video, they’re already very keen on the idea of buying that said product? In fact, there’s a good chance they’re already sold.

Research by Think With Google found that over 50% of internet users look for videos related to a product or service before visiting a store, making it crucial for businesses to invest in product demo videos. Without a compelling demonstration of your product, you run the risk of losing potential customers to competitors that have invested in video marketing.

Make amazing demo videos!

Make professional-quality demos videos quickly and easily with Camtasia. Record your screen or upload an existing video, then bring the “Wow!” with effects, music, and much more.

Try Camasia free
Camtasia icon

You may already have a good idea of just how important video marketing is and the impact it can have on driving sales. But, creating a product demo video might seem intimidating if you’re not familiar with the process. 

That’s where this guide comes in! 

In this article, we’ll provide you with the necessary resources and skills to create a top-notch product demo video that will help you showcase the unique features and benefits of your product.

What is a product demo video?

In a nutshell, a product demonstration video illustrates how your product works by showing it in action. This can be a compelling way to communicate the value of your product to prospective customers and persuade them to make a purchase.

In fact, product demo videos are one of the most popular types of instructional videos out there – and for good reason! Plus, knowing how to make a product demo video is a skill that will serve you well across a wide range of industries and professions — maybe even all of them! 

What’s more, you don’t need to be a video expert to create an amazing demo video! With the right tools and a bit of planning, you’ll be well on your way to creating a stunning video that showcases the full potential of your product.

In this guide, we’ll break down the process of how to make a demo video into four easy steps, so you can create outstanding video marketing content. But first, let’s take a look at some of the other ways businesses can benefit from demo videos.

The Marketer’s Ultimate Guide to Video

Text: In our FREE ebook, we’ve put together practical strategies to get out of the woods and create engaging, powerful video content on your own that reaches your audience.

Download now!
techsmith logo

How can product demo videos benefit your business?

We’ve said it once and we’ll say it again: product demo videos are an effective — possibly the most effective — way to showcase a product’s features and use cases.

By visually demonstrating how your product works and highlighting important features, you can help potential customers understand how it can meet their needs. This is especially important in today’s market, where consumers are bombarded with countless options and are often looking for guidance on what to buy. 

However, the very best demo videos can benefit businesses in a number of ways. From building trust and credibility to increasing traffic and sales. Let’s take a closer look at some of the most valuable ways in which a video demo of a product can help businesses grow. 

Product demo videos build credibility

Perhaps one of the key benefits of product demo videos is that they can help establish credibility and encourage your audience to trust that your product is going to help them in the way they need. 

By giving potential customers a clear understanding of what they can expect from your product and what makes it the best solution to the problem they’re trying to solve, you can help them feel more comfortable in taking the next step and making a purchase. This is especially important for newer or lesser-known products, where customers may be hesitant to take a chance on something they’re unfamiliar with.

Product demo videos introduce product features

Showcasing the features of a product and its USPs is a great way to sell to an audience without making it feel like a heavy-handed sales pitch. Rather than telling your audience they need to buy your product, you’re showing them how it will help them. 

This ‘show don’t tell’ approach can be a great way to explain how your product will address their needs, without seeming too “salesy”. In turn, this will help you build trust with your audience, and come across as a brand that’s authentic and approachable.

You can also use product demos as a way to announce product updates and explain new features. By walking viewers through the changes and showing how they’ll benefit, you can get your audience excited about what’s to come. 

Product demo videos increase traffic

There are a number of ways that video can help boost traffic to your website. First, the internet has become an incredibly visual space and with this change, videos have become more and more important for SEO.

In fact, research shows that websites featuring videos are 53 times more likely to reach the front page of Google than those without. And with over 25% of searchers clicking on the first organic search result, getting links to your website as high as possible on the first page of Google is key to driving traffic.

And what do users do once they’re on a website with lots of video content? They watch the content! Your videos will encourage users to spend more time on your page, which sends a positive signal to search engines — boosting your SEO and web traffic even higher! It’s like the opposite of a vicious circle. 

Finally, videos can be shared across a wide range of platforms, from YouTube to Facebook, all of which can increase your brand’s visibility and reach. In fact, viewers will share the very best videos with their friends and family, further increasing your exposure and driving more traffic to your website.

Make amazing demo videos!

Make professional-quality demos videos quickly and easily with Camtasia. Record your screen or upload an existing video, then bring the “Wow!” with effects, music, and much more.

Try Camasia free
Camtasia icon

Product demo videos increase sales

When potential customers see your product in action, they’ll start to understand how it can solve their problems, which will make them more likely to buy. It’s not just about showing them what your product can do, it’s about addressing any doubts or concerns they may have about the quality or effectiveness of the product in question.

Good advertising has, at some point or another, fooled all of us into thinking that some product is going to be the best thing since sliced bread. But then when we finally get our hands on it, it doesn’t live up to expectations and we’re left disappointed. 

As a result, many people have become skeptical of advertising and wary of products that might not be all they’re cracked up to be. However, showing people how your product works will give them a little taste of what it will be like to use it themselves. This can alleviate doubts, which will make consumers more likely to make a purchase.

So, if your business is yet to make a product demo video, then what are you waiting for? 

How to make a product demo video

Step 1: Plan your product demo video

As the old adage goes, failing to plan is planning to fail — and the same goes when you make a demo video. To create a successful demo video it’s absolutely vital that you take the time to plan out your video. 

This means thinking about your video’s message, working out what you want your audience to learn from it, and what they’ll need to see in order to take the next step. As you plan your product demo, you’ll also want to include the following points:

Describe the product

Provide a high-level introduction to what your product does — but keep it brief. Remember, your audience is already interested in buying your product, they wouldn’t be watching your video if they weren’t! 

Provide a solution

While it can be tempting to focus exclusively on cool features, be sure to mention the problems and pain points that your product will solve. The idea here is to remind your audience why they need your product, which will encourage them to take the plunge. 

Show how the product works

A video demo wouldn’t be a demo without a demonstration. But remember, while it’s important to show your audience how your product works, you should avoid going into too much detail. 

Your demo video doesn’t need to outline every single step required to use the product. In fact, it’s usually better to put the more intricate details in a tutorial video.

If you are working with a complex product, however, you might consider creating multiple demo videos that address different functions and uses. However, we’d still recommend starting with a more general overview that’s likely to appeal to your entire audience.

Provide the audience with a clear call-to-action (CTA)

At the end of your demo video, always provide a specific and clear next step for your audience to take. Your CTA can be super simple, such as a button to “Start a Trial”, “Request More Information”, or even “Buy Now”. In fact, we’d say that the best CTAs are simple and effortless — because customers are more likely to follow the path of least resistance. 

Once you’ve thought through each aspect and have an idea of how to incorporate them into your video, you might find it helpful to write a script and storyboard. This will ensure you have a solid foundation for your product video demonstration.

Then, with a clear plan of action, it’s time to move on to step two.

Step 2: Start with a product demo video template

Now, if you’re thinking that you need to create a product demo video from scratch, we’re here to tell you otherwise. 

Make a demo product

With Camtasia, you can access a wide range of templates to help make the video creation process as smooth and easy as possible. And before you ask, yes, we do have a product demo template that you can use in Camtasia. 

This template is called “feature demo”, and as soon as you open it into Camtasia, you’ll see that, as if by magic, your entire video will already be laid out for you. Best of all, the template is completely customizable! You can change colors, logos, fonts, and more to fit your product branding.

Once you’ve opened up your template, it’s time to move on to the third step: recording your footage.

Step 3: Record your product in action

To capture a software program in action, you’ll need a tool that will let you record your screen. Fortunately, we at TechSmith have several screen recording tools you can use.

Of course, if you’re filming a demonstration of a physical product, you’ll need a physical camera rather than a screen recorder. But most of the other steps discussed in this guide will still apply to you. 

For desktop software

If you’re using a desktop, Camtasia is a great all-in-one program for creating a demo video project, as it offers tools to record your screen and edit your video.

For iOS apps

On the other hand, if you need to record an app or feature on an iOS device, we can help you there as well! With the TechSmith Capture mobile app, you can easily record your smartphone screen and import the recording into Camtasia.

Create demo
Record a demo video

Once you have your software open on your computer, you may want to walk through the product demonstration a few times for practice, kind of like a dress rehearsal! 
When it comes to doing the product demonstration for real, it’s worth considering the desired dimensions of your finished video, as resizing it later on might affect the picture quality. Knowing the output size before you record will ensure that your finished video is crisp and clear.

Then, when you’re ready, open Camtasia and select the record option. You’ll then be prompted to select the part of your screen that you wish to capture.

Make amazing demo videos!

Make professional-quality demos videos quickly and easily with Camtasia. Record your screen or upload an existing video, then bring the “Wow!” with effects, music, and much more.

Try Camasia free
Camtasia icon

This is also when you’ll need to select which audio sources you want to record, including system audio, microphone audio, neither, or both. Recording system audio means anything that would normally play through your computer speakers will also be captured, which might be important if your software features any sound.

However, system audio refers to all the sounds that your computer makes, including things like email notifications. So be sure to adjust your settings so your recording isn’t interrupted by distracting beeps and tones.

Making demo videos

If you choose to record your narration as you demonstrate your product, then you’ll also want to capture your microphone. However, if you have prepared a script, you might find it easier to record your voiceover separately, after you’ve captured the onscreen action. But don’t worry, Camtasia makes it easy to sync audio and video sources.  

Once all the prep and practice is out of the way, it’s time to hit the Record button and capture your demonstration. Don’t worry — you’ve got this! 

When you’ve finished showing how the product works, hit Stop. 

You can follow the same steps to capture any additional recordings that you outlined in your plan. Keep in mind, it’s easier to remove or trim down any unwanted footage than to have to re-record a missed step later.

Step 4: Edit your product demo Video

Once you’ve planned and filmed your video, it’s time for the fun part – editing! Don’t worry if you’re new to this, Camtasia’s easy-to-use drag-and-drop editor makes editing easy and intuitive.

The editing suite is where you can trim your footage, insert your audio narration, add captions, add music, and play with animated effects — as well as a load of other things that will make your video stand out. 

From the TechSmith blog to the free TechSmith Academy, there’s a whole library of resources and instructional tutorials that you can use to familiarize yourself with all of Camtasia’s tools.

Make amazing demo videos!

Make professional-quality demos videos quickly and easily with Camtasia. Record your screen or upload an existing video, then bring the “Wow!” with effects, music, and much more.

Try Camasia free
Camtasia icon

However, do keep in mind that despite the cornucopia of tools and effects, it’s important not to go overboard. We know firsthand how tempting it can be to use every neat trick you learn, but remember to refer back to your storyboard for guidance, and always keep your audience in mind.

The best videos are usually kept simple so that your audience can focus on the information you want to convey.

How to edit with templates

If you used a template to create your video, even better! Your editing process will be even faster and more efficient.

How to make a demonstration video

With the template already laid out on your timeline, it’s as simple as taking your screen recording (or real-life footage) and dropping it into the placeholder.

Make a product demo video

Camtasia will give you a few options for adding your footage to the placeholders, but we recommend using Ripple Replace. This option adjusts the length of the placeholder to fit your footage, without removing affecting the other items and effects. It’s all customizable though, so feel free to adjust the transitions and identification (often called lower-third) graphics as you see fit.

Use a template to create a video demo

The “feature demo” template also has options to add device frames that can make your footage look like it’s on a computer screen or mobile device. All you have to do is drag your clip into a scene and transition into the full screen of your recording.

Pretty sweet, right?

Bonus! Reuse your template

Now this part is really cool. Once you have your demo video set out the way you like, you can save it as a new template, ready to be used for your next video, and the one after that! 

This can save a lot of time in the future as you’ll already have all your own brand elements ready to go. The only thing you’ll have to do next time is swap out the footage and any visual aids, such as text or annotations, that are specific to your recording.

Templates to make a demo video

Saving the video you just made as your own custom template is easy too. In fact, it’s probably easier than all the other steps we’ve covered — and even they weren’t that hard, right? 

The first step is to replace the screen recording with a placeholder, after you’ve saved and/or exported your demo video that is. To do this, right-click any piece of media on the timeline and choos Convert to Placeholder.

Then, go to File > Save as Template and provide a name for the template file. This saves the template in Camtasia on your computer.

How to make a product demo video thanks to templates

If, on the other hand, you want to share your template, go to File > Export > Template, and name the file.

Your template will then be exported as a Camtasia Template file, known as a CAMTEMPLATE. Once it’s exported, you can send the file to colleagues or place it in a shared location. All they have to do is download the template file and double-click to add it to their templates menu, where it can be selected at any time.

The Camtasia template file works on both Windows and Mac, so you don’t have to worry about sharing between different platforms.

Product demo video FAQs

How long should a product demo video be?

The ideal length for a product demo video is between 60 and 90 seconds, though two minutes is okay for more complicated products. This should be the perfect amount of time to showcase the key features of your product, without overwhelming the viewer with information.

What should be included in a product demo video?

Most product demo videos have a product intro, a demonstration of its key features, and a call to action. This way, you can show your audience how your product will help them, and encourage them to take the next step, such as registering for a free trial or making a purchase.

How much does it cost to make a product demo video?

When it comes to budget, there’s no one-size fits all solution. Big companies spend thousands of dollars on their demo videos. But, with the right knowledge, a little planning, and some practice, you can create a demo video in-house for little to no cost.

Ryan Knott

Ryan Knott is a Marketing Content Strategist at TechSmith, where he creates content about easy, effective, and efficient video creation, editing, and tips and tricks, as well as audio editing for creators of all kinds. He/him.