


The TechSmith Blog

Subscribe to TechSmith’s Newsletter
Join over 200,000 people who get actionable tips and expert advice every month in the TechSmith Newsletter.
Subscribe
More from our blog
How to Edit OBS Recordings: Tools and Simple Steps
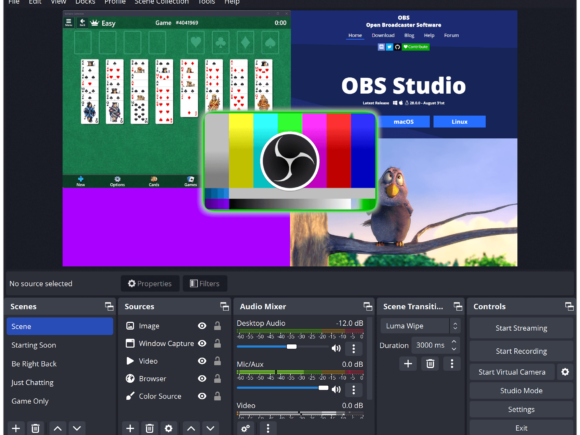
How to Edit OBS Recordings: Tools and Simple Steps
OBS Studio is built for live streaming and screen recording, not video editing. It doesn’t include tools for trimming, adding effects, or polishing your footage. To turn a recording into a professional video, you’ll need a separate editor like Camtasia Editor, DaVinci …
AI Training for Employees: How to Build a Program That Sticks

AI Training for Employees: How to Build a Program That Sticks
These days, most knowledge workers reach for generative AI tools without a second thought: drafting copy, summarizing notes, brainstorming ideas. But most organizations still haven’t built structured training to help teams use these tools effectively and safely. So em …
How Do You Annotate Recorded Calls in Camtasia?
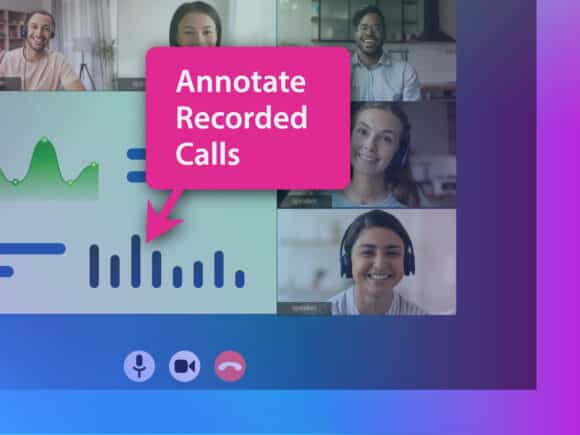
How Do You Annotate Recorded Calls in Camtasia?
A recorded sales or support call can be packed with useful information, but teammates may not know where to focus. Instead of asking teammates to search the full call recording, annotate key moments to guide their attention and make the call a more effective training resource. Ca …
Subscribe to TechSmith’s Newsletter
Join over 200,000 people who get actionable tips and expert advice every month in the TechSmith Newsletter.
Subscribe